Adding a Group Account You use group accounts to manage privileges for multiple users. You create global group accounts in Active Directory Users And Computers. You create local group accounts in Local Users And Groups. As you set out to create group accounts, remember that you create group accounts for similar types of users. Following this, the types of groups you might want to create include the following: -
Groups for departments within the organization Generally, users who work in the same department need access to similar resources. Because of this, you can create groups that are organized by department, such as Business Development, Sales, Marketing, or Engineering. -
Groups for users of specific applications Often users will need access to an application and resources related to the application. If you create application specific groups, you can be sure that users get proper access to the necessary resources and application files. -
Groups for roles within the organization Groups could also be organized by the user 's role within the organization. For example, executives probably need access to different resources than supervisors and general users. Thus, by creating groups based on roles within the organization, you can ensure that proper access is given to the users who need it. Creating a Global Group To create a global group, complete the following steps: -
Start Active Directory Users And Computers. Right-click the container in which you want to place the user account. Afterward, choose New, and then select Group. This opens the New Object - Group dialog box shown in Figure 9-11. Figure 9-11. The New Object - Group dialog box allows you to add a new global group to the domain. 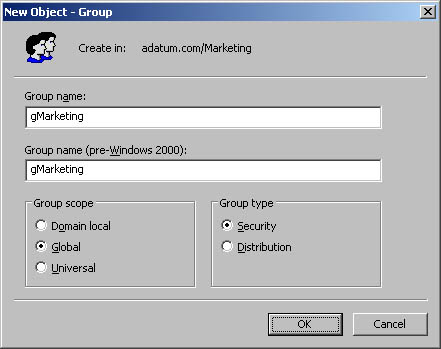 -
Type a name for the group. Global group account names follow the same naming rules as display names for user accounts. They aren't case sensitive and can be up to 64 characters long. -
The first 20 characters of the group name are used to set the pre “Windows 2000 group name. This group name must be unique in the domain. If necessary, change the pre “Windows 2000 group name. -
Select a group scope, either Domain Local, Global, or Universal. More Info Universal groups are available only when Active Directory is running in Windows 2000 native operations mode or in Windows Server 2003 operations mode. For more information on operations modes, see the section entitled "Using Windows NT and Windows 2000 Domains with Active Directory" in Chapter 6 , "Using Active Directory."
-
Select a group type, either Security or Distribution. -
Click OK to create the group. Once the account is created, you can add members and set additional properties, as discussed later in this chapter. Creating a Local Group and Assigning Members You create local groups with Local Users And Groups. You can access this utility and create a group by completing the following steps: -
Choose Start, then Programs or All Programs as appropriate, then Administrative Tools, and then Computer Management. Or select Computer Management in the Administrative Tools folder. -
Right-click the Computer Management entry in the console tree and select Connect To Another Computer on the shortcut menu. You can now choose the system whose local accounts you want to manage. Domain controllers don't have local users and groups. -
Expand the System Tools node by clicking the plus sign (+) next to it and then choose Local Users And Groups. -
Right-click Groups and then select New Group. This opens the New Group dialog box shown in Figure 9-12. -
After you type a name and description of the group, use the Add button to add names to the group. This opens the Select Users dialog box. -
In the Select Users dialog box, type the name of a user you want to use in the Name field and then click Check Names. If matches are found, select the account you want to use and then click OK. If no matches are found, update the name you entered and try searching again. Repeat this step as necessary, and then click OK when finished. -
The New Group dialog box is updated to reflect your selections. If you made a mistake, select a name and remove it by clicking Remove. -
Click Create when you've finished adding or removing group members. Figure 9-12. The New Group dialog box allows you to add a new local group to a computer. 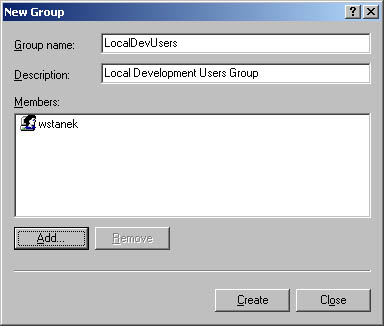  |