| Certain activities take place in virtually every SharePoint Portal Server 2003 and Windows SharePoint Services environment. These activities seem straightforward but are not always intuitive to perform. Gaining an understanding of the specific steps required to perform each of these activities is important for administrators in a SharePoint environment. Adding and Managing Users A SharePoint Site, set up out of the box, is configured with only a single user. One of the first steps that can be taken is to add additional users into a SharePoint Site or portal. To add users, perform the following steps: 1. | Open the SharePoint Site and click on Site Settings.
| 2. | Click on Manage Users.
| 3. | On the Manage Users page, click on Add Users.
| 4. | In the Administration area, enter the name of the user(s) to be added in the format companyabc\username or username@companyabc.com, with each user separated by a comma, as shown in Figure 17.1.
Figure 17.1. Adding users to a SharePoint Site. 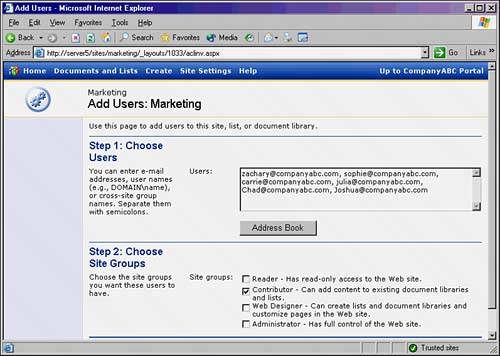
| 5. | Select the appropriate Site groups (Reader, Contributor, Web Designer, Administrator) that the users will be added into and click Next.
| 6. | Verify email address and display name, as shown in Figure 17.2.
Figure 17.2. Confirming users to be added to a SharePoint Site. 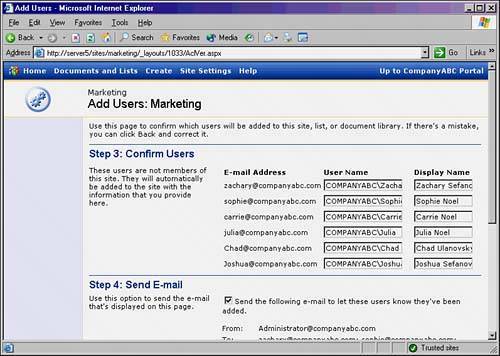
| 7. | Check the Send the Following E-mail to Let These Users Know They've Been Added box.
| 8. | Modify the subject and body of the email as necessary.
| 9. | Click Finish.
|
Creating Pages in a SharePoint Site Within a SharePoint Site, an administrator needs to create pages to house specific SharePoint content. The content that can be listed on a page can take multiple forms: It can be a document library, picture library, list, custom list, discussion board, survey, or web page. Depending on the needs of the organization, one, some, or most of these pages will be created. To create a page in a SharePoint Site, perform the following steps: 1. | Open a SharePoint Site.
| 2. | Click on Create.
| 3. | Select the appropriate page to be created (for example, Document Library).
| 4. | Enter the name of the page to be created (include information specific to the site as a best practicefor example, Marketing Document Library 2) and a description if needed.
| 5. | Specify whether a link to this document library appears in the Quick Launch bar on the home page.
| 6. | Specify whether a backup copy, or version, is created each time you edit a file in the document library.
| 7. | Select a document template to determine the default for all new files created in this document library, as shown in Figure 17.3.
Figure 17.3. Creating a new document library for a site. 
| 8. | Click on Create to finalize creation of the page.
|
At this point, the page can be dropped into a site as a Web Part. Changing the Settings for a Library or List Web Part After specific Web Parts are added into a SharePoint Site, they can be administered and modified for a number of settings. For example, to change security settings of a Web Part, do the following: 1. | Go to the SharePoint Site.
| 2. | Click on the name of the Web Part to be modified.
| 3. | Click on Modify Settings and Columns.
| 4. | Click on Change General Settings to change settings, as shown in Figure 17.4.
Figure 17.4. Changing Web Part settings. 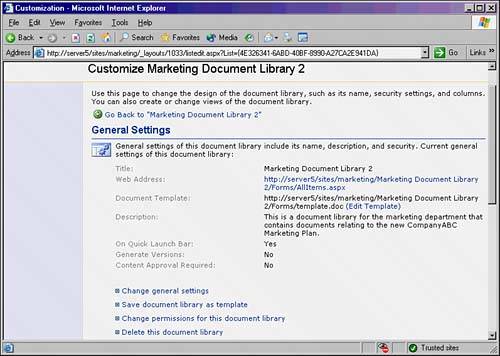
| 5. | When finished making changes to the settings, click OK.
|
Adding and Modifying Web Parts Web Parts can be added and removed to site web pages with relative ease. Administering Web Parts can actually become a big part of a SharePoint administrator's responsibilities. To modify an existing Web Part, perform the following steps: 1. | Navigate to the site to modify.
| 2. | Click on Modify Shared Page.
| 3. | Select Add Web Parts, Browse.
| 4. | Select a Web Part from the list, as shown in Figure 17.5.
Figure 17.5. Adding a Web Part to a site. 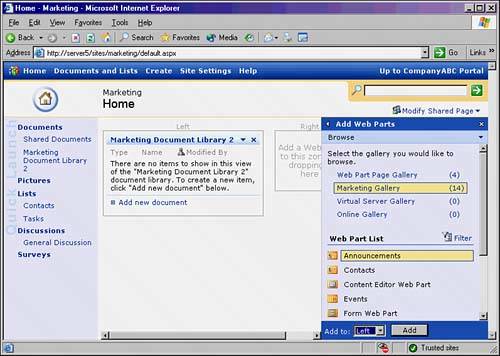
| 5. | Under the Add To field, choose which zone to add the Web Part into and click Add, or simply drag and drop the Web Part into the appropriate zone.
|
After Web Parts are added into a site, they can easily be modified through the following steps: 1. | Click on Modify Shared Page, Modify Shared Web Parts, Web Part Name.
| 2. | Make changes to the Modify Web Part panel on the right side of the page. Categories such as Appearance, Layout, and Advanced can be expanded to modify settings, as shown in Figure 17.6.
Figure 17.6. Modifying a Web Part. 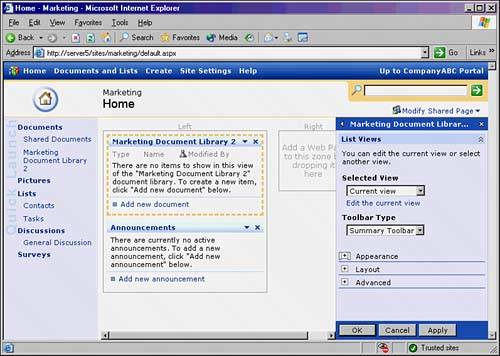
|
|