Using SharePoint Picture Libraries
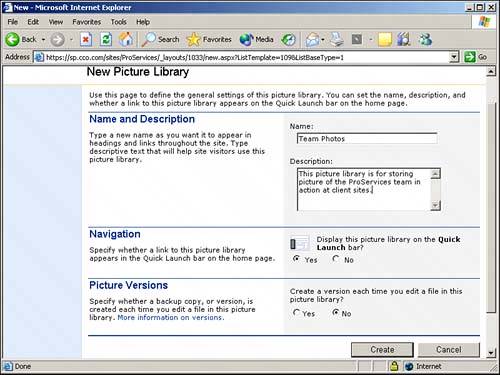
| A picture library is very similar to a document library in that it's also designed to store documents and allow users to attach metadata to the documents. The picture library is designed with the assumption that users will want to store graphics files in the library. Thus, the Marketing department might create one picture library on its home page for approved logo files and another one for graphics and photographs for use in publications. Or, the Human Resources department might create a picture library for company events and then create subfolders for different events, such as the Christmas party and company picnic. Creating a Picture LibraryTo create a picture library (if you have the appropriate rights), you can do one of two things: You can use the Create link from the site's home page, or you can click Pictures in the Quick Launch bar. To create a picture library with the Create command
To create a picture library by clicking Pictures in the Quick Launch Bar
Using the Picture LibraryThe resulting library will be empty, and the uploading process is similar to what was covered for the document library previously in this chapter. To upload a single document, simply click the Add Picture button in the toolbar in the picture library page (listed as AllItems.aspx in the URL address) and then browse for the file. If you have Office 2003 installed and want to upload multiple files, the process is a little different because SharePoint will open the Microsoft Office Picture Manager program to allow you to choose multiple files. NOTE If you don't have Office 2003 installed, you won't see the option to upload multiple files in a picture library. Figure 11.21 shows the interface when you click Add Picture; then choose the Upload Multiple Files option from the Add Picture page (the Upload.aspx page in the URL address). Figure 11.21. Upload multiple images using Microsoft Office Picture Manager.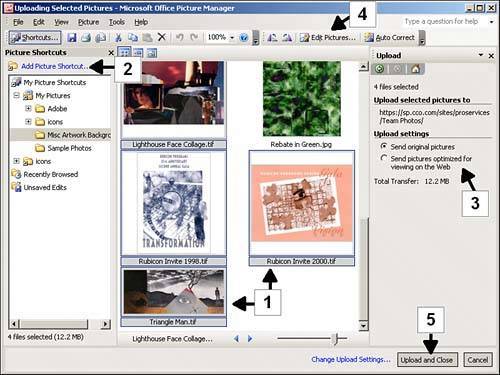 Several things are worth covering briefly in the Picture Manager, as numbered in Figure 11.21:
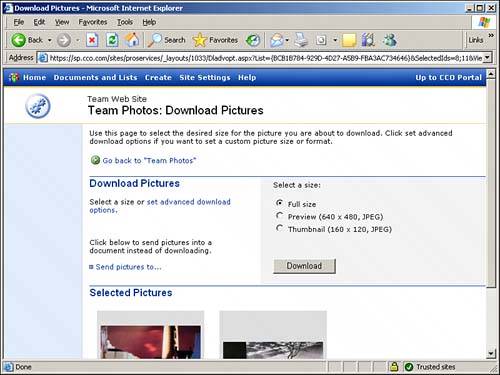
Once the images have been uploaded, you may have to click Go back to "Team Photos" (or the name of your picture library). You'll then see something like what's shown Figure 11.22, with the images displayed in the Thumbnails view. Figure 11.22. The picture library's All Items view.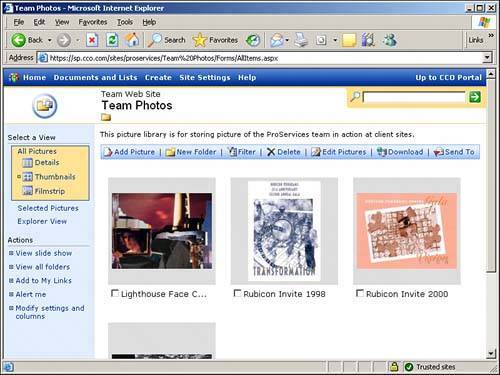 Tools Available in the Picture LibraryThe tools discussed here will be familiar to you. Add Picture is the equivalent of Upload Document, and New Folder allows you to create a folder within the library. The Filter feature was also covered in Chapter 5, "Planning and Designing the SharePoint 2003 User Environment." A Delete button is also offered in the picture library toolbar, along with several others: Edit Pictures, Download, and Send To. Note that each image in the Thumbnails view has a check box under it. Checking the box next to an image or several images allows you to use the Edit Pictures, Download, and Send To tools. These tools are detailed in the following list:
Accessing Additional Tools Within the LibraryFrom the Thumbnails view (which can be selected on the left side of the page) in the picture library, the drop-down menu is not available when you hover the mouse over the filename and click the down arrow. As shown in Figure 11.24, to access the additional tools available in this menu, such as Check Out and Version History, you need to click the Details view (circled in Figure 11.24). Then the menu will be available when you hover the mouse over the filename and click on the down arrow. Figure 11.24. Additional tools available in Details view.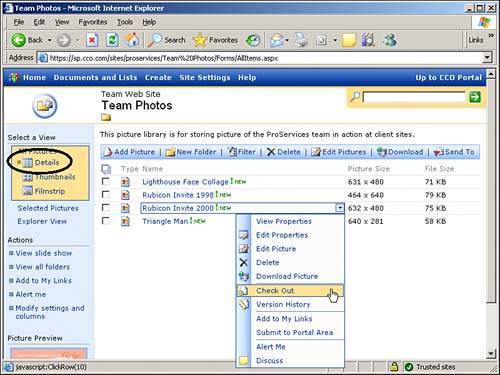 The tools offered in this menu are similar to those available in the document library, with the addition of the Download Picture option. Picture PropertiesWhen in the Details view of the picture library, if you select Edit Properties, you can edit the picture properties, as shown in Figure 11.25, in the EditForm.aspx view. This is where additional information, such as title, the date the picture was taken, and keywords, can be entered about the images uploaded to the picture library. This information is searchable in SharePoint, so it is helpful to add it to uploaded images. If metadata has been added to the library, it will also be available for editing. In Figure 11.25 the standard column Date Picture Taken was changed to Date Image Created (circled in Figure 11.25), as that was a more descriptive label. Also a metadata column was added, title Artist, that appears at the bottom of the screen. Figure 11.25. Additional tools available in Details view.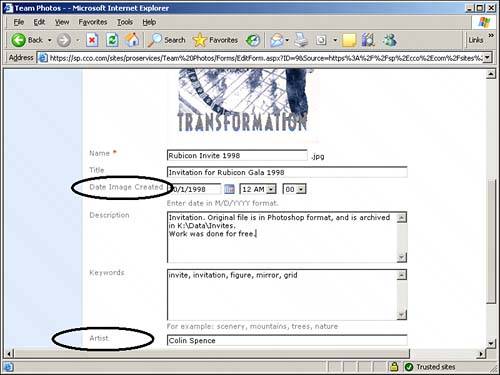 If you click the preview image shown in the EditForm.aspx page (as shown in Figure 11.25), the image will be shown without property information, and the address bar will show the full picture name and location. In the case of this example, the picture filename and location is https://sp.cco.com/sites/ProServices/Team%20Photos/Carmel%201.jpg. Note the "%20" in the filename. This is how HTML refers to a space in the filename, so don't be alarmed. This file location can now be referenced elsewhere in SharePoint, for example if the image was to be used in an Image Web Part. If the URL is sent to someone, and they have access to the library, they can view the image by simply clicking on the URL. NOTE If you right click on the image preview shown in the EditForm.aspx page or the DispForm.aspx you will get a different version of the image, not the actual image that was uploaded. This reduces the amount of data that needs to be sent to the viewer's browser to show what the image looks like. For example, an image titled "Great Work of Art.tif" was uploaded. If it is right-clicked in either of these views, and Properties is selected, the filename that will show will be "Great%20Work%20of%20Art_tif.jpg." Note the file is now a .jpg file. So if you want to reference the actual image, you must take the additional step of right-clicking the name of the file, which is located right below the .jpg preview of the image, and choosing properties. This will show the actual URL of the file, in this case "Great%20Work%20of%20Art.tif." Different Views AvailableThe menu bar on the left side of the picture library (the AllItems.aspx page as shown in Figure 11.22) offers several different view choices. The Thumbnails view is shown in Figure 11.22, and shows what the image looks like at reduced resolution, and the Details view, which provides access to additional tools via the drop-down menu. The Filmstrip view is also offered, as well as the Selected Pictures view and the Explorer view. The Filmstrip view shows the smaller preview images and a larger version of the selected image. The Selected Pictures view only displays pictures that have been checked off in the Thumbnails or Filmstrip view. The View slide show action (on the left menu of the picture library) opens up a slide show window (Office 2003 is not required for this feature) that provides standard VCR buttonsplay, pause, stop, rewind, and fast forwardto present the different images in the library. The slide show also provides the name of the image, the date it was taken, and description information. |
EAN: 2147483647
Pages: 288