Choosing an Image s Size and Other Properties


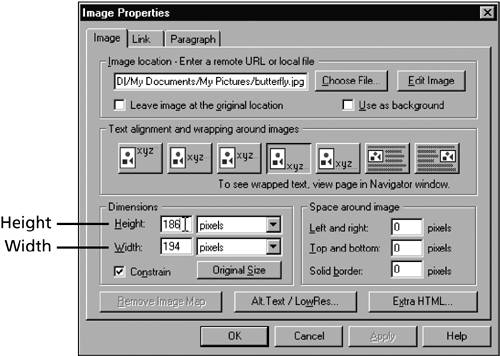
Choosing an Image's Size and Other Properties

After you've inserted an image (or while inserting it for the first time), you can change its appearance in a variety of ways, all by choosing options in the Image Properties dialog box (see Figure 25.5).

Figure 25.5. Use the Image Properties dialog box to change an image's role in the layout of a page.

graphics/25fig05.gif

The Image Properties dialog box opens while you are inserting an image, as shown earlier in this chapter. You can open the dialog box later for an image you have already inserted by double-clicking the image.

The next several pages describe ways you can use the Image Properties dialog box to change a picture's appearance.

Changing the Dimensions (Size and Shape) of an Image

From right within Composer, you can change the size of an image, and you can change its shape, stretching or squeezing (and distorting) it, as you learn to do shortly. But first

As a rule, you get better results if you choose the size and shape of the image in the application used to create it or in a good image-editing program (such as Paint Shop Pro) rather than in Composer or most other Web authoring programs.

Why? Well, Composer can't really change the dimensions of an image. Instead, it applies tags to the HTML file that browsers use to resize the image when displaying it. A browser is not as sophisticated a graphics scaler as a real image-editing program, and the likelihood of unattractive "artifacts" in the scaled image (such as streaks through the image) or a loss of the transparency of a transparent GIF file is high.

With that caveat, the following example shows how to change the size and shape of an image in Composer, when doing so seems prudent to you.
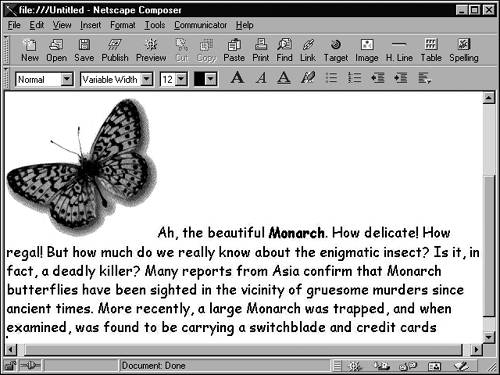
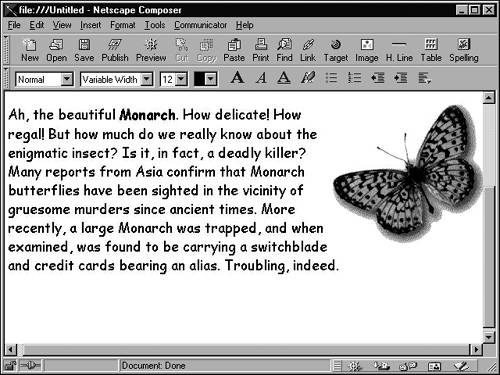
  1. Double-click the image to open the Image Properties dialog box.

  2. Observe the Height and Width boxes shown in the Dimensions area (the numbers show the number of screen pixels) and " guesstimate " how much to change those numbers (see Figure 25.6). For example, if Width is 200 and you want to make the image half as large, you enter 100 for the width. (After you change the width, the height changes automatically.) Click OK to close the dialog box and see how your picture looks at its new size.

    Figure 25.6. Step 2: Change the width (or height) to change an image's size.

    graphics/25fig06.jpg

    graphics/bookpencil_icon.gif

    If you don't change both the width and height of the image by exactly the same proportion, the image winds up stretched out of shape, in one dimension or the other. You may choose to do this on purpose, to achieve a particular effect. But if you want to change just the size of the image without changing its shape, make sure that the Constrain box is checked in the Image Properties dialog box.

    When Constrain is checked, you need to change only one dimension. Change the width, and the height changes automatically to maintain the picture's original shape at its new size. Change the height, and the width changes automatically.

  3. To change the shape of the image, click to clear the Constrain box (see Figure 25.7). Then change the width or height as desired and click OK to see the results.

    Figure 25.7. Step 3: To change an image's shape, clear the Constrain box and change the width or height.

    graphics/25fig07.gif

Controlling Alignment

A picture's alignment describes its position on the page and how it relates to any text adjacent to it.

By default, a picture aligns to the left side of the page (just like left-aligned text). The first line of any text immediately following the picture appears to the right of the picture, near its bottom. If the text runs for more than one line without an intervening paragraph break, all lines after the first line appear underneath the image. This default alignment is called bottom alignment (see Figure 25.8).

Figure 25.8. The default alignment for images, known as "bottom" alignment.

graphics/25fig08.jpg

graphics/bookpencil_icon.gif

To understand alignment options, you need to understand what the baseline of text is. The baseline is the line the letters sit on when you write them. Most letters appear entirely above that line, but a fewsuch as lowercase j and y have descenders that drop down below the baseline.

The default, bottom alignment, aligns the baseline with the bottom of the image so that any descenders drop lower than the bottom of the image.

To change a picture's alignment, choose from the options in the Align Text to Image box in the Image Properties dialog box. The other choices (besides At the Bottom) are

  • At the Top The first line of text appears to the right of the top of the image, with the top of the text aligned to the top of the image. Any lines after the first line appear underneath the image.

  • In the Center The first line of text appears to the right of the image, with the baseline of the text aligned to the vertical center of the image. Any lines after the first line appear underneath the image.

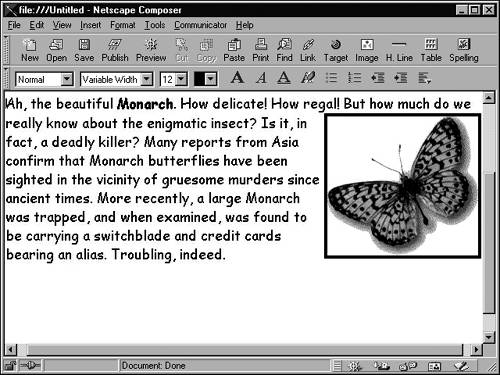
The bottom two alignment options, Wrap to the Left and Wrap to the Right, are special "wrapping" options. Unlike all the other options, which can put only the first line of text alongside the image, right and left allow multiple lines of text to appear alongside a picture:

  • Left Text wraps alongside the image, with the image to the left of the text (text on the right).

  • Right Text wraps alongside the image, with the image to the right of the text (text on the left); see Figure 25.9.

    Figure 25.9. Left alignment and right alignment (shown here) allow multiple lines of text to wrap alongside an image.

    graphics/25fig09.jpg

graphics/bookpencil_icon.gif

All the alignment options are represented reasonably accurately when you view a page in Composer, but sometimes the representation is not 100 percent accurate. Always evaluate your alignment formatting by viewing the page in a Web browser.

Controlling Spacing and Borders

To add a border around a picture, or to change the amount of space between the image and what's around it, use the spacing options in the Image Properties dialog box:

  • To increase the space between the sides of the image and adjacent text, tables, or other objects, enter a number of pixels in the Left and Right boxes.

  • To increase the space between the top and bottom of the image and adjacent text, tables, or other objects, enter a number of pixels in the Top and Bottom boxes.

  • To add a black border all around the image (see Figure 25.10), enter in the Solid Border box a number of pixels for the thickness of the border.

    Figure 25.10. The same page shown in Figure 25.9 but with additional space around the image (30 pixels left and right) and a 4-pixel border indicated in the Image Properties dialog box.

    graphics/25fig10.jpg

graphics/lightbulb_icon.gif

Typing 4 in the Solid Border box makes a nice, bold border like the one shown in Figure 25.10. A lower number makes a finer border; a higher number, a thicker one. A border thicker than about 8 pixels is probably overkill.

Entering Alternate Text

You can help some visitors cope with your images by entering alternate text in the Image Properties dialog box (see Figure 25.11).

Figure 25.11. You can use alternate text to help some visitors with slow connections or nongraphical browsers.

graphics/25fig11.gif

Alternate text is any block of words you want to appear in place of the graphic in browsers that do not support graphics. Try to supply informative text to replace the idea that was originally communicated by the image. Also, many browsers that support text alternates display an image placeholder, something like <image> , if you don't supply a text alternative representation. The text alternate is not only more informative in such browsers, but also better looking.


Sams Teach Yourself Internet and Web Basics All in One
ISBN: 0672325330
EAN: 2147483647
Year: 2003
Pages: 350
Authors: Ned Snell

flylib.com © 2008-2017.
If you may any questions please contact us: flylib@qtcs.net