Building Blocks
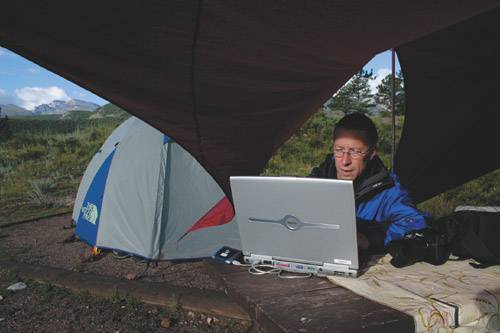
| There are a number of ways to carry out the steps of digital processing. Numerous programs available to help manage your photographs, but pros and consumers generally have different needs. Not every solution is right for every photographer. But remember, the steps are always the same, regardless of what programs you use. To help you pick your solution, I'll discuss the all-in-one approaches to digital image management, as well as the more advanced a la carte methods most pros use. First, let's turn to the steps of digital photo processing (and why they're important) to help explain why some programs are better suited to different types of users than others. The Importance of ImportingDownloading your photos from your camera to your computeralso known as transferring, importing, or ingestingis the first step in processing your digital photographs. Once you take a picture, you'll need to move it from your camera's media card into your computer. Downloading is a crucial step because you'll need those images on your computer to work with them, and you'll need to erase the card to take more pictures. NOTE Chapter One talked about using a personal computer on the road, versus bringing along a portable storage device (sometimes called "digital wallet"). If you're using a storage device, you'll need to connect it to your computer when you get home and ingest the images stored inthe device. That's one reason it's good to bring your computer along on a photographic tripit'll save you a step. Figure 6.3. You can do your downloading to the computer wherever you happen to be if you're using a laptop, even while camping in the Rockies. (Photo by Reed Hoffmann)
Whichever program you use will copy the images from your card to your computer's hard drive. You might have to specify where they'll go (depending on what software you're using) so it's a good idea to have an organizational structure in mind. That's what naming is all about. TIP Some programs allow you to erase the media card automatically after you've ingested your photos. This is never a good idea, for two reasons. First, you'll have fewer problems with your media card if you format it using the camera's formatting options. More important, there are rare times when your computer might think that it's transferred the images correctly, but something happened to corrupt the files. You'll want to be able to re-download them from the card if that happens, something you can't do if they've been erased. The Name GameCreating a good file structure is the first step in being able to easily find your images. The file structure is the way you organize folders and files on your hard drive. You probably already do it with your word processing and email files. Over time you'll amass a large number of digital images on your computer, so it's important to start with a good naming and organizing system. Most pro photographers use a variation of what I'll call the "date/name system." The idea behind using the date/name system is that you can locate files easily if you remember either when you took the photo, or what you called the shoot. For example, inside your photos folder (called the Pictures folder by most Mac users and the My Pictures folder on Windows systems) will be a folder for each year, and inside that will be folders for each shoot, labeled with both a date and a name. The files inside that folder should have the same label as the enclosing folder. For example, say that you shot the canals of Venice on June 26, 2005. A good naming structure would be Pictures>2005>062606_venice_canals. Files inside that should have the same name so they should be 062606_venice_canals_1.jpg, and so on. An example of a poor name would be Pictures>Italy. Figure 6.4. A good naming system for your files will make them much easier to find in the future.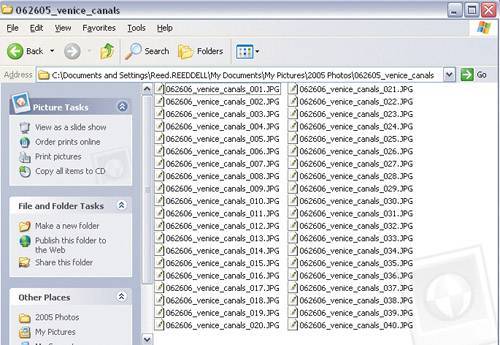 By naming your files and folders with both the date and a memorable name for the shoot, it's easier to find them at-a-glance. You don't have to use this exact system. There's nothing wrong with naming the folder Venice_canals_june_26_2005 or any other variation, but it works best if you arrange your files in a method that integrates both the date and name of your shoot. MEET THE PRESSInside every digital photograph there's hidden information. This is the file's metadata. When you take a digital picture, the camera automatically records information about all the camera's settings. Hidden inside each picture file is information detailing the shutter speed, f-stop, color mode, the date and time the photo was taken (if you've bothered to set them properly), and more. That information is called EXIF data and it's in almost all every digital photos ever taken. Figure 6.5. EXIF data is embedded in every digital camera file, and you can view it if you have the right software.
In you photo files is also something called IPTC data, information specified by the International Press Telecommunications Council, designed to help newspapers around the world ensure that a photo's copyright information, captions, author credits, and more are correct when sent from news photographers to newspapers. Most digital photography software lets you access this IPTC data, though the degree to which it can be edited depends on the sophistication of the program. Programs such as iPhoto or Photoshop Album only let you add keywords, while a more sophisticated program like Photo Mechanic enables you to add tons of information to the IPTC fields of your photo files. Figure 6.6. Photo Mechanic by Camera Bits is one of the more powerful browsers. It gives you the ability to add or change IPTC information. (Photos by Reed Hoffmann)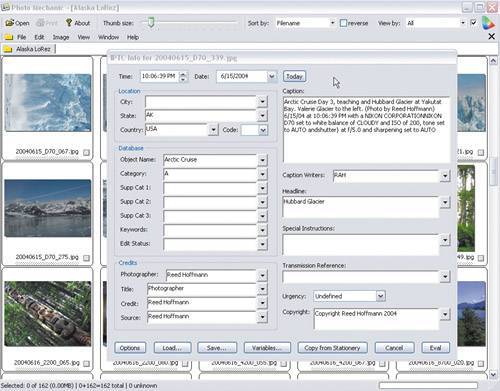 Why is this important? By taking advantage of the IPTC fields, you can find images much more easily. Programs such as Photoshop and Photo Mechanic can look directly inside a file's IPTC data, allowing you to see detailed technical information about a photo. The Macintosh operating system OS X Tiger can even search inside your photos for metadata, meaning, for example, that you could search all the photo files on your hard drive with the word "Venice" in the location field of the IPTC data. Figure 6.7. Reed Hoffmann: "By doing a search for 'Fallesen,' I was able to quickly find the photos of the Fallesen family we hiked with in the Rockies a few years ago. (Photo by Reed Hoffmann)
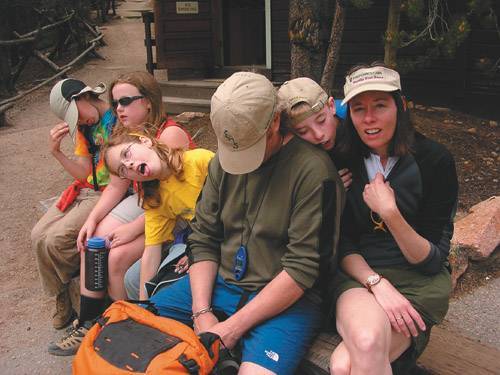
The process of adding information to files is called captioning, and although it's an optional step, it's important. Programs like Photo Mechanic allow you to batch-caption and batch-rename images while downloading them, saving time and improving future productivity. I'm Just BrowsingPerhaps the easiest part of the process is image browsing. Browsing your images is the digital equivalent of flipping through prints or scanning a proof sheet, but with more power. To do so, you'll want a tool that lets you look at your images individually or as a group of thumbnails; allows you to rate or rank your images (to separate the great shots from the stinkers); and allows you to rename or recaption your images. Figure 6.8. Many people find Adobe Photoshop Elements' browser, called "the Organizer," to be all that they need.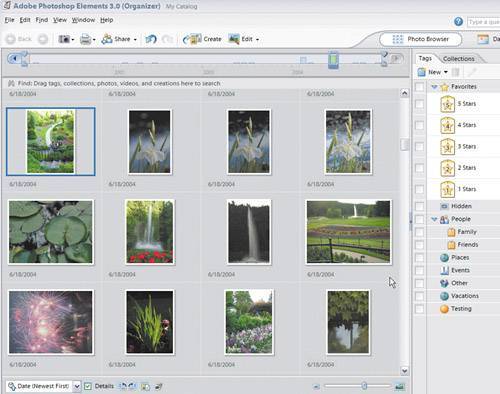 Some programs keep track of all of your photos, which enables you to find them by date groupings or by searching for keywords or captions. Many programs use the browser interface as the gateway to the rest of the program's functions. Find an image in the browser and then click on a button to send it via email, for example. Nip and TuckFigure 6.9. A good organizer, or browser, will let you launch a selected photo directly into the editor of your choice for touch-up work and cropping. (Photos by Reed Hoffmann) The editing stage is an important part of the workflow process, even if it's just used for redeye removal, cropping, minor retouching, and color adjustment. Most programs integrate some editing features into the browser, while allowing you to open the image in a more powerful stand-alone photo editing program if you wish. Shares Well with OthersSharing your images is an important part of the digital imaging workflow. One of the chief advantages of digital photos over film is the ease with which pictures can be sent around the house, or the world. We'll cover image sharing in the next chapter, but any good photographic tool will be full of ways to get your photos in front of family and friends no matter where they may be. Working with a Safety NetAsk anyone to name the things they'd try to save if their house was on fire and chances are they're going to mention the family photo album. Computers, cameras, and TVs can all be replaced, but photographs are fragile, priceless, and easily destroyed. At least that was the case with film. Digital photographs can live nearly forever, and they needn't be relegated to a single computer. In fact, the more locations you stash copies of your digital photos, the safer they'll be. That's' why the backup stage (also known as archiving) is so important. It safeguards your photos against digital extinction. Any good program will let you make copies of your photo files with a click or two. You can never, ever have enough backups. One of the reasons that it's such a good idea to bring along your laptop when you travel is that it makes archiving on the road so much easier. You can use its built-in CD or DVD burner to make copies of your files the same day you shoot them, and connect small, portable external hard drives to your computer via the USB 2.0 and FireWire connections. Figure 6.10. Portable hard drives are small and easy to take with you. They're available with both USB 2.0 and Firewire connections. (Photo by Reed Hoffmann)
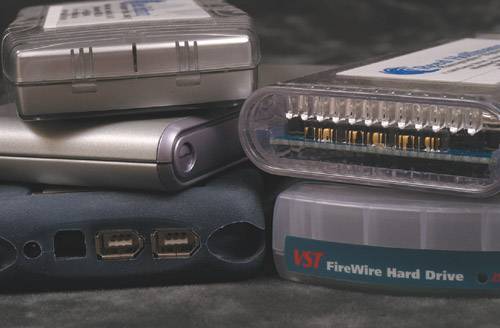
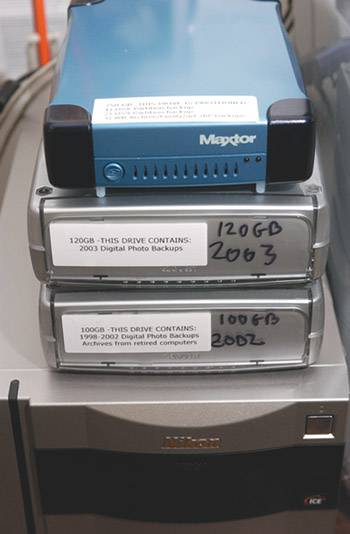
TIP Archiving isn't just essential for your photos, it's also crucial for your Word documents, Quicken Files, Excel spreadsheets, audio files, and anything else that's hard or impossible to replace if lost. Some great software programs like Dantz Retrospect will let you easily backup Macs or PCs, while hard drives such as the Maxtor OneTouch and the Mirra Personal Server can back up your entire hard drive either automatically or at the touch of a button. In addition to photographs that you have stored on your computer's hard drive, you'll want to stash several copies of those photos elsewhere. Ideally, at least one copy should be stored at a location other than where you keep your computer. TIP Got a priceless photograph that you want to archive now? Get yourself a Google GMail account (http://mail.google.com/mail/help/about.html). It's a free Web-based email service with an incredible amount of storage space2 gigabytes at the time this book was written). You can also email yourself photographs, or other files, for safekeeping. Figure 6.11. A digital camera and a computer open doors to new ways of sharing and storing your photos. (Photo by Reed Hoffmann)
Here's an example of a typical photographic backup system:
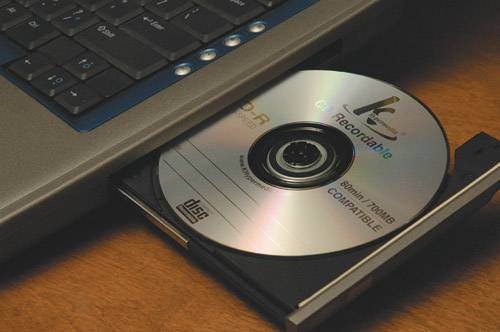
Figure 6.13. The ease of backing up your photos on CD or DVD makes it a great way to keep your precious memories safer than ever. (Photo by Reed Hoffmann)
When you're on the road, it's not easy to transfer copies of your CDs to a friend's house, so mail them home instead. If something should happen to your computer and backups while you're traveling, you'll arrive home to an envelope full of images. TIP There are a number of small hard drives you can take along to backup your images while you're on the road. When traveling, be sure to put your backup in a different bag than your computer (hard drive in the suitcase, computer in your carry on, for example). This way, if one gets lost, you'll still have the other. Figure 6.14. It's common to find Internet cafes around the world where you can burn your images to disk, and then mail them home. (Photo by Reed Hoffmann)
|

EAN: 2147483647
Pages: 79