PRINTING YOUR DOCUMENT


To print your file to a connected printer, choose File, Print. Choose a print preset if one has been defined, the name of your printer, and the PPD that drives that printer.

Use the tabs on the left side of the dialog to set the options in various categories.

General Print Options

The General panel of the Print dialog provides the most common printing options (see Figure 31.16):

  • Set number of copies.

  • Check Collate if you are printing more than one copy of a multiple page document, to keep the pages together.

  • Check Reverse Order to print the pages backwards.

  • Choose to print All pages or a specific Range.

  • Choose your Sequence: All Pages, Even Pages, or Odd Pages.

  • Check to print in Spreads and/or to print Master Pages.

  • Check to choose whether or not to print Non-printing Objects, Blank Pages, and/or Visible Guides and Baseline Grids.

Figure 31.16. General print options.
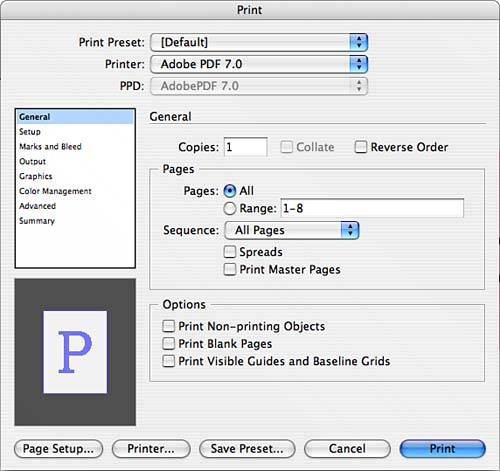

Setup Print Options

The Setup panel of the Print dialog enables you to choose your paper size and specify the size at which the pages should be printed and arranged on the sheet (see Figure 31.17):

  • Choose your page size. Select Custom to enter your own width and height.

  • Choose your page orientation.

  • Offset refers to how much space is left between the print area and the left side of the page.

  • Gap refers to how much space is left between pages if you are printing on continuous media, such as a roll of paper.

  • Transverse rotates the pages by 45°.

Figure 31.17. Print Setup options.


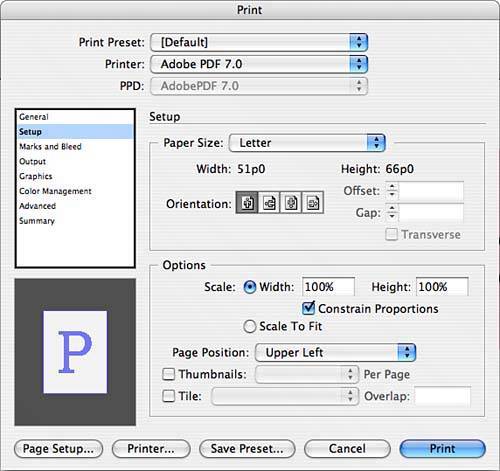
In the Options area are several additional setup choices you can specify:

  • Choose a different percentage for the width and height of your document to change the scale. Use the Constrain Proportions check box to keep the width and height equal.

  • Click the Scale to Fit radio button to shrink or enlarge your print area automatically to fit the page.

  • Choose how the print area should align on the page.

  • If you want to print thumbnails of multiple pages in your document, check the check box and enter the number of thumbnails that should print per page.

  • Tile your document to print a large-format file on multiple pages. Tile options include Auto, which automatically prints the number of tiles as necessary, including overlap. Auto Justified increases the amount of overlap as necessary so the right edges of the right tiles align to the right edge of the page, and the bottom edges of the bottom tiles align to the bottom edge of the page. Manual prints a single tile based on the location of the zero point on the page.

  • For Overlap, type the minimum amount of duplicated information you want printed with each tile. Overlap helps make it easier to arrange your final document from the tiles.

Marks and Bleeds Print Options

This panel of the Print dialog enables you to specify printer's marks for the page, including whether to use the document's bleed information or enter your own.

Output Print Options

On the Output panel of the Print dialog (see Figure 31.18), you can choose how to deal with color in your document. You can choose Composite Gray (for black-and-white printers), Composite RGB, Composite CMYK, or Composite Leave Unchanged, or you can choose to print Separations.

Figure 31.18. Print Output options.


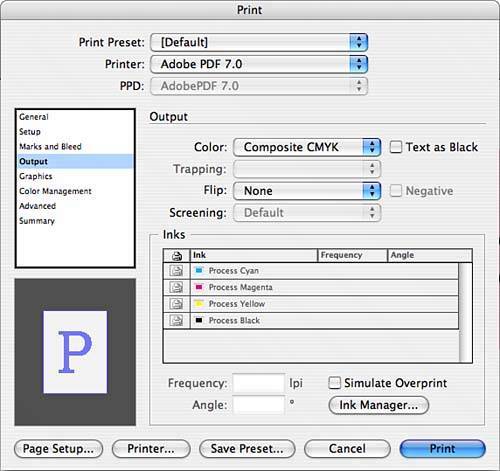
What's the difference? A composite prints all colors in the document on the same page, simulating how it will look when it is printed on a press. Printing separations result in a separate page for each color used on the page. A CMYK page printed as separations, for example, results in four printed pages: one that shows cyan ink placement, one that shows magenta, one that shows yellow, and one that shows black.

If you choose to print separations, use the Inks window to turn certain ink colors on and off.

Graphics Print Options

The Graphics print options panel (see Figure 31.19) enables you to choose how graphics are handled when you print your document. If you do not necessarily need to see your graphics at their highest resolution in your printout, printing no graphics or proxies can help speed up the printing process:

Figure 31.19. Graphic print options.


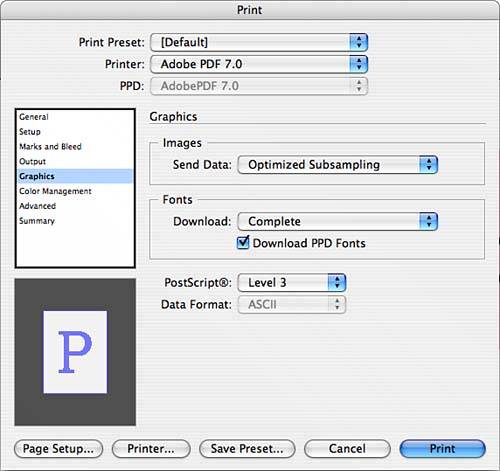
The Images, Send Data pop-up menu offers the following options:

  • All prints all graphics at the appropriate resolution.

  • Optimized subsampling prints the graphic at the best resolution supported by the output device.

  • Proxy prints a low-resolution image suitable for checking placement.

  • None prints a gray box in place of all graphics for faster printing.

The Fonts, Download pop-up menu offers these options:

  • Choose None if your fonts are installed in the printer's memory.

  • Choose Complete to download all fonts when the document is printed.

  • Choose Subset to download only the characters used in the document.

The Download PPD Fonts option download fonts even if they are installed in the printer's memory, for more reliable reproduction.

From the PostScript pop-up menu, choose the PostScript level that most closely matches your printer for the best output.

The Data Format pop-up menu, refers to how InDesign sends image data to the printer: either as ASCII (more common) or Binary (smaller).

Color Management Print Options

The choices in the color management print options pane (see Figure 31.20) refer to the color profiles used to print your document and how colors should be simulated based on your printer:

  • Choose whether you are printing a document or a proof.

  • Choose to let either InDesign or the PostScript printer determine your colors. If you choose to let InDesign determine colors, choose the printer profile from the list.

  • Preserve the CMYK or RGB numbers if your document uses color in images, for example, that do not have color profiles applied to them.

  • If you have set up a paper color other than white, you can choose to simulate that color here.

Figure 31.20. Color management options for printing.
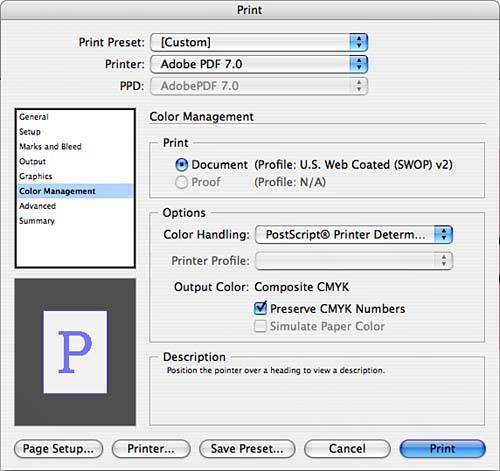

Advanced Print Options

The Advanced Print Options dialog (see Figure 31.21) gives you choices for omitting or keeping graphics, as well as how transparencies should be printed:

  • The Omit for OPI option enables you to select various graphic types used in your document that can be omitted, making a smaller file.

  • Choose your Transparency Flattener preset.

  • Click the Ignore Spread Overrides check box to maintain the transparency flattening choice you make in this panel throughout the document.

Figure 31.21. Advanced printing options.
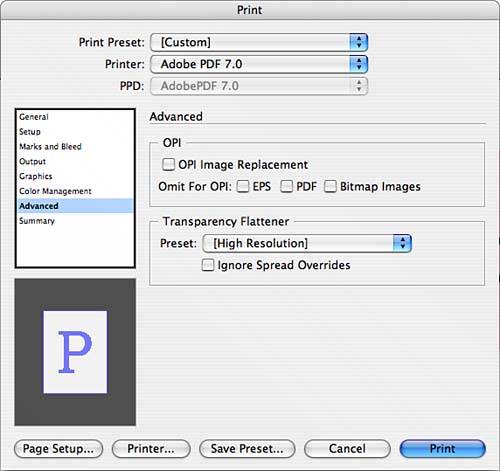

Summary Print Options

The Summary panel of the Print dialog shows a summary of your printing choices:

  • Click Save Preset to name and save this printing profile.

  • Click Setup to access the printer's setup options directly.

  • Click Print to print your document.


Special Edition Using Adobe Creative Suite 2
ISBN: 0789733676
EAN: 2147483647
Year: 2005
Pages: 426
Authors: Michael Smick

flylib.com © 2008-2017.
If you may any questions please contact us: flylib@qtcs.net