WORKING WITH THE IMAGEREADY DESKTOP
| Before we start to use ImageReady, let's take a minute to look at the program. Much of it is already familiar from Photoshop. The Photoshop Save for Web dialog is very similar to the ImageReady interface. It has a toolbox at the left, a tool options bar across the top of the screen, and a collection of palettes on the right. Below the tool's Options bar you can see the Window tabs at the top of the window in ImageReady and starting in the upper-left corner of the Save for Web dialog. They determine the content of the preview area. You can show the original image alone, a single image that is updated to show you current optimization settings, or you can compare images. When you select 2-Up, a pair of images is visible in the preview area. By default, the original image and an optimized image are shown, although you can change the original to any optimization settings. When you choose 4-Up, you can see the original and three different optimization possibilities for comparison or see four different sets of optimization options. In both the 2-Up and 4-Up views, you activate a pane by clicking it. That version's settings is shown and can then be changed. Figure 11.2 shows the 4-Up view. Figure 11.2. The ImageReady 4-Up is the most useful view.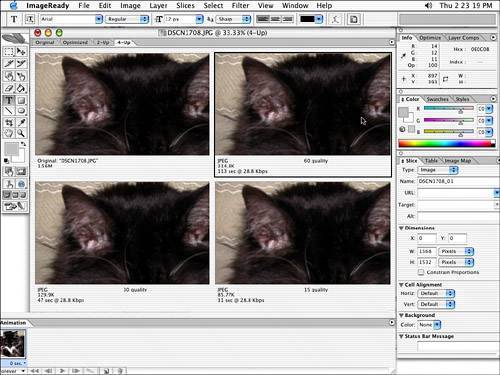 The ToolsTo the left of the preview area, you have four tools available (see Figure 11.3). In 2-Up and 4-Up views, the tools can be used only in the active pane. They function similarly to the comparable tools in Photoshop:
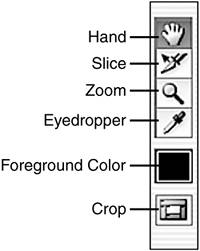
Figure 11.3. These are the tools in Photoshop's Save for Web dialog box.
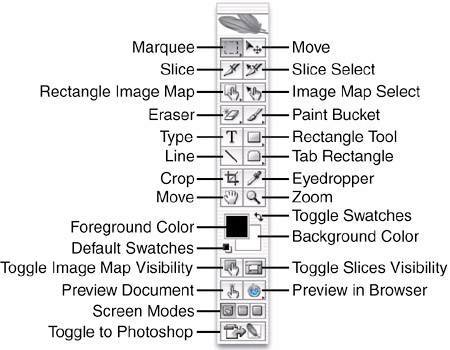
The color swatch, which shows the color most recently selected with the Eyedropper, is below the tools. (When you open the Save for Web dialog, the last selected color is still visible, even if it's not present in the current image.)
Although the Save for Web dialog offers preset zoom magnifications from 12.5% to 1600%, you can use the Zoom tool to zoom out as far as 1%. Remember, however, that you should always make your final evaluation of web graphics at 100% zoomthat's how they'll be seen in a web browser. The button below the color swatch toggles slice visibility on and off. Clicking the Slice Select tool automatically shows slices, too. Figure 11.4 shows the ImageReady toolbox. As you can see, many of the icons are familiar from Photoshop. The tools work exactly the same in ImageReady, so it doesn't really matter which application you access them from. You can toggle back and forth between Photoshop and ImageReady by clicking the icon at the bottom of the toolbox. Figure 11.4. Click the button at the bottom of the toolbox or press |
EAN: 2147483647
Pages: 426