Customizing the Visual Web Developer Experience
| Like any robust programming editor, Visual Web Developer is highly customizable, enabling developers to configure the editor in a way that maximizes their productivity. Not only does Visual Web Developer give you fine-grained control over a variety of settings, but it also provides an easy way to export your unique settings to a single file. You can then re-create your environment at a new computer by importing your settings file. This makes it easy to move your settings from a desktop computer to a laptop; additionally, if you place your settings file on a website or keep it saved on a USB drive or web-based email account, you can easily re-create your development environment at any computer where you end up working! In this section we'll examine how to customize Visual Web Developer. The bulk of the customizability is accomplished through the Options dialog box, which is available through the Tools menu. There are literally hundreds of settings, so we won't have the time to go through each and every one. Instead, we'll focus on the more germane settings. We'll also see how to alter the Visual Web Developer panes and their display settings, along with settings that aid with laying out HTML content in the Design view. By default, the Visual Web Developer Options dialog box shows only the most pertinent options. To see all available options, check the Show All Settings check box.
Examining the Environment SettingsThe majority of the customizable settings in Visual Web Developer are accessible via the Options dialog box, which you can display by selecting the Options item from the Tools menu. Figure 3.6 shows the Options dialog box when first opened. Figure 3.6. Customize your Visual Web Developer experience through the Options dialog box.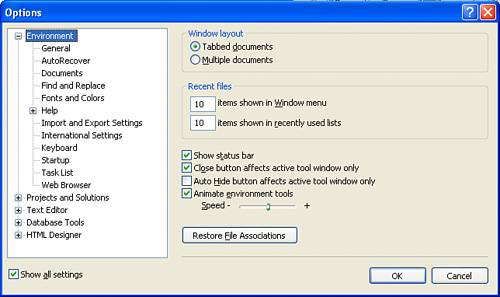 The Options dialog box is broken down into various hierarchical categories, which are listed in the left column. Selecting an item from the list on the left displays its corresponding options on the right. As Figure 3.6 shows, the default category selected when opening the Options dialog box is the Environment category. There are far too many categories and options available in this dialog box to exhaustively list them all; instead, let's just focus on the more pertinent ones. The Environment has two settings worth exploring. The first is the AutoRecover setting. While you are working on a website, Visual Web Developer will automatically save copies of modified files every so often, based on a setting you provide (the default is every five minutes). These backup copies are kept around for a specified number of days (seven, by default). The AutoRecover feature protects against losing hours of work due to an unexpected shutdown. If your officemate LeRoy happens to walk past your desk and kick the power cord out of the wall, in the worst case you'll not have the last five minutes of changes saved (assuming you left the AutoRecover frequency as the default). If you have AutoRecover enabled (which it is, by default), backup copies of your modified files will be saved periodically to the \My Documents\Visual Studio 2005\Backup Files\ <projectname> folder. The final Environment setting we'll look at is the Fonts and Colors settings, which is shown in Figure 3.7. The Fonts and Colors settings dictate the fonts, sizes, and colors of the text used in Visual Web Developer. You can alter the fonts and colors for a variety of settings: the Visual Web Developer text editor, the printed output, various debugging windows, and so on. Furthermore, for each variety of setting, there are multiple display items whose font and color can be customized. For example, the default fonts and colors for the Text Editor setting's Plain Text is black, 10pt, Courier New; its setting for the Selected Text is white with a blue background, 10pt, Courier New. Figure 3.7. Specify the fonts, sizes, and colors of the text used in Visual Web Developer.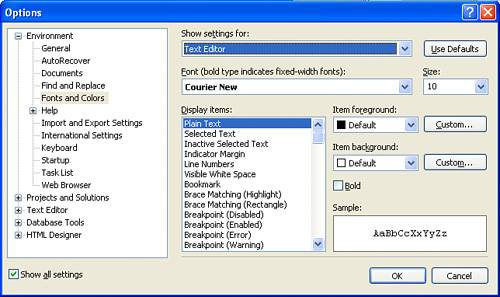 Many developers tweak the Fonts and Colors settings to make it easier to see certain types of tokens in their source code. For example, in the version of Visual Web Developer I use, I have Numbers displayed as purple, bold, 10pt, Courier New text, and Strings displayed as turquoise, 10pt, Courier New text. Configuring the HTML Design-Time ExperienceThe last settings item in the Options dialog box worth noting is the HTML Designer category. Expand this category and select the General item beneath it. On the right you should see an option titled Start Pages In with two options: Source View and Design View. Recall that when editing an ASP.NET page's source code portion, you can either work with the HTML content directly, through the Source view, or drag and drop HTML elements and Web controls onto the page from the Design view. By default, when you're creating a new web page or opening an existing one, the page is opened in the Source view. If you prefer the Design view, you can change the default behavior here. The second setting in the HTML Designer category that merits discussion is the CSS Positioning item (see Figure 3.8). The key setting in this item is the Positioning options. If you check the first check boxChange Positioning to the Following for Controls Added Using the Toolbox, Paste, or Drag and Dropyou can indicate how items should be laid out on the designer. By default, this check box is unchecked, meaning that no positioning information is applied to Web controls or HTML elements added through the Design view. In the preceding hour we touched on this, discussing how extraneous whitespace is ignored in HTML, and to position elements, you need to use <table> elements like we did in the example in Hour 2, "Understanding the ASP.NET Programming Model," or other techniques that we have yet to explore. Figure 3.8. Control the HTML layout to a finer degree with absolute positioning.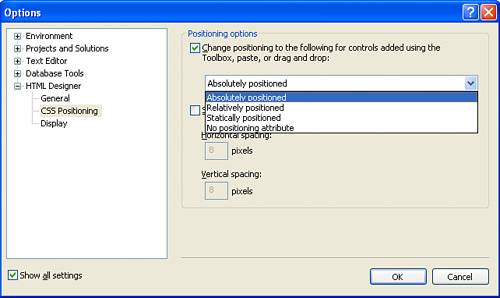 One such positioning technique is absolute positioning. This technique gives each HTML element and Web control dragged onto the designer a fixed coordinate for its upper-left corner. These coordinates are sent down to the browser and are positioned accordingly. If you check the Change Positioning to the Following for Controls Added Using the Toolbox, Paste, or Drag and Drop check box and select the Absolutely Positioned item from the drop-down list, you will be able to simply drag Web controls and HTML elements to the position you want on the designer. Figure 3.9 illustrates this by examining the designer after configuring Visual Web Developer to use Absolutely Positioned elements. Specifically, I have added a Button Web control and then dragged it near the middle of the design surface. More precisely, the absolute position of the Button Web control is 119 pixels from the top and 100 pixels from the left, as can be seen in the lower-left corner of the Visual Web Developer status bar. Figure 3.9. A button has been absolutely positioned to 119px from the top and 100px from the left.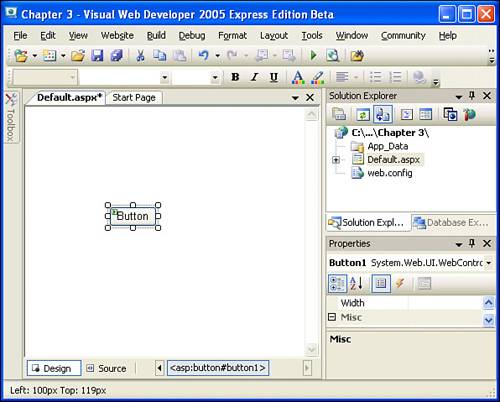 While absolute positioned elements may seem like a godsend, making it supremely simple to move elements around to specific locations, it is important to be aware of the risks. For starters, when you position elements absolutely, you are making inherent assumptions about your visitors' screen resolutions. For example, imagine that you are designing your site on a monitor with a resolution that's 1,024 pixels wide and 768 pixels tall and you want a Button Web control to be placed near the right side of the page. You may drag the Button to have an absolute position of, say, 900 pixels from the left and 100 pixels from the top. When a visitor reaches your site, his browser will place that Button 900 pixels from its left margin and 100 pixels from its top. But what if the visitor's monitor supports only a resolution of 800 pixels wide by 600 pixels tall? That Button you meant to be on the right side of the screen is now off the visitor's screen, so he needs to scroll to the right to see it. Another disadvantage of absolutely positioned elements is that they do not flow nicely as their size increases. When we reach Hour 15, "Displaying Data with the Data Web Controls," we'll look at a Web control that displays database data. Since at design time we might not know how much data will be displayed (because that would depend on how much data is in the database, which will change over time), we may run into problems if we put a GridView on our page and, say, a Button beneath it. When there are but a few items in the GridView, the Button may be positioned nicely, but as time goes on and more data is added to the database, the GridView's dimensions will increase and eventually its larger size will cover up the Button beneath it. I am not categorically saying that you should never use absolute positioned elements. They make perfect sense in a controlled environment, like an intranet, where you can be assured that your visitors all have a certain minimum resolution so you can design the site accordingly. However, don't simply opt to use absolute positioned elements because it seems simpler than learning the more intricate methods of positioning using HTML syntax. The time you save in bypassing learning positioning with HTML syntax is likely time that will be taken back from you when some of these common absolute position design issues arise.
|
EAN: 2147483647
Pages: 233