Connecting the VPN Tunnel
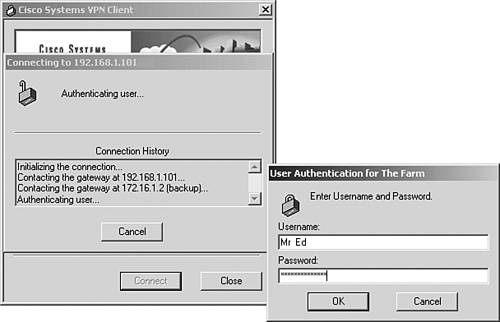
| After you have defined all parameters necessary on the client, in addition to the configurations on the concentrator, you can initiate the session by clicking on the Connect button. You are presented with the individual user login screen, similar to that in Figure 10.6. Notice in this particular example that the client was not able to communicate with the primary concentrator on this connection attempt, but it did connect with the first backup server in the supplied backup list. (In subsequent examples, the Unity Client will be connected to the primary concentrator.) Figure 10.6. Individual user login.
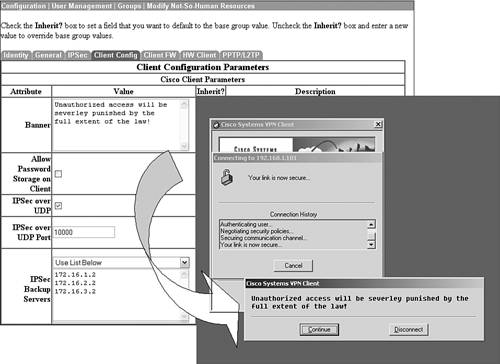
After the concentrator authenticates the user, the user may be prompted with a banner message that can be centrally defined in the VPN Concentrator's Client Config tab, as demonstrated in Figure 10.7. After the banner is displayed, the user is given the option to disconnect or to continue the session. Figure 10.7. Login banner message.
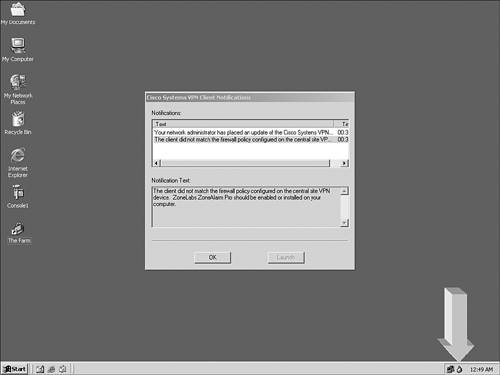
After the connection is complete, the Unity Client alerts you of any notifications being received from the central concentrator. These notifications might consist of update messages or firewall warnings. After the notifications are closed, the VPN connection entry is signified as a closed lock in the workstation's systray, as illustrated in Figure 10.8. Figure 10.8. Notification with entry icon.
Client Auto-Initiation FeatureIn instances where the Unity Client resides on a network that consists of a wireless local area network (WLAN), you can manipulate the client to auto-initiate a VPN session to the concentrator when it receives an IP address on the wireless network card. This is quite useful because this address can change if you have multiple wireless access points throughout the building assigning different IP addresses from different networks. In addition, you can use this utility to force desktops or laptops to resume the VPN session when the station reboots or returns from a hibernate or suspended state.
You can achieve auto-initiation by manipulating the global profile that is represented as a file in the client's installation directory. This global profile file is called vpnclient.ini and is shown in Listing 10.2. This vpnclient.ini contains settings that are global to all profiles and is created when you add functions from the Options menu. You can edit this file by simply using a text-editing program such as Notepad. Listing 10.2 Sample Output of vpnclient.ini[main] RunAtLogon=1 DialerDisconnect=1 AutoInitiationEnable=1 AutoInitiationRetryInterval=1 AutoInitiationList=techsupport StatefulFirewall=0 [techsupport] Network=192.168.100.0 Mask=255.255.255.0 ConnectionEntry=The Farm The AutoInitiationEnable value in this file determines whether to turn on this function. A one signifies that the function is on, whereas a zero indicates the function is off. If for some reason the auto-initiate fails, the AutoInitiationRetryInterval code determines how many minutes (default is 1) should pass before the auto-initiate is retried. In addition, you can specify up to 64 networks in which you want to trigger the Auto-initiate session. Those networks are defined and named in the vpnclient.ini file and need to be referenced in the AutoInitiationList line, separated by commas. To complete the Auto-initiation procedure, you have to tell the Cisco Unity Client how to associate the IP address on its NIC to a .pcf profile. In Listing 10.2, the Auto-initiation entry is named techsupport. Following the entry's name, you have to specify the network and mask that is to trigger the Auto-initiate process. After the network has been defined, you must associate the .pcf profile file in the ConnectionEntry line. In this example, when the client receives an IP address from the 192.168.100.0 network with a subnet mask of 255.255.255.0, it initiates a session with the parameters specified in the profile called "The Farm." The Auto-initiation sequence is demonstrated in Figure 10.9. Figure 10.9. Auto-initiation process.
|
EAN: 2147483647
Pages: 185