Adding Footnotes and Endnotes
3 4
If you're working on a document that's based on research, that points to other documents, or that references a URL, you can easily add the source information at either the bottom of the page or at the end of the document.
Footnotes appear in an area at the bottom of your page, with a separator line and a note reference mark to identify the note. (See Figure 28-1.) A matching note reference mark appears in the text at the place you create the footnote.
Endnotes look similar to footnotes, except that they're placed at the end of a document. Only one separator line separates the text and the endnotes, and the note reference marks are placed to the left of the noted items.
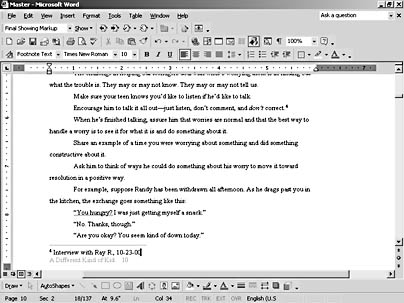
Figure 28-1. Footnotes appear at the bottom of the page and include a separator line and a note reference mark.
You can enter footnotes and endnotes of any length, but because the notes are placed in a typeface that's smaller than regular text and because they take up room in your document otherwise reserved for text, your reader will be happier if you keep your footnotes and endnotes as short as possible.
Inserting Footnotes and Endnotes
When you're ready to insert a footnote or endnote in your document, follow these steps:
- Place the insertion point where you want to add the footnote or endnote.
- Choose Insert, Reference, Footnote. The Footnote And Endnote dialog box appears, as Figure 28-2 shows.
- In the Location section of the Footnote And Endnote dialog box, click either the Footnotes or Endnotes option.
- In the Format section, click the Number Format down arrow and choose the numbering scheme you want to use for the note reference marks that identify your footnotes and endnotes. You'll find all the traditional choices—numeric, alphabetic, and roman numerals—plus something different: a collection of special symbols.
- If you want to start the footnote or endnote with a number other than 1, click in the Start At box and type the number you want.
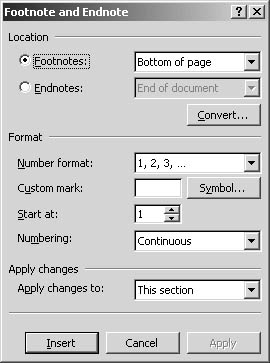
Figure 28-2. Enter footnote and endnote format choices in the Footnote And Endnote dialog box.
- Click Insert to add the note. Word adds the note reference mark and, if you're viewing the document in Normal view, opens either the Footnotes pane (shown in Figure 28-3) or the Endnotes pane at the bottom of the Word window so that you can enter and later edit the note. If you're working in Print Layout view, Word places the insertion point following the footnote or endnote identifier at the bottom or end of the document.
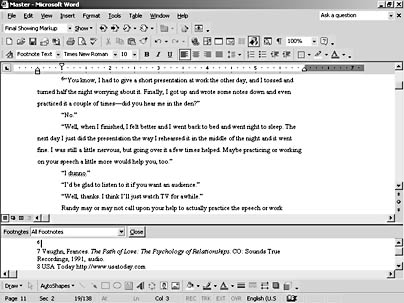
Figure 28-3. Word opens the Footnotes pane so that you can enter footnotes.
Tip - Add notes in sections
If you want to apply the changes you make in the Footnote And Endnote dialog box to only a section in your document, begin by clicking in the section and displaying the dialog box by choosing Insert, Reference, Footnote. Make your changes in the dialog box, and then click the Apply Changes To down arrow. Choose This Section to apply the changes only to the current section, and then click Apply.
Viewing Footnotes
As you work with the text in your document, the only clue you'll get about the placement of your footnotes and endnotes are the note reference marks inserted in the text. If you want to view the footnotes or endnotes you've entered, you can do so by displaying them as ScreenTips, by double-clicking the note reference mark, or by opening the Footnotes or Endnotes pane.
To display a footnote as a ScreenTip, position the pointer over the note reference mark in the document. The footnote appears as a tip above the pointer. (See Figure 28-4.)
Figure 28-4. Displaying a footnote as a ScreenTip is a quick way to review a footnote you've entered.
Tip
You can display a footnote or endnote in the Footnotes or Endnotes pane quickly by double-clicking the note reference mark.
To have Word display your footnotes in the Footnotes pane at the bottom of your screen, follow these steps:
- Choose View, Normal or click the Normal View button to the left of the horizontal scroll bar.
- Choose View, Footnotes. If you have both footnotes and endnotes, the View Footnotes dialog box appears. Click either View Footnote Area or View Endnote Area, and click OK.
Note
The Footnotes option on the View menu is available only after you've chosen Insert, Reference, Footnote to add a footnote to your document.1
1a sample
Editing Footnotes and Endnotes
When you want to edit a footnote or endnote, you need to display the Footnotes or Endnotes pane for the item you want to edit. You can then edit and enhance the text as needed. Here are the steps:
- Double-click the note reference mark of the footnote or endnote you want to edit. The Footnotes or Endnotes pane appears at the bottom of the Word window.
- Edit the note as needed.
- Click Close to close the pane.
Moving Footnotes and Endnotes
If you want to move a footnote or endnote from one position to another, select and drag the mark to the new location. If you want to move the mark to a location that's too far away to drag, you can cut and paste the mark by using Ctrl+X to cut and Ctrl+V to paste.
Note
If the position to which you move the footnote precedes another footnote, Word changes the numbering automatically.
Copying Footnotes and Endnotes
If you have a footnote or endnote you plan to use more than once in your document, you can copy a note reference mark instead of typing a duplicate entry. Simply select the note reference mark, and press and hold Ctrl while dragging the mark to the new place in the document.
Deleting Footnotes and Endnotes
When you want to remove a footnote or endnote from your document, go to the place in the document where the note reference mark appears and delete it. Simply removing the text in the Footnotes or Endnotes pane doesn't remove the note itself—Word will still keep the note reference mark in place and reserve the space at the bottom or end of your document for the note.
Troubleshooting
Deleted Footnotes Won't Go Away
If you've deleted a footnote or endnote that keeps reappearing, chances are that a portion of the note has been left behind. To find the culprit character, click the Show All button on the Standard toolbar. All the paragraph marks will appear, and you can move to the footnote area and delete the stray paragraph mark. The reference in the text will then be deleted.
Adding Symbols to Footnotes
If you want to use a symbol instead of a numeric or alphabetic character as the identifier in your note reference marks, display the Footnote And Endnote dialog box by choosing Insert, Reference, Footnote. Then click the Symbol button. The Symbol dialog box appears, as shown in Figure 28-5. Choose the font and character you want to use, and then click OK. Word adds the symbol to the Custom Mark box in the Footnote And Endnote dialog box and, when you click Insert, the symbol is added as the note reference character in the text and in the Footnotes or Endnotes pane.
Troubleshooting
My Footnotes Disappeared on My Web Page
If you created a document, complete with footnotes and endnotes, and then saved it as a Web page, your footnotes haven't disappeared completely; they've simply been moved to the end of the Web document. The footnotes are turned into hyperlinks, so you can access them easily from within the page.
Click the note reference mark to activate the link; the footnote is then displayed in your browser. To return to the Web page, click your browser's Back button to return to the previous page.
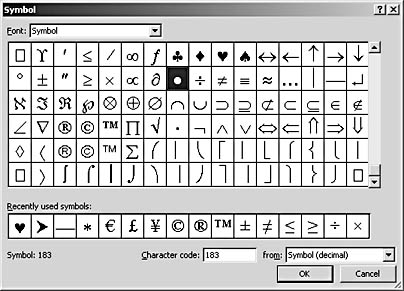
Figure 28-5. You can use symbols as note reference marks instead of numbers.
Creating a New Separator Line
The separator line Word uses to show where the document text ends and the footnote text begins is a pretty nondescript line that extends a short distance across the page. If you want to change the separator line—perhaps to add color or choose a different line style or thickness—use the Borders And Shading dialog box to make the change. Here are the steps:
- In Normal view, choose View, Footnotes to open the Footnotes pane.
- Click the Footnotes down arrow, and select Footnotes Separator from the Footnotes drop-down list.
- Delete the existing separator line by clicking it and pressing Delete.
- Choose Format, Borders And Shading. The Borders And Shading dialog box appears.
- Click the Borders tab.
- In the Style list, select the border style you want.
- Click the bottom and side segments in the Preview section to remove them, leaving only the top line.
- Click OK to add the new separator line to the document.
Troubleshooting
My Footnote Is Split Across Two Pages
Sometimes getting footnotes to print just where you'd intended can be a bit tricky. You might wind up with too many additional blank lines on the page after the footnote, or you could find that your footnote has been divided, with one line appearing on the first page and a second line printing on the next page.
If you find that part of your footnote is moved to the next page, take a look at the margin settings you have for the page. The text on the page, the margins, and the footnote length all play a part in the amount of space reserved for your footnote area. Click File, Page Setup to display the Page Setup dialog box, and note the space you have entered for the margins. Try reducing the Bottom Margin setting to allow more room for the footnote; click OK to return to the document.
For best results, try to keep your footnotes short—to one or two lines if possible. If you need to insert a long footnote, consider converting it to an endnote so that it can be placed at the end of the document.
EAN: 2147483647
Pages: 337