Choosing the Way You Want Your Outline Displayed
|
| < Day Day Up > |
|
Working in Word's Outline view enables you to customize the display so you see only the heading levels you want to work with. For example, you might want to see only the first-level heads in your outline so that you can check that all your most important topics are covered. Or perhaps you want to see every level, to check the completeness of the subtopics. You can easily move back and forth between various outline displays by using the buttons on the Outlining toolbar.
Displaying Different Levels of Text
![]() You can easily control how much of the outline you want to see. If you want to limit the display of your outline to only Heading 2 levels, for example, you click the Outline Level arrow to display the list of levels. Click Show Level 2 to display every level down to and including level 2, as shown in Figure 10-5.
You can easily control how much of the outline you want to see. If you want to limit the display of your outline to only Heading 2 levels, for example, you click the Outline Level arrow to display the list of levels. Click Show Level 2 to display every level down to and including level 2, as shown in Figure 10-5.
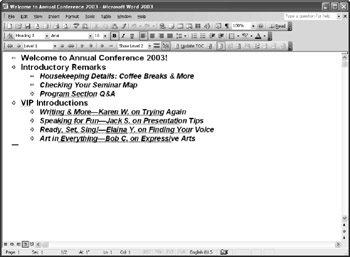
Figure 10-5: Control the levels displayed in Outline view by choosing what you want to see in the Show Level list box.
Inside Out: Copy document headings without all the text
Being able to collapse the outline display to headings only gives you a quick look at the overall organization of your document. If only you could copy and paste only the headings of your outline as well. Unfortunately, when you highlight the entire outline, copy it, and paste it into another document, the whole thing—headings and subordinate text—goes along for the ride. The workaround is to create a table of contents (Chapter 21, "Generating First-Class Tables of Contents and Related Elements," tells you how) and then convert the TOC to regular text by pressing Ctrl+Shift+F9. Then you can copy the headings and paste them into a document.
| Tip | Dictate your outline If you prefer dictation to typing, you can "speak" your outline into being. If you've enabled the Speech Recognition feature, created a profile, and taught Word how to recognize your speech patterns by using the Speech Recognition Training Wizard, you can dictate your outline as you would any other document. To dictate your outline, follow these steps:
The first few times you use Word's Dictation feature, don't expect miracles. It's a long process of training the program to recognize the way you say the words you use. Using the training wizard and creating your own profile help, but it's a continual process. It's fun, and hopefully worth the effort, but a process nonetheless. One word of caution, however: If you forget to turn your microphone off and you mutter to yourself as you work, you can have odd words appear in your paragraphs. A laugh apparently sounds like "Lincoln" to Word, and the phrase "You talkin' to me?" was interpreted as "Utah in the." So be forewarned: remember to turn your microphone off when you're no longer using dictation. Something's listening to every word you say. |
| Note | There are other methods of changing which heading levels appear: you can click the Expand or Collapse button on the Outlining toolbar, or you can double-click the Expand button to the right of a heading to display subordinate items. |
Showing the First Line of Text
When you get to the point in the work on your outline that you're ready to look at the paragraph text you've entered, you can have Word display only the first line of text so that you can see what the content of the paragraph is without displaying the entire paragraph. Why might you want to display only the first line of text?
-
You might want to check the order in which you discuss topics.
-
You're considering whether to move text to a different part of the document.
-
You're reviewing the primary points you've covered under subheadings.
 To display only the first line of text for the paragraphs in your document, click the Show First Line Only button on the Outlining toolbar. The display changes to show the first text lines, as Figure 10-6 shows. To display full paragraphs again, click the button a second time.
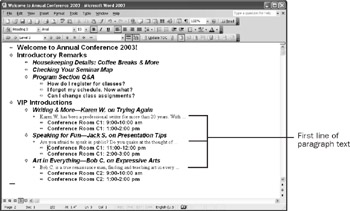
Figure 10-6: Displaying only the first line of a paragraph lets you see the general subject of your text so that you can make informed choices about reordering topics.
Removing and Showing Formatting
Another quick change you might want to make is to suppress the display of formatting in your outline. As you know, when you change to Outline view, the headings are shown with whatever character formatting they're assigned in the other Word views. Heading 1, by default, is in the Arial 16 point font, for example. When you're working in the outline, however, you might find formatting differences distracting while you consider the content and organization of your topics.
 To hide the formatting assigned to heading levels in your outline, click the Show Formatting button on the Outlining toolbar. This button actually functions as a toggle, meaning that the first click hides the formatting and the second displays it again. Figure 10-7 shows you what a simple outline looks like when all formatting has been suppressed.
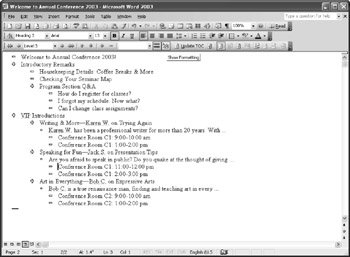
Figure 10-7: When you want to focus on the thoughts in your outline, you might want to hide the formatting applied to heading levels.
|
| < Day Day Up > |
|
EAN: 2147483647
Pages: 373