Using Digital Certificates to Digitally Sign Files and Macros
|
| < Day Day Up > |
|
Office applications use Microsoft Authenticode technology to enable you to digitally sign a file or macro by using a digital certificate. Digital certificates can be likened to online identification cards that are attached to macros and documents. These IDs help confirm to others that a macro or document originated from the signer and hasn't been altered along the way. Digital certificates contain information about the person who obtained the certificate as well as information about the certification authority that issued the certificate.
Obtaining Digital Certificates
To obtain a digital certificate, you can purchase one from a certification authority (such as VeriSign, at http://www.verisign.com, or E-Lock, at http://www.elock.com), you can obtain one from your organization's security administrator or IT professional, or you can create a digital signature for limited local use. Since a certification authority doesn't sign the digital certificates you create, your "homemade" certificates will be considered unauthenticated, which means they'll generate a security warning if you send the certificate to a user whose security level is set to Medium or be completely disabled if the user's security level is set to High. (For more information about security levels, see "Setting Word Security Levels".)
Working with Certificate Authorities and Security Administrators
When you obtain a digital certificate from a certification authority, you must submit an application to the authority and pay a fee (which is usually an annual rate based on the type of security you want to obtain). When you receive your digital certificate, the certification authority provides instructions for installation. Similarly, if you work with an in-house security administrator, you'll need to follow your organization's policies regarding how digital certificates are distributed and how digital signatures are added to your macros and files.
Creating Your Own Digital Certificates
If you want to create your own digital certificate to practice working with digital signatures or for your personal use, you can do so by using the Selfcert.exe application included with Office. Remember, this type of certification is unauthenticated, so it doesn't provide much security assurance to others outside of your local area network.
Installing the Selfcert.exe Application By default, Selfcert.exe is not installed with Office, so your first step in creating a digital certificate is to install the application from the Office installation CD, as follows:
-
Choose Start, Control Panel, and then double-click the Add Or Remove Programs icon.
-
Select Microsoft Office, and then click Change.
-
Choose Add Or Remove features, and then click Next.
-
Select Choose Advanced Customization Of Applications, and then click Next.
-
Expand Office Shared Features, click Digital Signature For VBA Projects, and choose Run From My Computer.
-
Click Update. When the updating is complete, a message box appears, stating that Office has been updated successfully. Click OK.
After you click Update, the Selfcert.exe feature is installed on your system. Usually, the application is installed in the C:\Program Files\Microsoft Office\Office11 folder.
Creating a Certificate After you install the Selfcert.exe application, you're ready to create a digital certificate. To do so, follow these steps:
-
Double-click the Selfcert.exe application. If the file isn't stored in the C:\Program Files\Microsoft Office\Office11 folder, choose Start, Search, For Files Or Folders, and run a search for selfcert.exe. When the search is completed, double-click the Selfcert.exe application. You'll see the Create Digital Certificate dialog box, as shown in Figure 28-11.
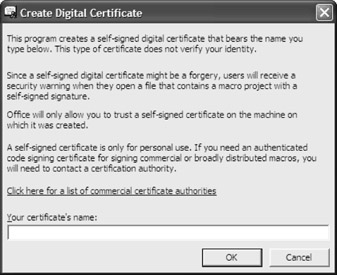
Figure 28-11: The Selfcert.exe application enables you to create an unauthenticated digital certificate that you can use for your own macros and files. -
Type your name in the Your Certificate's Name box, and click OK. A message box appears, stating that you've successfully created a certificate, as shown in Figure 28-12. Click OK.
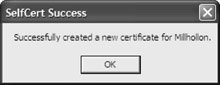
Figure 28-12: A message box appears after your certificate has been created.
At this point, you've successfully created an unauthorized digital certificate that you can use to sign and run macros on your local machine. You can also use your unofficial certificate to practice working with digital certificates. You can view your newly created certificate and attach it to your files and macros, as described in the next section.
Attaching a Digital Certificate to a File
After you obtain a digital certificate, you can authenticate your files and macros by digitally signing them. Basically, digitally signing a file or macro means that you've attached your digital certificate to the document. In this section, you'll learn how to digitally sign a file. For information about digitally signing a macro, see Chapter 32, "Creating and Working with VBA Macros."
To attach a digital certificate to a file, follow these steps:
-
Open the document you want to digitally sign, and then choose Tools, Options, and click the Security tab.
-
Click Digital Signatures. The Digital Signature dialog box appears, as shown in Figure 28-13.
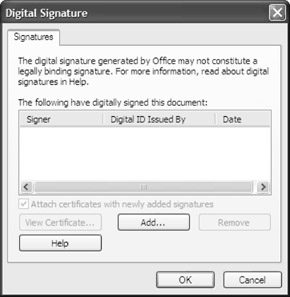
Figure 28-13: The Digital Signature dialog box lists the digital certificates attached to the current document and enables you to view, add, and remove certificates. -
In the Digital Signature dialog box, click Add. The Select Certificate dialog box appears, as shown in Figure 28-14.
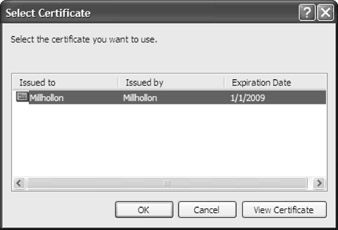
Figure 28-14: The Select Certificate dialog box lists the certificates you can use to digitally sign a file.Note If you're working in Normal view when you click Add in step 3, or if ink annotations are included in the document, you might receive a message box that states that all text and pictures might not be visible in the current view. If you haven't saved the current document, you'll receive a message box stating that you must first save the document as a Word document before you can add a digital certificate. If you haven't accepted tracked changes, you might receive a message box that recommends that you accept or reject tracked changes before signing your document. In any message box, click Cancel if you want to proceed with the recommended actions or click Yes to continue.
-
Select the digital certificate you want to use. Click View Certificate to see more information about the selected certificate. The Certificate dialog box opens, displaying the General tab, as shown in Figure 28-15. Notice that the certificate icon has a red X mark in the lower right corner, indicating that the certificate is unauthorized. This certificate was created using the Selfcert.exe application, which, as mentioned, creates unauthorized certificates for your personal use.
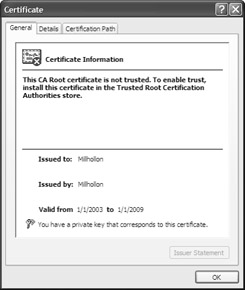
Figure 28-15: The Certificate dialog box shows you detailed information about a selected digital certificate. -
Click OK to close the Certificate dialog box and return to the Select Certificate dialog box.
-
Click OK to add the certificate to the current document. The certificate will now be listed in the Digital Signature dialog box.
-
Click OK to close the Digital Signature dialog box, and then click OK to close the Options dialog box.
After you add a certificate to a document, you can remove it at any time. To do so, choose Tools, Options, and click the Security tab. Click Digital Signatures, select the digital certificate you want to remove, click Remove, and then click OK twice. This action removes the certificate's association with the current document—it doesn't delete the certificate.
As mentioned, a digital certificate you create using the Selfcert.exe application will be displayed with a red X mark because the certificate is unauthenticated. A red X can also indicate the following security issues associated with a certificate:
-
The signed file or macro has been tampered with.
-
The certificate was not issued by a trusted certification authority.
-
The certificate was issued without verification (such as a free certificate authority trial download).
-
The certificate was invalid when it was used to sign the file or macros.
When you see a certificate with a red X, proceed with caution. This is a clear sign that something about the certificate is amiss.
Viewing Digital Certificates Attached to Files
If you're working with a file that's been digitally signed, you can easily view the digital certificates. The procedure for viewing digital signatures is similar to digitally signing a file. To view a digital signature, follow these steps:
-
Choose Tools, Options, click the Security tab, and click Digital Signatures.
-
Select the digital signature you want to learn about, and click View Certificate. The Certificate dialog box opens, showing details about the certificate.
-
Click OK three times to close all open dialog boxes.
If you want to export a certificate to a file (for instance, you might want to copy your certificate to disk and then install it on another machine), you can do so by using the Certificate Export Wizard. To access this wizard, click the Details tab in the Certificate dialog box and then click Copy To File. The wizard walks you through the process of exporting your digital certificate. Be careful when exporting your digital certificates. The security aspect of certificates relies entirely on the secrecy of the certificates' codes. If your codes become available to others, you've jeopardized your digital certificates' effectiveness.
|
| < Day Day Up > |
|
EAN: 2147483647
Pages: 373