Locking Textures and Getting Descriptions
| Just like the vertex and index buffers earlier, each of the texture types also has a locking mechanism, and a way to determine the features it uses. In addition to these methods, textures also have two new features that the geometry resources do not: namely, dirty regions and a "backing" object. Before we get into those, let's explore the locking mechanism for textures. The locking mechanism for textures is remarkably similar to locking our geometry buffers, with two differences. The first is the lock calls take in a "level" parameter, which is naturally the mipmap level you wish to perform this lock operation on. The second is the rectangle (or box for volume textures) you wish to perform the lock on. You can use the overloads that do not specify this member to lock the entire texture surface. When dealing with cube textures, there is one extra parameter that is needed: the face of the cube map you wish to lock. You can use a value from the CubeMapFace enumeration for this parameter. You may also notice that some of the overloads for LockRectangle can return a pitch parameter as an out. If you need to know the amount of data in each row, this is what the pitch will provide you. If you specify this parameter, it will return the number of bytes in a row of blows. While the texture locks can take in a type parameter for locking specific types of data, the textures themselves only store color information. If you wish to use one of the overloads that use a type, you should ensure that type is the same size as the pixel format of the texture; for example, a 32-bit pixel format should be locked with an integer, while a 16-bit pixel format should be locked with a short. We should look at an example of locking a texture now. We will use the MeshFile example we've already looked at as the basis for this example. We'll remove the texture that is currently used for rendering the model, and replace it with one we generate dynamically for our application. We will want to have two modes for this texture, one that is "cycling" the textures, and one that is purely random. We will need the following variables to be declared for this: private uint texColor = 0; private bool randomTextureColor = false; We plan on having a 32-bit pixel format for our texture, so we store our cycling color in a 32-bit format (uint) as well. We also want to specify whether we are creating random texture colors, or using the cycling texture, thus the need for the Boolean. Now, we should create the method that will do the actual texture locking and updating. In order to show the differences between the array methods, and the unsafe methods, we will do both. The array method is shown in Listing 8.2. Listing 8.2 Filling a Texture with an Array private void FillTexture(Texture t, bool random) { SurfaceDescription s = t.GetLevelDescription(0); Random r = new Random(); uint[,] data = (uint[,])t.LockRectangle(typeof(uint), 0, LockFlags.None, s.Width, s.Height); for (int i = 0; i < s.Width; i++) { for (int j = 0; j < s.Height; j++) { if (random) { data[i,j] = (uint)Color.FromArgb( r.Next(byte.MaxValue), r.Next(byte.MaxValue), r.Next(byte.MaxValue)).ToArgb(); } else { data[i,j] = texColor++; if (texColor >= 0x00ffffff) texColor = 0; } } } t.UnlockRectangle(0); } So what is going on in this code? You take an existing texture, and first get the description of the texture. You do this in order to get the width and size of the data so that you know how much data will need to be filled. Since you know the width and height of the data, you will lock into a two dimensional array (of size width/height). You want to lock into an unsigned integer (since you are using a 32-bit pixel format), and don't care about any lock flags. Since you will only create one level of the mipmap chain, you will lock level zero. After the texture is locked, we will go through every member of the returned array and update its color, either to a random value or to a value we increment every time (our "cycling" color). Finally, after this data is all updated, we unlock our texture and we are finished. Now, what would the unsafe version of this method look like? Actually, quite similar, and that code is shown in Listing 8.3. Listing 8.3 Filling a Texture with Unsafe Code private unsafe void FillTextureUnsafe(Texture t, bool random) { SurfaceDescription s = t.GetLevelDescription(0); Random r = new Random(); uint* pData = (uint*)t.LockRectangle(0, LockFlags.None).InternalData.ToPointer(); for (int i = 0; i < s.Width; i++) { for (int j = 0; j < s.Height; j++) { if (random) { *pData = (uint)Color.FromArgb( r.Next(byte.MaxValue), r.Next(byte.MaxValue), r.Next(byte.MaxValue)).ToArgb(); } else { *pData = texColor++; if (texColor >= 0x00ffffff) texColor = 0; } pData++; } } t.UnlockRectangle(0); } Notice that the only differences in this function are the declaration of unsafe, and how we've updated our data? We lock the buffer into a graphics stream, and use the "InternalData" member (which is an IntPtr) to get the actual pointer to the data we wish to manipulate. We manipulate the data directly via the pointer, and finally unlock our texture. In order to compile this method, you will need to turn on the capability to compile unsafe code in your project properties. In the Configuration Properties section, set the Allow Unsafe Code Blocks to true. Now that you've got the function to fill the texture with fancy color data, you should update the LoadMesh function to not attempt to create the textures via a file, but instead use the function. Replace the material code in the LoadMesh method with the following: // Store each material and texture for (int i = 0; i < mtrl.Length; i++) { meshMaterials[i] = mtrl[i].Material3D; meshTextures[i] = new Texture(device, 256, 256, 1, 0, Format.X8R8G8B8 ,Pool.Managed); #if (UNSAFE) FillTextureUnsafe(meshTextures[i], randomTextureColor); #else FillTexture(meshTextures[i], randomTextureColor); #endif } As you can see, we no longer attempt to load a texture from a file. For each texture in our array, we create a new texture using pixel format X8R8G8B8 (a 32-bit format). We create a 256x256 texture, with only one level, so there are no mipmap levels after the first. We then fill our texture using the method we just wrote. You'll notice I have the fill texture method wrapped in an #if statement. You can define Unsafe in your code file to use that method instead. With the texture now being created via our function, you can run the application and notice the model looks quite colorful. However, it once again appears "blocky," and the textures are staying constant. We should call our fill texture method every frame. We might as well fix the blocky look of our texture as well. Replace the SetupCamera function with the one in Listing 8.4:
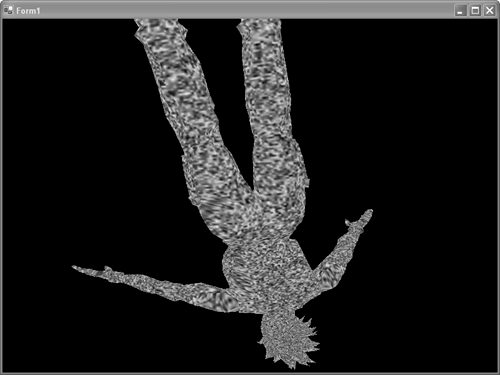
Listing 8.4 Setting Camera Options private void SetupCamera() { device.Transform.Projection = Matrix.PerspectiveFovLH((float)Math.PI / 4, this.Width / this.Height, 1.0f, 10000.0f); device.Transform.View = Matrix.LookAtLH(new Vector3(0,0, 580.0f), new Vector3(), new Vector3(0,1,0)); device.RenderState.Lighting = false; if (device.DeviceCaps.TextureFilterCaps.SupportsMinifyAnisotropic) device.SamplerState[0].MinFilter = TextureFilter.Anisotropic; else if (device.DeviceCaps.TextureFilterCaps.SupportsMinifyLinear) device.SamplerState[0].MinFilter = TextureFilter.Linear; if (device.DeviceCaps.TextureFilterCaps.SupportsMagnifyAnisotropic) device.SamplerState[0].MagFilter = TextureFilter.Anisotropic; else if (device.DeviceCaps.TextureFilterCaps.SupportsMagnifyLinear) device.SamplerState[0].MagFilter = TextureFilter.Linear; foreach(Texture t in meshTextures) #if (UNSAFE) FillTextureUnsafe(t, randomTextureColor); #else FillTexture(t, randomTextureColor); #endif } We turned lighting off so we can see the beauty of our colors without them being "shaded" by the lighting. We also turned on a texture filter (if it is supported) to remove the blocky look of the texture. The last thing we need to do is have a way to turn on the "random" texture colors. We'll just use any keypress as a toggle between the two texture modes. Add the following: protected override void OnKeyPress(KeyPressEventArgs e) { randomTextureColor = !randomTextureColor; } Using the random color option produces an almost animated effect. It almost looks like the snow you see on the television when there's no reception. See Figure 8.1. Figure 8.1. A snowy texture.
|
EAN: N/A
Pages: 180