Customizing Menus and Toolbars
|
| < Day Day Up > |
|
Microsoft Office Specialist You will most likely find that you use certain menus and toolbar buttons quite fre quently and that you never use others. To make Outlook more effective, you can customize your menus and toolbars to contain the items you use and display them in the way that you use them. You can add and remove items from both menus and toolbars, hide or display toolbars, move toolbars, and create your own toolbars. For example, if you frequently use dial-up networking, you might create a toolbar contain ing commands you use to mark message headers. Or if you don’t use custom forms, you might remove the Forms command from the Tools menu.
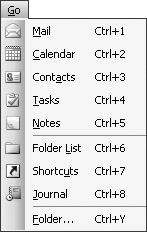
New in Office 2003—Go menu When customizing the Outlook 2003 interface, take advantage of the new Go menu. This menu links to all the panes that can appear in the Navigation Pane, allowing you to quickly switch between them.
In this exercise, you select which toolbars are displayed, set options for how menus appear, add and remove items from menus, and add and remove items from toolbars.
BE SURE TO start Outlook before beginning this exercise.
-
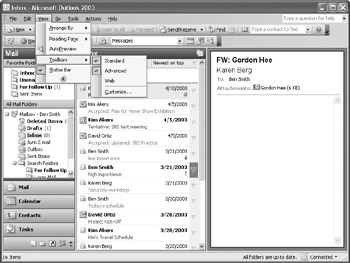
In the Navigation Pane, click the Mail button, and then click the Inbox.
The Inbox is displayed.
-
On the View menu, point to Toolbars. The displayed toolbars are indicated on the submenu.
-
Click Customize.
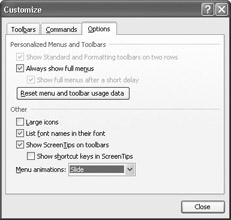
The Customize dialog box appears with the Options tab displayed.
Troubleshooting If the Options tab is not displayed, click it now.
-
In the Personalized Menus and Toolbars area, select the Always show full menus check box.
-
In the Other area, click the down arrow to the right of the Menu animations box, and then click Slide in the drop-down list.
-
Click Close to save your selections.
-
Click the Tools menu.
Because you selected the “Always show full menus” check box, the menu opens fully, displaying all its commands.
-
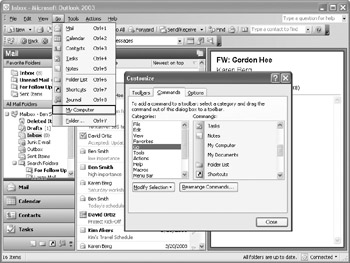
On the Tools menu, click Customize.
-
In the Customize dialog box, click the Commands tab.
-
In the Categories list, click Go.
The list of commands in the View category is displayed in the Commands list.
-
In the Commands list, click My Computer, drag it to the Go menu, which expands, and drop it just below Journal.
The command is added to the Go menu.
-
In the Customize dialog box, click Close.
-
On the Go menu, click My Computer.
The contents of the My Computer folder are displayed in a separate window.
-
Close the My Computer window.
-
On the Tools menu, click Customize.
The Customize dialog box appears. When this dialog box is open, you can add and remove items from visible menus and toolbars, using the menus and toolbars themselves.
-
On the Go menu, right-click My Computer, and then click Delete.
The command is removed from the menu.
-
In the Customize dialog box, click the Commands tab.
-
In the Categories list, click Advanced.
The list of commands for the View category is displayed.
-
In the Commands list, drag Outlook Today to the right end of the standard toolbar.
The Outlook Today button appears on the toolbar.

-
In the Customize dialog box, click Close.
-
On the Standard toolbar, click Outlook Today.
Outlook Today appears.
-
On the Tools menu, click Customize.
-
In the Customize dialog box, click the Toolbars tab.
-
In the Toolbars list, click Standard, and then click the Reset button.
The Standard toolbar is reset to its default state, and the Outlook Today button is removed.
-
Close the Customize dialog box.
|
| < Day Day Up > |
|
EAN: 2147483647
Pages: 116