Presenting Information in a Table
Microsoft Office Specialist To add a simple table to a document, you can use the Insert Table button on the Standard toolbar and then select the number of rows and columns you want from the grid that appears. If you want to set the size of the table along with other options, such as table formatting, you use the Insert command on the Table menu to open the Insert Table dialog box. You can also convert existing plain text into a table.
After you create a table, you can type text or numbers into cells and press the [TAB] key to move the insertion point from cell to cell. If the insertion point is positioned in the rightmost cell in the last row of the table, pressing [TAB] adds another row to the bottom of the table. In addition to the [TAB] key, you can use the arrow keys or you can simply click a cell to position the insertion point there.
You can modify a table’s structure at any time. To change the structure, you often need to select the entire table or specific rows or columns, using the following methods:
-
To select the entire table, click the Select Table button that appears above and to the left of the first cell in the table whenever you point to the table. Or on the Table menu, point to Select, and then click Table.
-
To select a column or row, point to the top border of the column or the left border of the row, and when the pointer changes to an arrow, click once.
-
To select a cell, triple-click the cell.
-
To select multiple cells, click the first cell, hold down the [SHIFT] key, and press the arrow keys to select adjacent cells in a column or row.
Tip The document must be in Print Layout view for you to use the Select Table button at the upper-left of the table or the table resize handle at the lower right of the table.
After you’ve learned the fundamentals of working with tables, you can efficiently organize large amounts and various types of information. The basic methods for manipulating tables are as follows:
-
Insert a row or column. Click anywhere in a row or column adjacent to where you want to make the insertion. Then on the Table menu, point to Insert, and click Rows Above, Rows Below, Columns to the Right, or Columns to the Left. If you select more than one row or column and use an Insert command, Word inserts that number of rows or columns in the table.
-
Delete a row or column. Click anywhere in the row or column, and on the Table menu, point to Delete, and then click Rows or Columns.
-
Size an entire table. To size a table quickly, drag the table resize handle in the lower-right corner of the table in Print Layout view.
-
Size a single column or row. Change the width of a column or row by pointing to its right or bottom border and dragging it.
-
Merge cells. Create cells that span columns by selecting the cells you want to merge and clicking Merge Cells on the Table menu. For example, to center a title in the first row of a table, you can create one merged cell that spans the table’s width.
-
Split cells. If you need to divide a merged cell into its component cells, split it by clicking Split Cells on the Table menu.
-
Move a table. Select the table, and drag it to a new location. Or use the Cut and Paste commands to move the table.
-
Sort information. Use the Sort command on the Table menu to sort the rows in ascending or descending order by the data in any column. For example, you can sort a table that has the column headings Name, Address, ZIP Code, and Phone Number on any one of those columns to arrange the information in alphabetical or numerical order.
In this exercise, you will work with three tables. First you’ll create a table, enter text, add rows, and merge cells. Then you’ll create a second table by converting existing tabbed text. Finally, you’ll sort information in a third table.
| BE SURE TO | start Word before beginning this exercise. |
| USE | the CreateTable document in the practice file folder for this topic. This practice file is located in the My Documents\Microsoft Press\Word 2003 SBS\PresentingInfo\PresentingTable folder and can also be accessed by clicking Start/All Programs/Microsoft Press/Word 2003 Step by Step. |
| OPEN | the CreateTable document. |
-
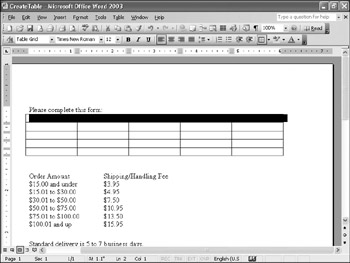
Press the key to position the insertion point in the blank line below the Please complete this form paragraph.
-
On the Table menu, point to Insert, and then click Table.
The Insert Table dialog box appears.

-
Be sure that the Number of columns box displays 5, click the Number of rows up arrow to display 5, and then click OK.
A blank table with five columns and five rows appears. The insertion point is located in the first cell.
-
In the selection area, point to the first row, and click to select the row.
-
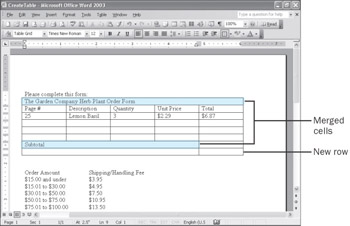
On the Table menu, click Merge Cells to combine the cells in the first row into one cell.
-
Type The Garden Company Herb Plant Order Form.
The text appears in the first row.
-
Click the first cell in the second row, type Page #, and press [TAB].
-
Type Description, and press [TAB]. Then, pressing [TAB] after each entry to move the insertion point to the next column, type Quantity ([TAB]), Unit Price ([TAB]), and Total ([TAB]).
The insertion point is now in the first column of the third row.
-
Type 25, press [TAB], and then type Lemon basil ([TAB]), 3 ([TAB]), $2.29, ([TAB]), and $6.87.
-
In the selection area, point to the fourth row, hold down the mouse button, and drag downward to select the last two rows.
-
On the Table menu, point to Insert, and then click Rows Below.
Word adds two new rows and selects them.
-
In the last row, click the first cell, hold down [SHIFT], and then press four times to select the first four cells in the row.
-
On the Table menu, click Merge Cells.
Word combines the selected cells in the last row into one cell.
-
Type Subtotal, and press [TAB] twice.
Word adds a new row to the bottom of the table. Note that the new row has the same structure as the preceding row.
-
Type Add shipping/handling fee, press [TAB] twice to add a new row, and then type Add special delivery fee.
-
Press [TAB] twice to add a new row, and then type Total.
-
Below the table, select the paragraphs that begin with Order Amount and end with $15.95.
-
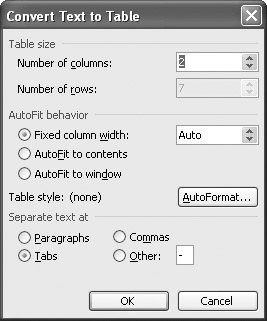
On the Table menu, point to Convert, and then click Text to Table.
The Convert Text to Table dialog box appears.
-
Make sure that the Number of columns box displays 2, and then click OK.
The selected text appears in a table with two columns and seven rows.
-
Click the table to deselect the cells, and point to the right border of the table. When the pointer changes to two opposing arrows, double-click the right border to make the right column just wide enough to hold its longest line of text.
-
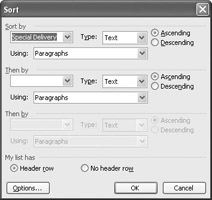
Scroll down, click anywhere in the special delivery table, and on the Table menu, click Sort.
The Sort dialog box appears.
-
Click the down arrow to the right of the Sort by box, and click Fee.
-
Select the Descending option. Then make sure the Header row option in the My list has area is selected, and click OK.
Word sorts the table in descending order based on the Fee column.
-
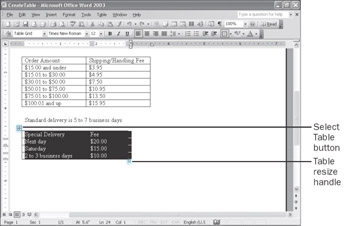
Point to the selected special delivery table.
Word displays a Select Table button and a table resize handle.
-
With the special delivery table still selected, drag the table resize handle in the lower-right corner to the right, releasing the mouse button when the right edges of the special delivery and shipping and handling fees tables are aligned.
Tip To make finer adjustments, hold down the Alt key while you drag, but be careful not to click the mouse button. [ALT]+click opens the Research task pane.

Save
-
On the Standard toolbar, click the Save button.
Word saves your changes to the document.
CLOSE the CreateTable document
EAN: 2147483647
Pages: 156