| If the features in this chapter seem a little academic, it might help to see a practical example of when and how you might use the precise visual positioning features in Photoshop. Suppose I'm going to mock up a Web page in Photoshop, and my mockup is due . . . well, as soon as possible, of course! Setting Up a Grid First I need to set up the overall structure of the page. I know I'm going to have a header, a body, and a footer. 1. | I start the document by choosing File > New. In the New dialog box I choose 800 x 600 from the Preset pop-up menu and then click OK, creating a new document that's 800 pixels wide by 600 pixels tall (Figure 8.12).
Figure 8.12. 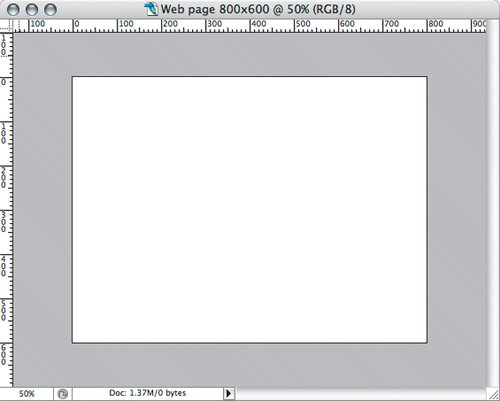
| 2. | I make sure that the View > Show > Grid command and the View > Snap to > Grid commands are enabled (Figure 8.13).
Figure 8.13. 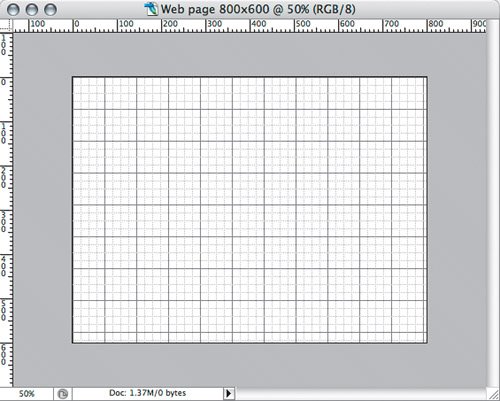
| 3. | Because this is a Web page measured in pixels, I want the grid to have appropriate spacing, so I open the Guides, Grid & Slices panel in the Preferences dialog box.
| | | 4. | In the Preferences dialog box, I set the Gridline Every option to 40 pixels (Figure 8.14). You want to specify a value that makes sense given your design; mine happens to be based on 20-pixel units, but entering 20 pixels would put too many dark gridlines on screen. You may also want to use a value that divides evenly into your canvas size; if I had set up a 1024 x 768-pixel document, I might have decided to set Gridline Every to 32 or 64 pixels. Notice that Photoshop updates the canvas as you change the grid values.
Figure 8.14. 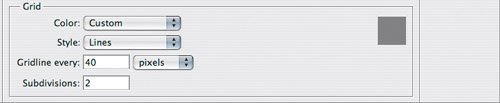
| 5. | I set Subdivisions to 2 because dividing the major 40-pixel gridlines by two gives me the 20-pixel blocks I'm using for the foundation of my design. If I were working in inches, I would set subdivisions to 4 to create quarter-inch subdivisions or 8 to create eighth-inch subdivisions, for example. I click OK, and the grid is now set up.
| 6. | I move on to adding the guides. I want the header and footer to be 80 pixels tall, so I drag a couple of guides out from the horizontal ruler and drop them at the 80 and 520 marks according to the vertical ruler. I like to monitor position using the Info palette; it updates as I drag so I always know where I am (Figure 8.15). Thanks to the snap-to-grid feature, the guides snap into place when I drag them close to a gridline.
Figure 8.15. 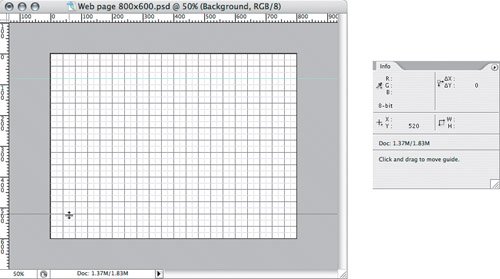
|
Adding a Header and Footer I want to add 80-pixel-tall bars across the top and bottom of the page to serve as the header and footer. Here's how I do it: 1. | I select the rectangle tool (not the rectangular marquee tool) in the Tools palette and drag it across the top of the page (Figure 8.16), watching the width (W) and height (H) readouts in the Info palette to make sure I'm drawing each of them at the size I want (800 x 80 pixels). I set its color to yellow by double-clicking the shape layer thumbnail in the Layers palette, choosing a color in the color picker, and clicking OK.
Figure 8.16. 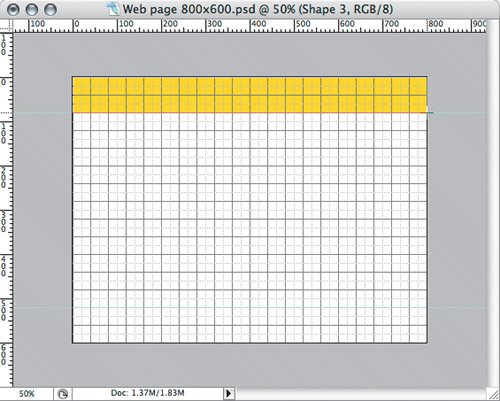
| 2. | I switch to the move tool and, with the header shape layer selected in the Layers palette, I Option/Alt-drag the header rectangle to make a copy that I move to the bottom of the page (Figure 8.17). Of course, with the snap-to-grid feature enabled, the new footer snaps precisely into place.
Figure 8.17. 
|
Adding a Navigation Bar I want to add a navigation bar with a row of buttons, just below the header. | | 1. | Using the rectangle tool again (this time by pressing its keyboard shortcut, the U key), I drag it just below the header rectangle and make it one minor gridline deep (20 pixels) (Figure 8.18). I edit the shape's yellow color by double-clicking the shape layer thumbnail in the Layers palette.
Figure 8.18. 
| | | 2. | I select the horizontal type tool in the Tools palette and then click near the near the left edge of the yellow header. I type Store and press Enter (not Return) to apply the text. With the text layer selected in the Layers palette, I use the options bar to set the font, size, and paragraph alignment (to Left Align Text). I switch to the move tool and press the arrow keys to nudge the type into place.
| 3. | Now I want to mock up the buttons on the navigation bar. I press T as a shortcut to switch back to the horizontal type tool, and in an empty area of the page, I drag a rectangle 80 pixels wide by 20 pixels tall according to the Info palette. The snap-to grid feature makes this go quickly because the dimensions fall on the grid. I type the button text (Figure 8.19) and press Enter.
Figure 8.19. 
| 4. | With the text layer selected in the Layers palette, I use the options bar to set the font, size, and paragraph alignment (to Center Text). Then I use the Character palette (Window > Character) to lower the Baseline Shift value so that the text is vertically centered in its text layer (Figure 8.20). I select the move tool, and then I drag and nudge the text into place on the navigation bar.
Figure 8.20. 
| | | 5. | I want to add the other navigation bar buttons. At this point there are several equally good ways I can maintain precision visually, without numbers or calculations:
Using the move tool, I could Option+drag/Alt+drag the first text layer to the right and let the snap-to grid keep it aligned. If I didn't want grid snap to be enabled, I could still use the move tool to Option+Shift+drag/Alt+Shift+drag the first text layer to the right to copy it (Figure 8.21) and then edit the content of the new text layer. The Option key copies, and the Shift key keeps the copy aligned with the original. Figure 8.21.  I could work without the grid but make sure that View > Show > Smart Guides is enabled. Then, using the move tool, I could Option+drag/Alt+drag the first text layer to the right and use the Smart Guides to keep the copy lined up with the original. If View > Snap to > Layers is enabled, it's easy to Option+drag/Alt+drag aligned copies without having to press Shift (Figure 8.22). Figure 8.22.  Using the move tool, I could Option+drag/Alt+drag the first text layer to the right and not worry about perfect alignment right now (Figure 8.23). Later, I'd select the text layers and use the Align and Distribute buttons on the options bar to align the text layers and space them evenly (Figure 8.24). Figure 8.23.  Figure 8.24. 
|
The method you choose may depend on how many layers you're positioning. With just a few layers, it's easy enough to drag with modifier keys to copy (Option/Alt) and keep aligned (Shift). With many layers, it's typically less work to lay them out approximately and then use the Align and Distribute buttons or commands to fix everything in one swift move.  | Because the Option/Alt key creates a copy when applying a transformation to a layer (such as moving it), you can also use the Option/Alt key to copy when you're entering a numeric value. Select a layer, choose Edit > Free Transform, type a new horizontal or vertical position into the options bar, and press Option+Return/Option+Enter. In the navigation bar example, entering a new horizontal position and pressing Option+Return/Option+Enter copies the text layer and moves it horizontally, while maintaining its vertical position so that it's still aligned with the original. Nudging with the arrow keys is an easy way to make small, precise position adjustments. With the move tool selected, pressing the Up Arrow and Down Arrow keys moves a layer vertically one pixel, and the left and right keys move a layer horizontally. Don't forget to combine nudge keys with modifiersadding Shift amplifies the nudge to 10 pixels instead of just one, and adding Option/Alt copies the selected layer. |
|