Create Your Own Home Page
With .Mac you can create your own home page, using the many templates available on the .Mac web site. There are page templates for site menus, photo albums, movies, r sum s, file sharing, and more. To create a home page, click the HomePage link on the main .Mac page.
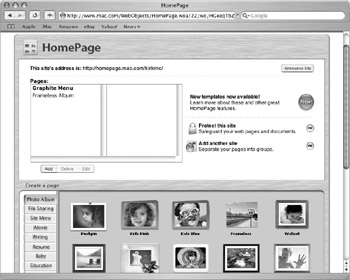
To add a page to your site, click the Add button beneath the list of pages. This takes you to a page where you can select what type of page to add: click the tabs at the left of this page, and then click one of the pages to add it. For example, if you want to add a r sum , click the Resume tab and you’ll see a page like the following.
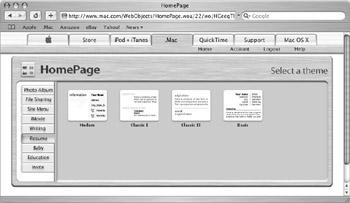
Click one of the r sum templates, and then click Edit. The r sum displays as a series of fields with preset headers. You can enter personal information in the fields to fill in your r sum .
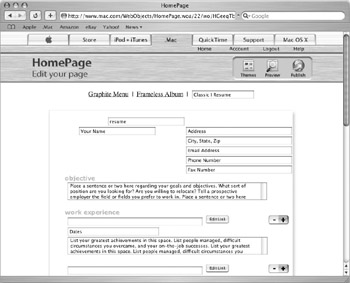
When you’ve finished, click the Publish button at the top of the page, or click Preview to see what it looks like (and proofread it) before publishing. The next page tells you that your page has been published, shows you its URL (web page address), and offers to send iCards to your family and friends to announce it.
Share Files on the Web
While it’s beyond the scope of this book to talk about all the pages available from .Mac’s HomePage, there is one type of page that’s very useful: File Sharing. This is a special page designed to provide links to files you want to share with others. The links on this page correspond to the files in your iDisk’s Public folder; so to share files with other users, whether they have a .Mac account or not—even with Windows users—you can use this page.
First, put some files to share in your iDisk’s Public folder. Earlier in this chapter, I explained that you can set up a local copy of your iDisk. If you have done this, just click the iDisk icon in a Finder window sidebar and copy files into the Public folder you see in this window. If you don’t have a local copy of your iDisk, select Go | iDisk | My iDisk to mount your iDisk on the Desktop. Double-click its icon, and then double-click the Public folder to open it.
In either case, copying files to your Public folder may take awhile, depending on the speed of your Internet connection and the size of the files. If you have a local copy of your iDisk you’ll see the progress of the synchronization at the bottom of the Finder window. (If you have your iDisk set to manual synchronization, click the rotating arrow icon next to the iDisk icon in the Finder window sidebar to start synchronization.) If you copy to an iDisk mounted on the Desktop, you’ll see a standard Finder copy dialog showing you the progress of the copy.
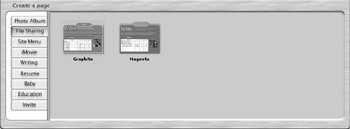
To create a File Sharing page, go to HomePage as described previously in the “Create Your Own Home Page” section. Click the Add button, and then click the File Sharing tab to see the File Sharing page templates. As of press time, there are only two—Graphite and Magenta—but it is possible that there will be more at a later date. Click one of these pages to select it.
Click Edit to edit some of the text on this page. You can change the header of the page, in the tab at the top of the folder-like graphic, and add text describing its contents. When you’ve made your changes, click the Publish icon at the top of the page to publish it. When you’ve done so, you’ll see the URL for the page; you can send this to others so they can access your files.
When someone goes to your page, they’ll see something like this:
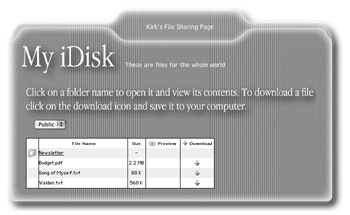
In this example, you can see that there is one folder, Newsletter, and three individual files. To download any of the individual files, just click the arrow icons in the Download column. To view the contents of the folder (which was uploaded as a folder to the Public folder), click the underlined link next to the folder icon. This displays download links for each of the items in the folder.
Create a Site Menu Page
If you have several pages on your site, it’s a good idea to create a Site Menu page. You can select one of the available Site Menu pages by clicking the Add button and the Site Menu tab. When you add a Site Menu page, it contains links to all the other pages in your site. When people come to your site, at its http://homepage.mac.com/your_user_name URL, they’ll see this Site Menu page and be able to enter any of your other pages by clicking these links.
| Note | I’ll tell you how to create a photo album page in Chapter 17, which looks at iPhoto. This function is integrated into iPhoto, so you can set up a photo album page on your .Mac web site with just a few clicks. |
Create Additional Sites
You are not limited to just one site with .Mac. You can create additional sites, which are actually subfolders within your main site. From the HomePage page, click the arrow icon next to Add Another Site.
![]()
This creates a new subfolder inside your web site. For example, your initial web site’s address is http://homepage.mac.com/your_user_name. If you create another site in this manner, its URL is http://homepage.mac.com/your_user_name/site_name. You can add pages to this site, as explained earlier, or password-protect this site to prevent unauthorized people from accessing it. To apply a password, just turn on password protection when you create the site, and enter a password in the Password field.
EAN: 2147483647
Pages: 171