Get Started with iPhoto
To start working with iPhoto, have your digital camera handy, with a few pictures in its memory, and open iPhoto by clicking its icon in the Dock or by double-clicking its icon in your Applications folder.

When you first open iPhoto, you’ll see a screen asking how you want to work with your digital camera. In most cases, clicking the Use iPhoto button is the best way to go; this means that when you plug your digital camera into your Mac, iPhoto opens immediately. If you want to use another program to import your pictures, click Use Other, and select the program you want to use. You can also click Decide Later to choose which program activates at a later time.
| Tip | If you choose now which application opens, you can always change it later, but you can’t change this setting from iPhoto. You’ll need to open Image Capture (located in your Applications folder), select Image Capture | Preferences, and click the Camera tab. Select an application from the pop-up menu on that tab. I’ll tell you more about Image Capture later in this chapter. |
When iPhoto first opens, it displays an empty window.
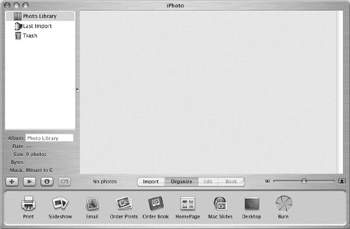
The left-hand column is the photo library list, showing your Photo Library, your Last Import, iPhoto’s Trash, and any photo albums you’ve created (see later in this chapter). Below this is information about the selected album, and below that are some buttons for working with your albums and photos.
The bottom row of icons shows many actions you can use iPhoto for: printing, creating a slideshow, mailing pictures, creating a web page with your photos, and more.
To work with iPhoto, you need to have some pictures in your Photo Library. You do this by plugging your digital camera into your Mac and turning the camera on. iPhoto detects when you have a camera connected, and either opens (if it is not active) or prepares to import its photos. Its window switches to the Import tab, and it shows the type of camera you have and how many photos it contains.
![]()
To import your photos, click the Import button. This copies all the pictures from your camera to your iPhoto library. If you want iPhoto to delete these pictures after importing, check Erase Camera Contents after Transfer.
| Tip | It’s a good idea to not delete your pictures until you’re sure that iPhoto imported them correctly. You can’t get them back if iPhoto deletes them. |
Apple calls the Macintosh a digital hub, and it is certainly the case when it comes to digital photography. In the old days, when working with film, photography was not only tedious work, trying to guess what exposure was best, but it was also sloppy, with smelly chemicals and many hours spent in the darkroom making prints. Photographers spent less time creating wonderful photos and more time playing with a chemistry set.
Today, I can just grab my digital camera when I see a beautiful sunset, landscape, or Aurora Borealis, take many photos, and experiment with different settings. I never have to worry about wasting “film,” and I can instantly check the images in the camera and decide if I want to use another angle or try different exposure settings. No more guessing games and no need to wait for the film to be developed.
When I get back home to my Mac, I load my photos and edit them quickly in an image editor and then print them out on my inkjet printer within minutes. Digital cameras have become so good that I can make stunning 8 10 prints without people knowing they were taken with a digital camera. It's instant gratification!
The initial cost of a digital camera might be high, but in the end it will pay off since you don't have to pay for film. I can use my memory card over and over and take thousands of photos for no additional cost. And the best part is this: my Mac is my darkroom and I can sit comfortably by my desk and create wonderful images and concentrate on being creative.
Petra Hall got her first camera at age 8, and discovered digital photography three years ago. Petra has been using Macs for 18 years in her work in the graphics industry. She now works at a regional newspaper in northern Sweden, and is also a freelance web designer (www.bazazz.com).
As the import progresses, you’ll see thumbnails of your photos and a progress bar showing the status of the import. Depending on how many photos you have in your camera, and their resolution, this may take a few minutes.
| Tip | Most digital cameras have limited memory, but you can buy additional memory cards for them. If you do so, you can change cards after they’re full if you’re away from your computer, such as when you’re on vacation. Also, if you plan to take a lot of digital pictures, you’ll find that buying a special memory card reader makes it much faster to import photos. With a card reader, you insert the card that mounts on your Mac’s Desktop like an external disk, copy them to your computer, and then drag them into your iPhoto Library or into an album you’ve created in iPhoto (see the next section, “Create Photo Albums,” for more on creating albums). |
When iPhoto has finished importing your photos, it switches to the Organize tab and displays your photos at thumbnail size.
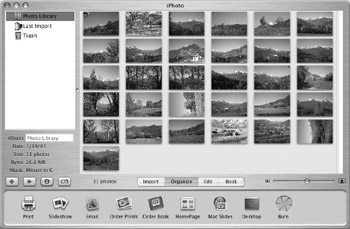
You can change this size by moving the slider:
![]()
To view any of these photos full-size, double-click one of them. This switches to the Edit tab and displays the photo as large as possible in the iPhoto window. You can increase the size of the iPhoto window by dragging the resize box at the bottom-right corner of the window, or by clicking the green Resize button at the top-left of the window. If you click the Resize button, the window enlarges to its maximum size. Click it again to return it to its previous size.
EAN: 2147483647
Pages: 171