Creating a New Blank Form
To create a new InfoPath form, select File | Design a Form to open the Design a Form view in the Task Pane, as shown in Figure 4-2.
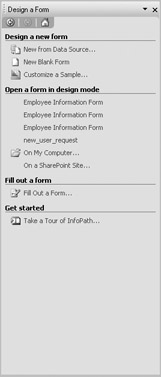
Figure 4-2: Design a Form view of the Task Pane
In this chapter, you are concentrating on basic form-building skills, so select the option for New Blank Form, which opens a blank form within the InfoPath designer, as shown in Figure 4-3.
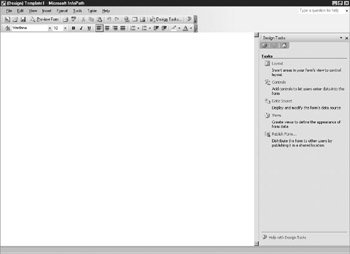
Figure 4-3: A new blank form
This method of creating a form does not rely on an underlying data source— you are actually going to build the required fields and structure for the data entered as you go along.
| Tip | If you are planning to build forms to populate data into a database (Access, SQL Server, and so on) from an existing XML file or schema or through a web service, don’t worry—both of these methods are covered in Chapter 5. |
Working with the InfoPath Designer
If you have ever worked with a WYSIWYG web development tool, the InfoPath designer will seem familiar. When working with a form, you can type directly on the form and add text, controls, pictures, horizontal lines, tables, and more. In addition to these features, InfoPath also makes extensive use of layout tables to organize content and control the positioning of objects on your form. Even if you don’t have any experience working with other web development tools, you should be able to create forms quickly and easily with the skills you’ll pick up in the following sections.
Adding Text to Your Form
To add text to your form, you can simply type the text directly onto your form, as shown here.

For your example form, you need to add a title for the form; for purposes of this example, call it Employee Information Form. InfoPath will automatically wrap the text that you enter, or you can press ENTER to move to the next line. You can use all the standard Windows shortcuts (Cut, Copy, Paste, and so forth) within InfoPath, and you can use the Find and Replace functionality to quickly replace text within your form.
Formatting Text
To format text on your InfoPath form, you can use the Formatting toolbar shown in the following illustration to select the formatting attributes you would like to apply to your text.
![]()
In addition to the options on the toolbar, you can also highlight a selection of text, right-click your selection, and select the Font option. This opens the Font pane on the right side of the window, allowing you to select the font name, size, color, and so on for the text you have entered.
In your example form, highlight the title and make the font Arial at a size of 18 points so that your form looks something like the form shown in Figure 4-4.
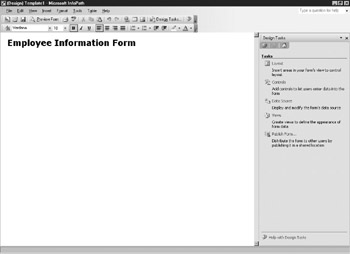
Figure 4-4: The example form with the formatted title
Adding Controls to Your Form
The majority of the content of your form is going to be taken up with fields that will be used for data entry, similar to the finished form shown in Figure 4-5. In this section, you are going to discover how to add these fields to your form and work with them.
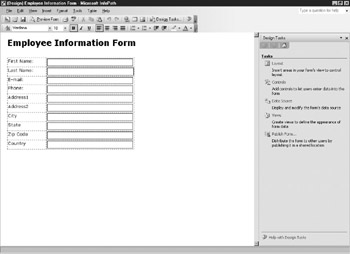
Figure 4-5: The finished form
The form shown in Figure 4-7 has a number of fields that have been added to capture information about the employee, including the employee’s name, address, and so forth. The majority of this information is entered using a simple text box, but you can develop InfoPath forms that use several of different types of fields. In InfoPath, these fields are called controls.
| Tip | This chapter looks at only a few basic types of controls. More advanced techniques for working with controls are presented in Chapter 7. |
To add controls to a form, select Insert | More Controls to open the Controls view of the Task Pane, shown in Figure 4-6.

Figure 4-6: Controls view of the Task Pane
To insert a control onto your form, simply click within your document where you would like to place the control and then click the name of the control in the list that appears in the Task Pane. Alternately, you could also drag a control from the list and drop it into position on your form.
| Tip | If you want to add some extra space in between fields, use the ENTER key to move down a line. |
Because you are creating an example form to capture employee details, you want to add controls (or fields) to capture the employee’s first name, last name, address, and other information. But before you get into that, you need to look at the design of your form. If you were to start typing labels for all the fields that you want to use and then adding the controls to your form in “free-form” fashion, it wouldn’t look very organized, as shown in Figure 4-7.

Figure 4-7: A form created with “free-form” placement
Fortunately, InfoPath enables you to use some of the same tricks that are available in web development tools to help you organize your form layout. Most InfoPath forms use a feature called a layout table to help organize headings, controls, and so on, and to give the forms a more uniform, well-spaced layout. A layout table is an invisible table within your form that is used to position objects within the form, as shown in Figure 4-8.
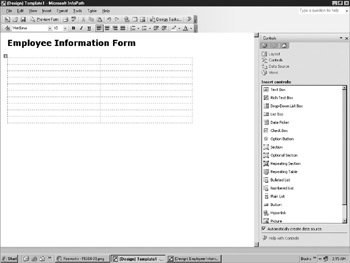
Figure 4-8: An example of a layout table
You’ll actually take an in-depth look at working with tables in Chapter 8, but for now you are going to insert a simple layout table to keep your first form looking good. To insert a layout table, select Insert | Layout Table to open the dialog box shown here.
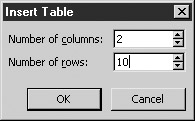
Since you are going to create a form that has ten fields of data to enter, create a table that has two columns and ten rows. One of the columns will be for the field label and the other column will be for the field object itself. Once you have created a layout table, you can then start entering the text labels in the first column and place text box objects in the second column. You should add the following labels and corresponding text boxes:
-
First Name
-
Last Name
-
Address1
-
Address2
-
City
-
State
-
ZIP Code
-
Country
Working with Control Properties
Now that you have added all the labels and text box controls to your form, you need to look at how to work with these objects. You may have noticed that as you added text boxes to your form, InfoPath automatically numbered and named these boxes (such as field1, field2). If you were to leave these fields with their current naming convention, these names would be used to describe the data that was entered on the form. Clearly, you need to change these names to reflect the data that is being entered. To change the name and set other field properties, right-click a field directly and select Text Box Properties to open the dialog box shown in Figure 4-9.
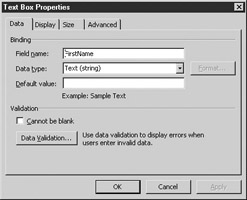
Figure 4-9: Text Box Properties dialog box
When working with text boxes or other objects, you can enter a field name and select the data type and any default values for the field. The field name itself should be something descriptive (for example, first_name) and should not include spaces or special characters. You can use the Data Type drop-down list shown in Figure 4-9 to select a data type for your field; for your example form, you are going to select Text for all of your text boxes.
| Tip | If you are interested in learning about the other types of fields and how they are used, flip ahead to Chapter 7. |
You can also enter in the Default Value text box a default value that will appear in the field when the form is filled out. You can use the check box at the bottom of the dialog box to require this field to be completed.
You could use this method to rename and set the options for all of your fields, but there is also an easier method that you can use to quickly change multiple fields. To see the fields that you have created when creating your form, select View | Data Source to open the Data Source view of the Task Pane, shown in Figure 4-10.
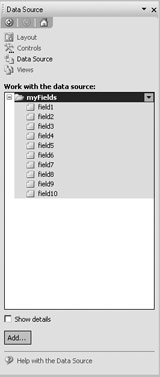
Figure 4-10: Data Source view of the Task Pane
You can use the Data Source view to quickly select and rename fields that appear on your form. By default, these fields have been placed into a group called myFields, so you probably want to rename the group as well to something more descriptive (for instance, Employee_Information). When you are finished updating your fields, the Data Sources view should look something like Figure 4-11.
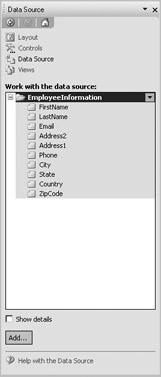
Figure 4-11: Updated Data Source view for your example form
Now when a user saves or exports the form data, it will be labeled correctly and the fields can be mapped to other database formats or systems for import. With the basic form design out of the way, you need to look at how to preview your form.
| Tip | You can also validate information that is entered into forms, which is covered in Chapter 9. |
EAN: 2147483647
Pages: 142