Customizing Toolbars
| As you learned in Chapter 1, "Getting Started," toolbars are collections of buttons that act as shortcuts to execute a command on a menu. Instead of opening a menu and clicking a command, you can click a toolbar button, reducing the steps needed to select a command to one mouse click. For example, to apply boldface to an entry in a spreadsheet, you can open the Format menu, click the Selection Properties command and, in the dialog box that appears, click the Bold check box. Or, you can take the quick and easy wayclick the Bold toolbar button (the one with the B on it) on the Property Bar toolbar. When you open Quattro Pro, you see two toolbars: the Notebook toolbar and the Property Bar toolbar. But Quattro Pro actually contains 14 toolbars. In this section, I'll show you how to display or hide any toolbar, change the appearance of any toolbar, and add and remove buttons from toolbars. Last, we'll create a new toolbar. Hiding and Showing ToolbarsAlthough you see only two toolbars when you open Quattro Prothe Notebook toolbar and the Property Bar toolbaryou can easily display any of the other 12 toolbars, or you can hide the Notebook toolbar or the Property Bar toolbar. You can display any toolbar by right-clicking the area where the toolbars appear. A shortcut menu appears (see Figure 15.1). Click any toolbar that doesn't have a check beside its name; Quattro Pro displays the toolbar onscreen. For example, in Figure 15.2, I displayed the Auditing toolbar, which contains buttons that help you trace precedents and dependents (see Chapter 14, "More Data Analysis," for details on auditing spreadsheets). Figure 15.1. Right-click in the toolbar area to select a toolbar to display or hide.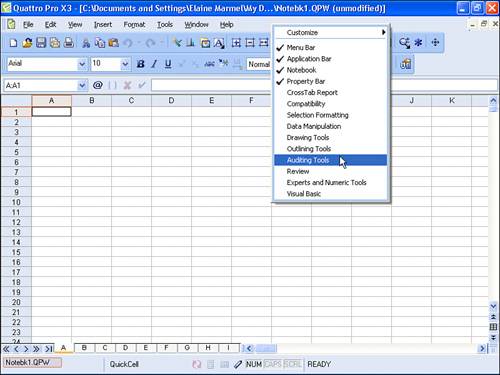 Figure 15.2. Any toolbar appearing onscreen has a check beside its name.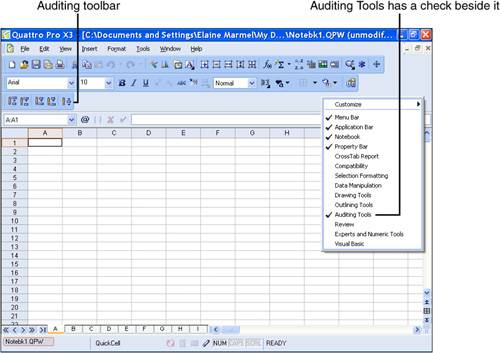 Any toolbar that appears onscreen has a check beside its name on the shortcut menu; to hide that toolbar, click it on the shortcut menu. You should be aware that nothing stops you from hiding the Main Menu bar, the Application bar, the Notebook toolbar and the Property Bar toolbar. When you hide all these elements, you have no place to right-click to display the shortcut menu. And, you can't get to any of Quattro Pro's commands. Tip
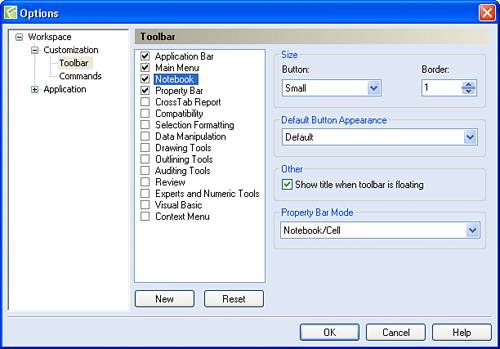
If you find yourself in this jam, right-click the program's title bar and select Settings. In the Options dialog box that appears, click the plus sign (+) beside Customization. Then, click Toolbar. You'll see a list of all available toolbars and check boxes beside their names. Place a check beside each element you want to display. You'll see the Options dialog box in the next section.
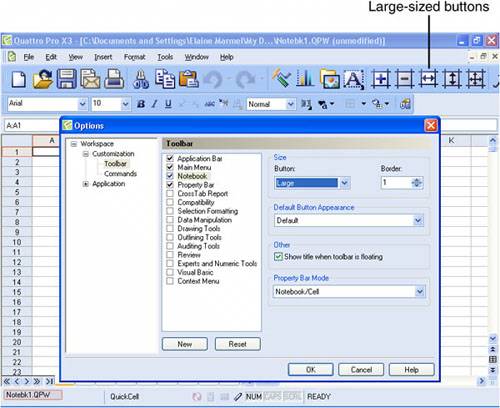
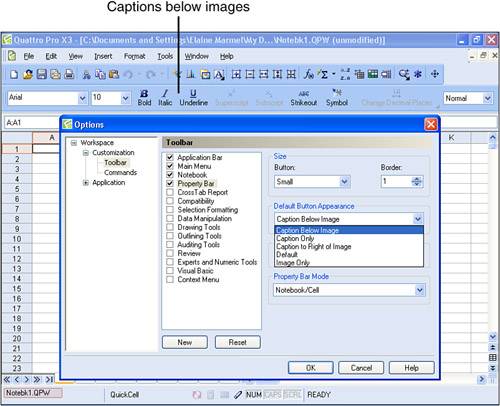
Changing the Appearance of a ToolbarThe default toolbars contain buttons, and you can determine each button's function from the QuickTip that appears if you rest the mouse pointer over a button. But suppose that you're not into pictures on buttons; in fact, your fondest wish is that the function of the button would appear on the button instead of some picture that you're supposed to recognize but don't. Or, suppose that you like the buttons with the pictures on them, but they're just too small for your taste. You can change the appearance of toolbar buttons by following these steps:
Tip
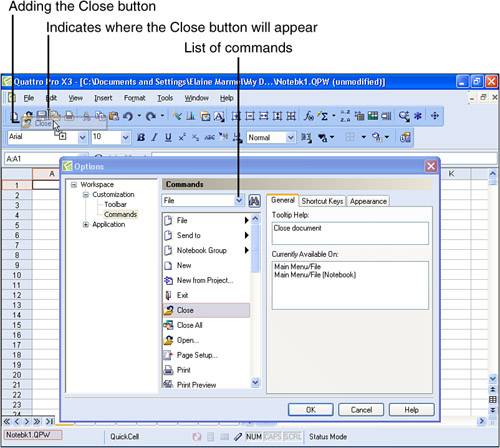
Adding or Removing Toolbar ButtonsIt's possible that you'll find yourself using a particular command on a menu regularly; you may find it more convenient to create a toolbar button for that command. Suppose, for example, that you'd like to add a button to the Notebook toolbar that closes a notebook. That way, when you want to close a notebook, you won't need to open the File menu and click Close; instead, you'll just click a toolbar button. Tip
To add a button to a toolbar, follow these steps:
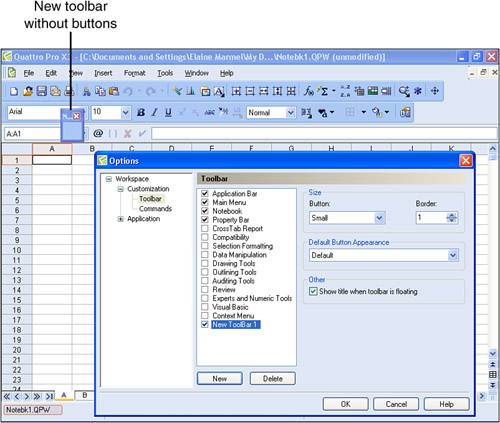
Creating Your Own ToolbarSuppose that you use some buttons on the Notebook toolbar, some buttons on the Property Bar toolbar, and some commands not found on either toolbar. Suppose, further, that you'd really like to group all the commands you use regularly on one toolbar and then hide all the others. You can create your own toolbar using these steps:
Tip
|


EAN: 2147483647
Pages: 128