Working with Windows
| The term window refers to some portion of your screen. Open programs appear in windows and files open in those programs also appear in windows. Windows can be different sizes. When a window occupies all the space available on your screen, the window is maximized. When you can see only the title bar of a window, that window is minimized. And, as you'd expect, you can size a window somewhere between the maximum and minimum size; you can easily identify a window that is somewhere between maximum and minimum size because that window has its own title bar. In this section, I'll show you how to control the size of the Quattro Pro window and the notebook file window. What Size Is the Window?Compare Figure 2.1, Figure 2.2, and Figure 2.3. In Figure 2.1 and Figure 2.2, Quattro Pro fills the entire screen, and we say that Quattro Pro is maximized. But in Figure 2.3, Quattro Pro does not fill the entire screen, and you can see the background of my Windows XP desktop behind Quattro Pro. Figure 2.1. Both Quattro Pro and the open notebook are maximized.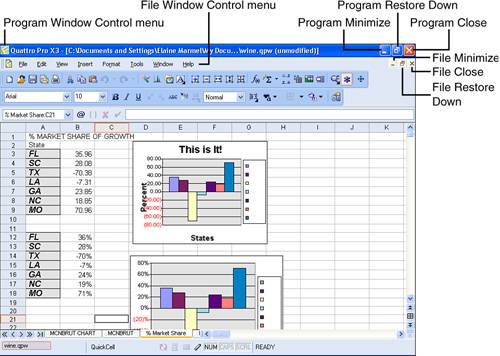 Figure 2.2. Quattro Pro is maximized, but the open notebook is not maximized.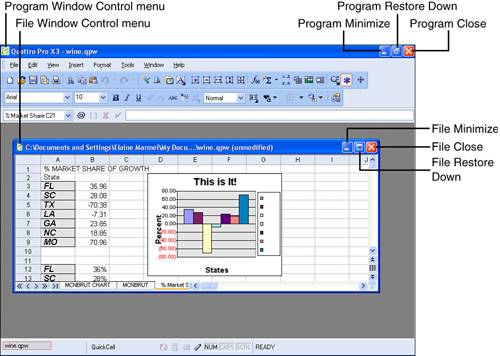 Figure 2.3. The open notebook is maximized, but Quattro Pro is not.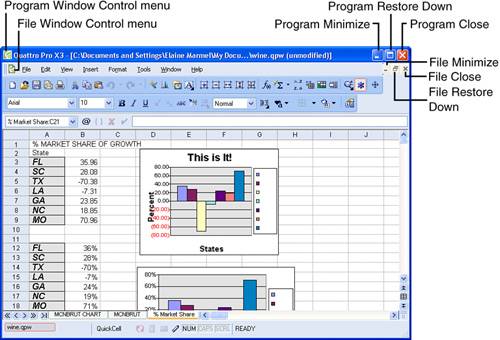 Every window has its own set of window control buttons. For program windows, the buttons appear on the right edge of the program's title bar, and you have access to menu commands that perform the functions of these buttons if you click the Window Control Menu button, the leftmost button on the program title bar. Finding the window control buttons for open files can be a little trickier. If a file is maximized within a program window like the file shown in Figure 2.1 and Figure 2.3, the file control buttons appear immediately below the window control buttons, on both the right and left sides of the file window. If the file is not maximized within a program window, like the file shown in Figure 2.2, the file has its own title bar and its window control buttons appear on either end of the file's title bar. You may also have noticed that some windows have a Maximize button and others have a Restore button in the same spot as the Maximize button. The button that appears depends on the whether the window is already maximized. If the window is maximized, you see a Restore Down buttonthe button that has two small squares in it (the squares are intended to represent a window, by the way). You use the Restore Down button to reduce the size of the window from its maximum to some smaller size. If, however, the window is not maximized, you see a Maximize buttonthe button that only one square on itin the same location where the Restore button appears. You use the Maximize button to enlarge the window so that it fills all available space. Minimizing, Maximizing, or Restoring a WindowYou can minimize any window. When you minimize a program, an icon for the program appears in the Windows taskbar; in Figure 2.4, I minimized Quattro Pro by clicking the Minimize button on the Quattro Pro title bar, and you can see the Windows XP desktop. Figure 2.4. When you minimize a program, an icon for it appears in the Windows taskbar.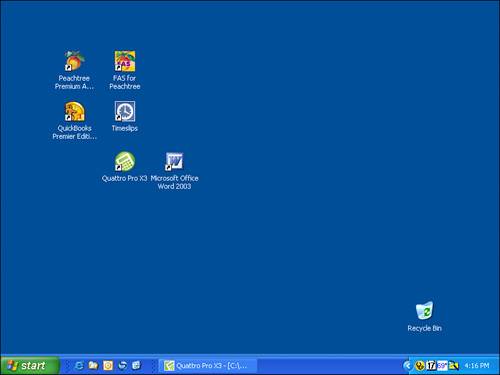 To redisplay any minimized program, click the icon in the Windows taskbar; the program reappears in whatever size it was before you minimized it. You also can minimize a file within a program window; when you minimize a file within a program window, you see only the file's title bar in the program window (see Figure 2.5). Figure 2.5. When you minimize a file in a program window, you see only the file's title bar.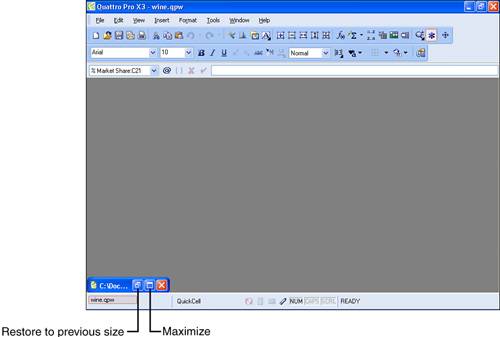 To minimize a file, you click the file's Minimize button. After you minimize a file, you can restore it to the window size it had before you minimized by clicking its Restore button. Or, you can maximize the file by clicking its Maximize button. Tip
Resizing a WindowYou've seen how to minimize or maximize a window, but I haven't yet shown you how you can set the size of a window somewhere between its minimum and its maximum. To set the size of a window, display that window and then click its Restore Down button to reduce it to a size that doesn't fill the Quattro Pro window; at this point, the Restore Down button changes to the Maximize button. You can now change the size of the window by dragging any edge of the window. To enlarge the window, drag outward, and to reduce the size of the window, drag inward. When you place the mouse pointer over any edge of the window, the shape of the mouse pointer becomes a double-headed arrow. If you want to change both the horizontal and the vertical size of the window simultaneously, drag any corner of the window, as you see in Figure 2.6. Figure 2.6. To resize any window, drag any side of the window.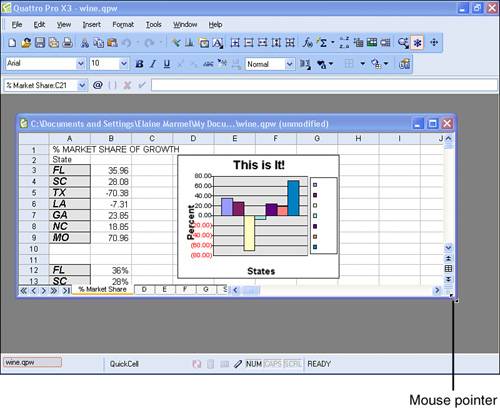 Arranging WindowsYou'll need to arrange windows when you open two or more notebooks in Quattro Pro simultaneously or when you create multiple views of a single notebook. See the next section, "Exploring Views," for more information on views. When you work with multiple notebooks or views, you can minimize one window to see another or you can tile or cascade the windows so that you can switch between files by clicking the title bar of the file you want to bring to the forefront. To arrange windows, start by opening all the files you want to view or create the views you want to use. Then, open the Window menu and click Cascade to create the arrangement you see in Figure 2.7. Figure 2.7. These windows are cascaded.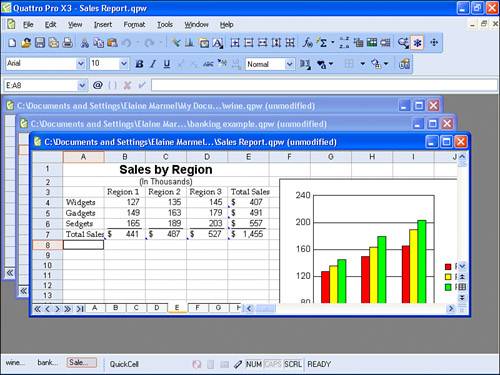 You can view any of these windows by clicking their title bars. If you open the Window menu and click Tile Top to Bottom, you can create the arrangement shown in Figure 2.8. To work in any of these windows, click its title bar; the information shown in the Input Line reflects the selected cell in the active notebook. The active notebook is the one whose title bar you clicked. Figure 2.8. Quattro Pro will arrange the windows in this type of configuration if you choose the Tile Top to Bottom command from the Window menu.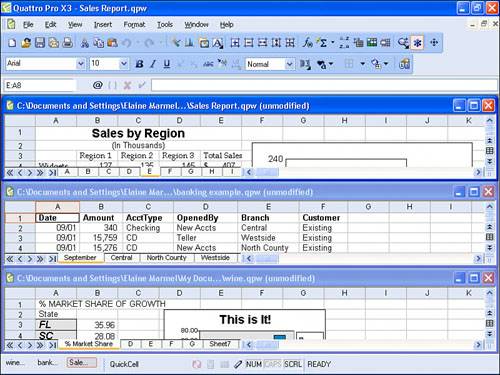 You also can tile windows across the screen by opening the Window menu and clicking Tile Side to Side (see Figure 2.9). Figure 2.9. In this arrangement, Quattro Pro displays the windows from side to side.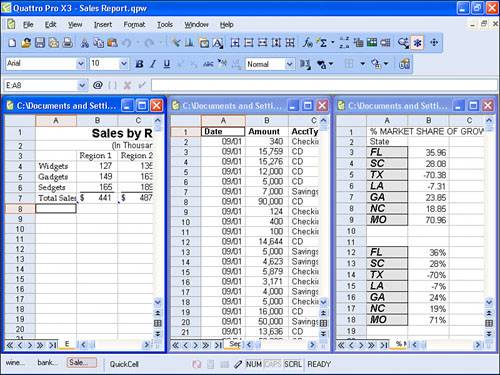 Although you can tile as many windows onscreen as you want, the law of diminishing returns kicks in when you try to display more than just a few windows. Although all the files will be open and visible, you'll have a hard time seeing the data in the files. You may prefer to open all of the views and then switch between maximized views of each window by opening the Window menu and clicking the name of the notebook you want to view (see Figure 2.10). Figure 2.10. You can easily switch between open notebooks and views using the Window menu.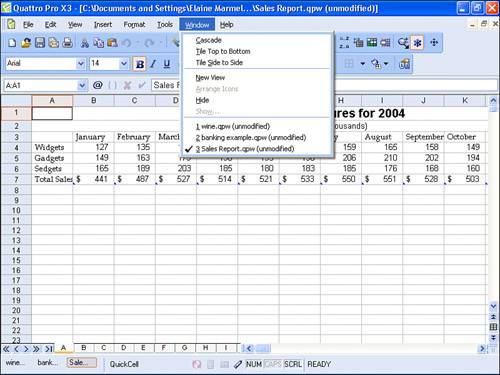 |

EAN: 2147483647
Pages: 128