Section 23.2. Adding Comments
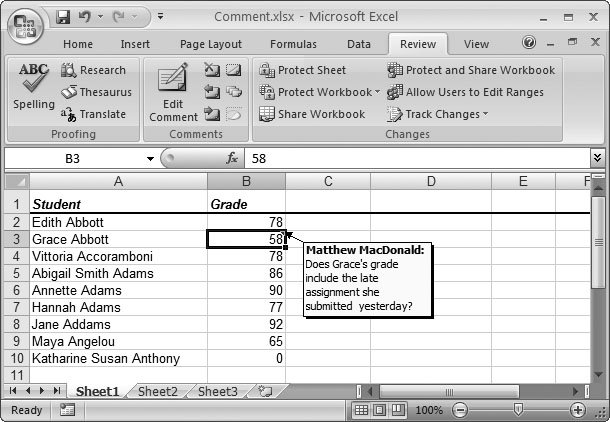
23.2. Adding CommentsComments are the simplest of Excel's collaboration features. Excel displays comments in a floating yellow box that points to a single cell (as shown in Figure 23-6). Place whatever descriptive text you want inside the comment box. For example, you can use comments to flag an error, raise a question, make a suggestion, or praise a particularly brilliant formula.
The beauty of comments is that you're free to include as much information as you want without modifying the worksheet data. For that reason, comments work perfectly when you're sending a workbook out for review. An employee can send an expense report to a manager, and the manager can add feedback using comments without altering the original information. Once the manager sends the workbook back, the employee can then decide whether to heed the comments and make some changes, keep the comments for later consideration, or just remove them altogether. 23.2.1. Inserting a CommentEvery workbook can include thousands of comments. The only limitation is that each individual cell can have only one attached comment. To create a new comment, just follow these steps:
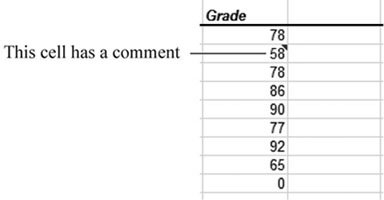
23.2.2. Showing and Hiding CommentsOrdinarily, comments appear when you hover over the commented cell with the mouse. When you move somewhere else, they politely disappear from view (although Excel still gives you a clue which cells have comments, as shown in Figure 23-7). This behavior makes sense if you're dealing with a lot of comments from multiple reviewers. Otherwise, you'd see so many comments that they'd obscure each otheror even important worksheet data.
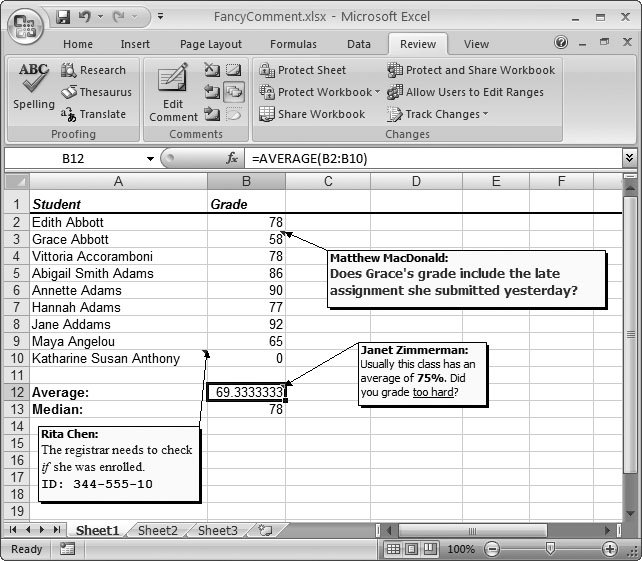
Sometimes, though, you want to make sure a comment is clearly visible and that no one will overlook it. In that case, you can set a comment so that it's always visible, no matter where your mouse is. To do this, move to the cell that has the comment, and then choose Review Tip: You can use the Review  Comments Show All Comments command to display every comment in your worksheet at once. Comments always appear wherever they were last situated. Comments Show All Comments command to display every comment in your worksheet at once. Comments always appear wherever they were last situated. 23.2.3. Fine-Tuning Comments Once you've created a comment, you can manipulate it the same way that you can manipulate other floating objects like charts and graphics. To start off, move to the cell that has the comment. Then, choose Review
Tip: To delete multiple comments at once, select all the cells that have the attached comments, and select Review Comments Delete. | ||||||
|
23.2.4. Reviewing Comments
If it's your job to review everyone else's comments (and, say, make the requested changes), you'll be interested in Excel's buttons for comment navigation . These buttons let you move through all the comments in a worksheet, one at a time. Best of all, this feature doesn't force you to unhide any comments. Instead, you can deal with them one at a time, which keeps your screen clutter-free and your sanity intact.
To move through your comments, start at the first cell of your worksheet (A1), and choose Review Comments Next. Excel scans the worksheet starting from the current cell, and then moves to the right, one cell at a time. If Excel doesnt find any comments in the current row, it scans the next row from left to right, starting in the first column. When Excel finds a comment, it stops the search and selects that comment. If the comment was hidden, it now appears on your worksheet.
To keep moving through the worksheet, click Review Comments Next again (or use Review Comments Previous to move backward). As you move on, comments that were previously hidden are concealed once more.
23.2.5. Printing Comments
Excel's standard behavior is to ignore all comments when it prints a worksheet. Your printed document won't show the comment text or even indicate that a cell has a comment.
If you'd like a printed record of your comments, Excel gives you two options:
-
You can print the visible comments on your worksheet . In this case, Excel draws the graphical comment boxes in the printout exactly as they appear, potentially obscuring other worksheet information. Hidden comments don't show up.
-
You can print all the comments on a separate page . In this case, Excel creates a list of comments. Each entry in the list indicates the cell reference, and the comment text.
To change the option you're using, follow these steps:
-
Head to the Page Layout
Sheet Options section, and then click the dialog box chooser (the small square with an arrow in it) at the bottom-right corner . The Page Setup dialog box appears, with the Sheet tab displayed.
-
Make a selection from the Comments list box .
You can choose "None" (the default), "At end of sheet" (which creates a separate comment page), or "As displayed on sheet" (which shows the graphical comment boxes). Figure 23-9 compares your options.

Figure 23-9. Here are two different ways to print comments in Excel. The top example shows the result of the "As displayed on sheet" option, which prints only the currently visible comments and may obscure worksheet data. The bottom example shows the result of the "At end of sheet" option, which prints a separate comment page that's useful for at-a-glance review.
Note: Excel doesn't let you print just the comment page. If you choose "At end of sheet", you must print the comments page and the worksheet data.
-
Click OK .
Excel stores your comment options for this worksheet. You can now use the Office button
Print command to send your data to the printer.