Section 3.1. Datasheet Customization
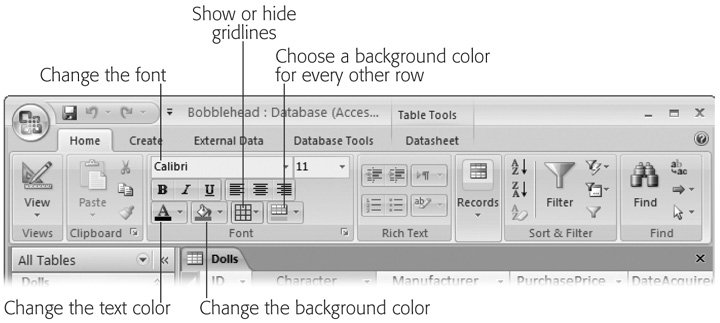
3.1. Datasheet CustomizationGetting tired of the drab datasheet, with its boring stretch of columns and plain text? You can do something about it. Access lets you tweak the datasheet's appearance and organization to make it more practical (or suit it to your peculiar sense of style). Some of these customizationslike modifying the datasheet fontare shameless frills. Other options, like hiding or freezing columns , can genuinely make it easier to work with large tables. Note: Access doesn't save formatting changes immediately (unlike record edits, which it stores as soon as you make them). Instead, Access prompts you to save changes the next time you close the datasheet. You can choose Yes to keep your customizations or No to revert to the table's last look and feel (which doesn't affect any edits you've made to the data in that table). 3.1.1. Formatting the DatasheetAccess lets you format the datasheet with eye-catching colors and fonts. Do these options make any difference to the way the datasheet works? Not really. But if your computer desktop looks more like a '60s revival party than an office terminal, then you'll enjoy this feature. To find the formatting features, look at the ribbon's Home
Every formatting change you make affects the entire table. You may think it's a nifty idea to apply different formatting to different columns, but Access doesn't let you. If this limitation's frustrating you, be sure to check out forms and reports later in this book. Both are more complicated to set up, but give you more formatting power. Note: There's one other way you can use the ribbon's Home  Font section. If you have a field that uses the Memo data type and youve set your field to use rich text (Section 2.3.2.1), then you can select some text inside your field, and change its formatting using the ribbon. Font section. If you have a field that uses the Memo data type and youve set your field to use rich text (Section 2.3.2.1), then you can select some text inside your field, and change its formatting using the ribbon.
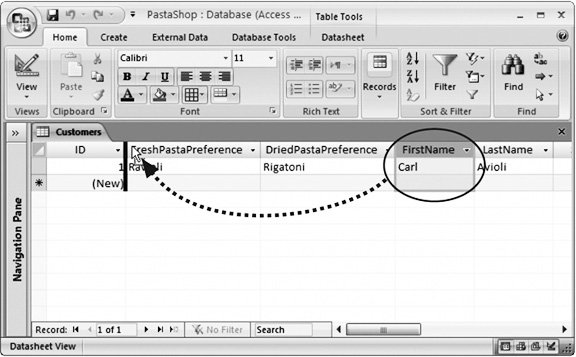
3.1.2. Rearranging ColumnsThe fields in the datasheet are laid out from left to right, in the order you created them. Often, you'll discover that this order isn't the most efficient for data entry. Imagine you've created a Customers table for a novelty pasta company. When a new customer registration ends up on your desk, you realize that the registration form starts with the name and address information, and then includes the customer's pasta preferences. Unfortunately, the fields on the datasheet are laid out in a completely different order. From right to left, they're arranged like this: ID, FreshPastaPreference, DriedPastaPreference, FirstName, LastName, Street, City, State, Country. (This organization isn't as crazy as it seemsit actually makes it easier for the people filling pasta orders to quickly find the information they want.) Because of this ordering, you need to skip back and forth just to enter the information from a single registration. Fortunately, you can solve this problem without redesigning the table. Drag the columns you want to move to new positions , as shown in Figure 3-2.
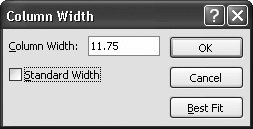
The best part of this approach is that you don't need to modify the database's actual structure. If you switch to Design view after moving a few columns, you'll see that the field order hasn't changed. In other words, you can keep the exact same physical order of fields (in your database file) but organize them differently in Datasheet view. Tip: Rearranging columns is a relatively minor change. Don't worry about shifting columns around to suit a specific editing job and then switching them back later on. Your changes don't affect the data in the database. If you want to use a particular column order for a one-time job, simply refrain from saving your changes when you close the datasheet. 3.1.3. Resizing Rows and ColumnsAs you cram more and more information into a table, your datasheet becomes wider and wider. In many cases, you'll be frustrated with some columns hogging more space than they need and others being impossibly narrow. As you'd expect, Access lets you tweak column widths. But you probably haven't realized how many different ways you can do it:
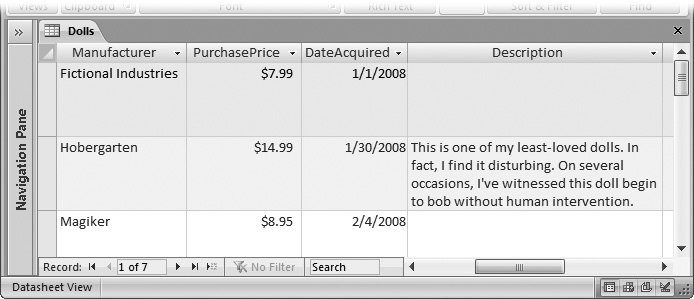
Note: Remember, a column doesn't need to be wide enough to show all its data at once. You can scroll through a lengthy text field using the arrow keys, and if that's too awkward , use the Shift+F2 shortcut to show the full contents of the current field in a Zoom box. Just as you can resize columns, you can also resize rows. The difference is that Access makes sure all rows have the same size. So when you make one row taller or shorter, Access adjusts all the other rows to match. You'll mainly want to shrink a row to cram more rows into view at once. You'll want to enlarge a row mostly to show more than one line of text in each text field (see Figure 3-4).
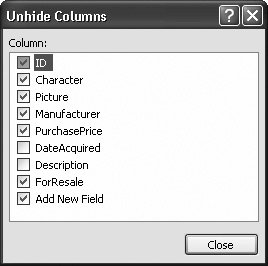
3.1.4. Hiding ColumnsMany tables contain so many columns that you can't possibly fit them all into view at the same time. This quality's one of the drawbacks to the datasheet, and often you have no choice but to scroll from side to side. However, in some situations, you may not need to see all the fields at once. In this case, you can temporarily hide the columns that don't interest you, thereby homing in on the important details without distraction. Initially, every field you add to a table is out in the open . To hide a column, select the column by clicking the column header. (You can also select several adjacent columns by clicking the column header of the first, and then dragging the mouse across the rest.) Then, right-click your selection, and then choose Hide Columns. The column instantly vanishes from the datasheet. (This sudden disappearance can be a little traumatic for Access newbies.) Fortunately, the field and all its data remain just out of sight. To pop the column back into view, right-click any column header and choose Unhide Columns. Access then shows the Unhide Columns dialog box (Figure 3-5).
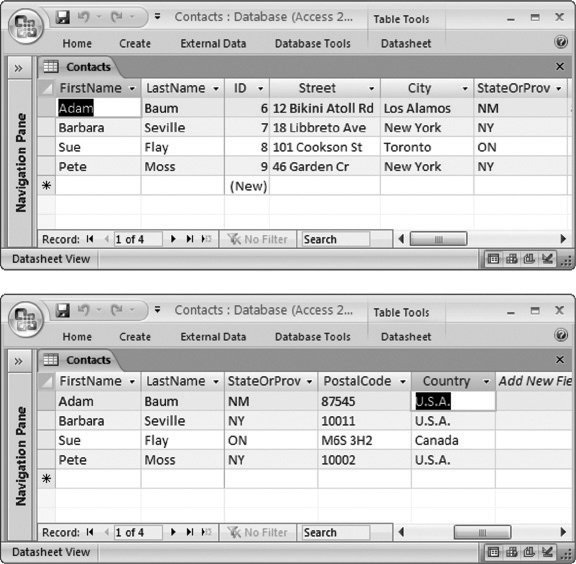
Note: At the bottom of the field list, you'll see an entry named Add New Field. This "field" isn't really a fieldit's the placeholder that appears just to the right of your last field in datasheet view, which you can use to add new fields (Section 2.2.1). If you're in the habit of adding fields using Design view (Section 1.2.3), then you can hide this placeholder to free up some extra space. If you add a new record while columns are hidden, you can't supply a value for that field. The value starts out either empty or with the default value (if you've defined one for that field, as described in Section 4.1.2). If you've hidden a required field (Section 4.1.1), you receive an error message when you try to insert the record. All you can do is unhide the appropriate column, and then fill in the missing information. 3.1.5. Freezing ColumnsEven with the ability to hide and resize columns, you'll probably need to scroll from side to side in a typical datasheet. In this situation, you can easily lose your place. You might scroll to see more information in the Contacts table, but then forget exactly which person you're looking at. Access has one more feature that can help you by making sure important information is always visible frozen columns. A frozen column remains fixed in place at the Access window's left side at all times. Even as you scroll to the right, all your frozen columns remain visible (Figure 3-6). To freeze a column (or columns), select them, right-click the column header, and then choose Freeze Columns. Tip: If you want to freeze several columns that aren't next to each other, start by freezing the column that you want to appear at the very left. Then, repeat the process to freeze the column that you want to appear just to the right of the first column, and so on.
Frozen columns must always be positioned at the left size of the datasheet. If you freeze a column that's somewhere else, Access moves it to the left side and then freezes it. You can move it back after you unfreeze the column using the column reordering trick in Section 3.1.2. Keep in mind that while a column's frozen, you can't drag it to a different place. To unfreeze columns, right-click a column header, and then choose Unfreeze All Columns. Note: Eventually, you'll discover that the customizations provided by the datasheet aren't enough, or you'll need to customize the same table different ways for different people. These signs tell you that you need to step up to forms, a more advanced data display option described in Part Four. |