Section 2.2. Design View
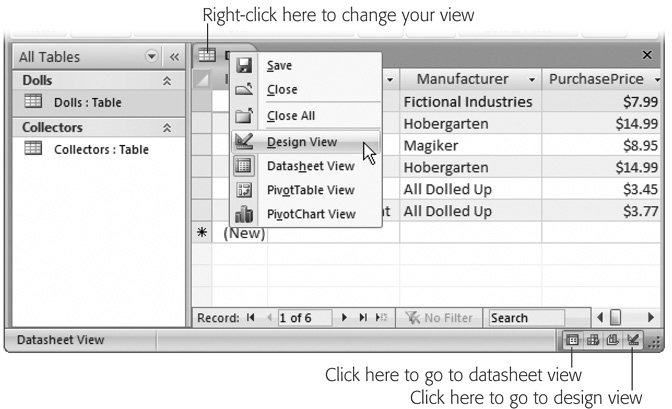
2.2. Design View When you create a new database, Access starts you off with a single table and shows that table in Datasheet view. (As you learned last chapter, Datasheet view is the grid-like view where you can create a table and enter data.) To switch to Design view, right-click the tab name (like "Dolls: Table"), and then choose Design View. (Or you can use the Home Note: If you've opened an old Access 2003 database, you won't see any tabs. Instead, you'll get a bunch of overlapping windows . You can remedy this problem and get your tabs back by following the instructions in Section 1.3.6. Or, if you want to keep the overlapping windows , just use the view buttons or the ribbon to change views (instead of the right-click-the-tab-title approach described above).
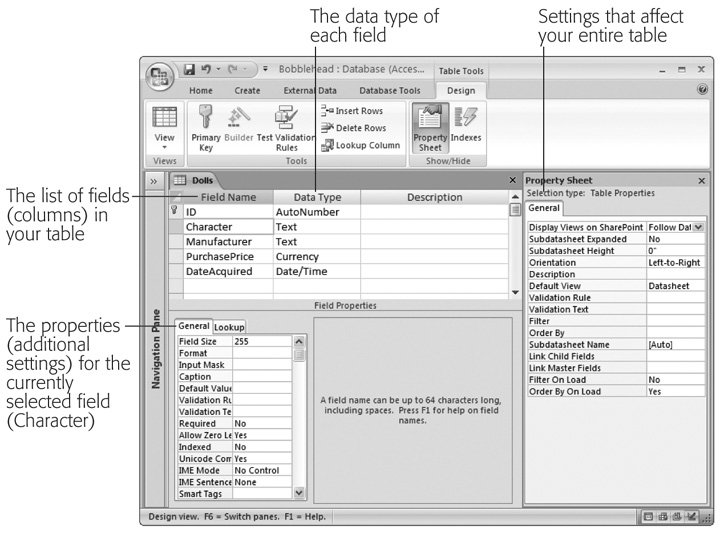
If you switch to Design view on a brand-new table that you haven't saved yet, Access asks you for a table name. Access then saves the table before switching you to Design view. Tip: For a handy shortcut, you can create a new table and automatically start in Design view. To do this, choose Create  Tables Table Design. However, when you take this route, your table doesnt include the very important ID column, so you need to add one, as described in Section 2.4.1. Tables Table Design. However, when you take this route, your table doesnt include the very important ID column, so you need to add one, as described in Section 2.4.1. While Datasheet view shows the content in your table, Design view shows only its structure (see Figure 2-3). You can use Design view to add, rearrange, and remove fields, but you can't use it to add new records. In the Dolls table, you can use Design view to add a Quantity field to keep track of doll duplicates. However, you can't add your newly purchased Bono bobblehead without switching back to the Datasheet view. Design view isn't intended for data entry. At first, Design view seems quite intimidating. To simplify what you're looking at, you should start by closing the Property Sheet box on the window's right side. (The Property Sheet lets you set a few highly technical table settings, none of which you need to consider right now.) To banish it, choose Table Tools Design 2.2.1. Organizing and Describing Your FieldsDesign view allows you to rearrange the order of your fields, add new ones, rename the existing ones, and more. You can also do all these things in Datasheet view, but Access gurus usually find it's easier to work in Design view, because you won't be distracted by the data in the table.
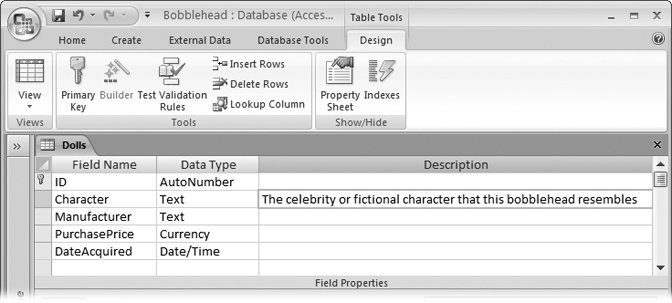
Here are a few simple ways you can change the structure of your table in Design view:
Note: Remember, fields' order isn't all that important, because you can change the order in which you view the fields in Datasheet view. However, most people find it's easier to design a table if you organize the fields from the very start.
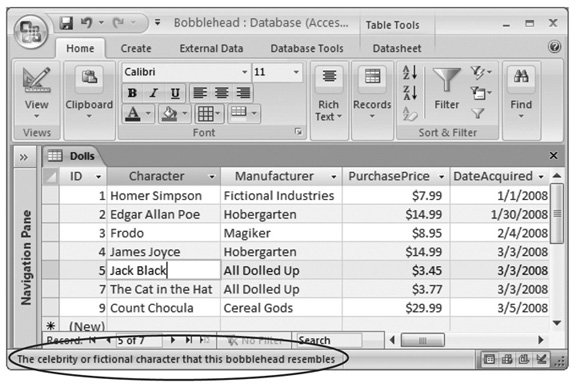
2.2.2. How Updates Work in Design ViewAccess doesn't immediately apply the changes you make in Design view. Instead, it waits until you close the table or switch back to Datasheet view. At that point, Access asks whether you want to save the table. (The answer, of course, is Yes.) Sometimes, you may apply a change that causes a bit of a problem. You could try to change the data type of a field so that it stores numbers instead of text. (The box in Section 2.3.1, "Changing the Data Type Can Lose Information," discusses this problem in more detail.) In this situation, you won't discover the problem until you close the table or switch back to the Datasheet view, which might be a little later than you expect. If you've made a potentially problematic change and you just can't take the suspense , you're better off applying your update immediately , so you can see if there's a problem before you go any further. To do so, click the Quick Access toolbar's Save button (it's the diskette icon in the Access window's top-left corner), or just use the keyboard shortcut Ctrl+S. Access applies your change, and then saves the table. If it runs into a problem, Access tells you about it (and lets you choose how you want to fix it) before you do anything else with the table. |