| The final page of the User Login application is an administrative function for tracking user registration. With this page, you'll be able to see the total number of registered users as well as how many registered in the last day, the last week, and the last month. One special feature of this application is that it makes use of an Access view in a process referred to as querying the query, in which a recordset is derived from a rather complex SQL statement within the data source. Step 1: Implement User Statistics Design As usual, we'll build the page structure first. 1. | Create a basic dynamic page, either by hand or from a template.
 In the UserLogin folder, locate the folder for your server model and open the userstatistics page found there. In the UserLogin folder, locate the folder for your server model and open the userstatistics page found there.
| 2. | Add a table to the content region of your page to contain the interface elements for the application.
From the Snippets panel, drag the Recipes > UserLogin > Wireframes > User Statistics - Wireframe snippet into the Content editable region.
| 3. | Within the table, insert a content table with the necessary text and a form button. No form is necessary for this application.
Place your cursor in the row below the words USER STATISTICS in the second cell and insert the Recipes > UserLogin > ContentTables > User Statistics - Content Table snippet [r1-25].
r1-25. 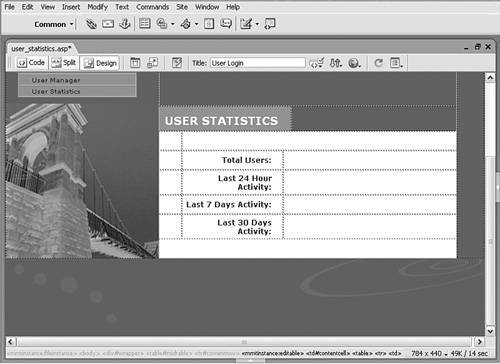
|
Step 2: Add Database Components Although we're actually adding a very powerful bit of functionality to our application page, Dreamweaver allows us to insert it as a standard recordset. Here's the SQL behind the Access view we'll be using: [View full width] SELECT (SELECT Count([UserID]) FROM Users WHERE ((([Users].[UserRegDate])>Now()-1))) AS  RegToday, (SELECT Count([UserID]) FROM Users WHERE ((([Users].[UserRegDate])> Now()-7))) AS RegThisWeek, (SELECT Count([UserID]) FROM Users WHERE ((([Users].[UserRegDate])>Now ()-30))) AS RegThisMonth, Count([UserID]) AS UserCount FROM Users; RegToday, (SELECT Count([UserID]) FROM Users WHERE ((([Users].[UserRegDate])> Now()-7))) AS RegThisWeek, (SELECT Count([UserID]) FROM Users WHERE ((([Users].[UserRegDate])>Now ()-30))) AS RegThisMonth, Count([UserID]) AS UserCount FROM Users;
Note This SQL is quite useful and can be repurposed fairly easily. You could, for example, use it to list the number of orders placed in an online store over the given time periods.
Despite the complexity of the view, the implementation of this functionality in Dreamweaver is quite straightforward for ASP and ColdFusion. Because PHP does not support views, the recordset needs to be added directly in the Advanced Recordset dialog. For ASP and ColdFusion 1. | From the Bindings panel, select Add (+) and choose Recordset.
| 2. | Make sure you are in Simple mode.
| 3. | In the Name field, enter the label for your recordset.
Enter UserStats as the recordset name.
| 4. | From the Connections list, choose the data source connection.
Select Recipes from the Connections list.
| 5. | Choose the appropriate table containing the user's information.
Select UserRegStats from the Tables list.
| 6. | Choose the All option under Columns.
No filtering or sorting is necessary; it's all handled in the SQL statement.
| 7. | Click OK to confirm your choices and close the dialog.
|
For PHP To prepare for this procedure, copy the snippet to the clipboard by first navigating to the Recipes > UserLogin > SQL folder. Then right-click (Controlclick) the UserStats View - PHP snippet and choose Copy Snippet. Note The Copy Snippet extension works best if you place your cursor in any bit of text in Design view before invoking the command.
1. | From the Bindings panel, choose Add (+) and select Recordset (Query).
| 2. | Switch to the advanced view of the Recordset dialog, if necessary.
| 3. | Enter an appropriate name for the recordset.
Enter UserStats in the Recordset field.
| 4. | Select your data source.
Choose Recipes from the Connections list.
| 5. | In the SQL area, enter the following code:
Press Ctrl-V (Command-V) to paste the copied snippet into the SQL area.

| [View full width] SELECT SUM(UserRegDate > NOW() - INTERVAL 24 HOUR) AS RegToday, SUM(UserRegDate > NOW() - INTERVAL 7 DAY) AS RegThisWeek, SUM(UserRegDate > NOW() - INTERVAL 30 DAY) AS RegThisMonth, COUNT(UserID) AS UserCount FROM Users
|
| 6. | Save your page.
|
Step 3: Display User Statistics All that's left is to show the results of the recordset. This is simply a matter of dragging dynamic elements into place. 1. | From the Bindings panel, expand the UserStats recordset.
| 2. | Drag the following dynamic elements onto the page:
Drag the UserCount field in the cell next to the label Total Users. Drag the RegToday field in the cell next to the label Last 24 Hour Activity. Drag the RegThisWeek field in the cell next to the label Last 7 Days Activity. Drag the RegThisMonth field in the cell next to the label Last 30 Days Activity.
When completed, the page will resemble the one shown in the figure [r1-26].
r1-26. 
| 3. | Save the page as userstatistics, using the appropriate file extension for your platform.
|
Your user login application is now complete. Be sure to test all the various pages as both a user and an administrator. |