Taking out the Trash
At the opposite end of the Dock from the Finder icon, you see an icon resembling a wire-mesh wastepaper basket. This is the Trash, the receptacle into which you place items you want to be rid of. Deleting files and folders is a two-step process. First, you need to move them to the Trash and then you need to empty the Trash. Before emptying the Trash, you can still change your mind, open the Trash and remove items from it.
Moving items to the Trash
Move one or more items to the Trash by using one of the following four ways:
-
Drag the items to the Trash icon in the Dock.
-
Select the items and choose Finder Move To Trash.
-
Select the items and press z-Delete (which is the keyboard shortcut for choosing Finder Move to Trash).
-
Control-click an item, or select several items and Control-click one of them, and then choose Move To Trash from the contextual menu that appears.
After moving an item to the Trash, the Trash icon will change from an empty wire mesh basket to a basket full of crumpled up papers. The documents are not deleted yet though. They are merely in your trash pail. To actually delete them, much like your kitchen trash pail, you have to take out the trash. In the Finder menu, select Empty Trash, or press z-Shift-Delete. A click or swish sound will be heard and your files will be deleted. Do not get in the habit storing items in the Trash. Not only will the trash file get bloated storing all the unwanted garbage, it’s also very easy to accidentally empty the trash when trying to send an item to the trash (especially with the keyboard shortcut, it’s only a Shift key’s difference). If you intend to trash something, do so. If you think you want to trash something, but aren’t sure yet, store the files somewhere else. We’ll talk more about file organization in Chapter 5.
Viewing and removing Trash contents
You can see the contents of the Trash by clicking the Trash icon in the Dock. The Trash contents appear in a Finder window. You can remove items from the Trash by dragging them out of this Finder window and placing them in another folder or on the desktop. (As you observed in Chapter 3, the items you put on the Mac OS X desktop are actually located in the Desktop folder of your home folder.)
| Note | When you view the Trash contents, you see only items that you have moved to the Trash since you last emptied it. If other people use your computer with different login accounts, you do not see items that they have moved to the Trash. Mac OS X keeps a separate Trash for each user. |
Emptying the Trash
Empty the Trash by using one of the following methods:
-
Choose Finder Empty Trash.
-
Press z-Shift-Delete.
-
Control-click the Trash icon (or click it and hold) and when the pop-up Dock menu appears, choose Empty Trash.
In the first two methods, the Finder displays a warning, asking if you really want to permanently delete the items that are in the Trash. If you use the pop-up Dock menu, the Trash is emptied without warning. Figure 3-34 shows the warning.
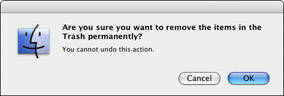
Figure 3-34: If you choose File Empty Trash or press z-Shift-Delete, the Finder confirms that you really want to empty the Trash.
| Tip | If you find the Trash warning annoying, you can eliminate it by changing a setting in Finder Preferences, as described in Chapter 4. The warning also does not appear if you press z-Shift-Option-Delete. |
| Note | If you put a file in the Trash by accident, you can remove it from the Trash by using the Finder undo feature, pressing z-Z. This will work only if putting the item in the Trash was the last thing you did (as the undo will only undo the last thing you did) and, most important, if you haven’t emptied the Trash yet. The emphasis is there for a reason! Emptying the Trash normally means “bye-bye files.” To recover files that have been erased accidentally or prematurely (or to rescue files from disks that are damaged) you will need to call in a team of professionals. Check out www.DriveSavers.com and www.OnTrack.com if you need help recovering files. Get your checkbook ready, as file recovery prices range from $100–$3000, depending on disk size, disk condition, and how quickly you need the files back. To avoid this unfortunate situation happening to you, back up your work often, as discussed in Chapter 23. |
Secure Empty Trash
If you are selling your computer, or have very sensitive information on your computer, simply emptying the Trash is not an effective way to remove the data. As noted above, it is indeed possible to get your work back! This may be a bad thing if you really want the files gone. To this end, Apple has added the Secure Empty Trash option, which will truly purge the trashed files from your computer by overwriting them with meaningless junk data. This is significant because what actually happens when a file gets simply trashed is the computer erases its record of where the file was. Because the computer no longer recognizes that there is a file there, it will write over the (still extant) file eventually, as you create more work. The problem is, this may take a while, or never occur at all. A good technician (or evil hacker) may be able to restore Trashed files with third-party software. By first erasing the file record, and then overwriting the file’s location with meaningless data, Mac OS X makes it much more difficult if not impossible to recover the work. To use this erasure method, simply select Secure Empty Trash from the Finder menu or contextual menu. Figure 3-35 shows the alert when selecting the Secure Empty Trash option.
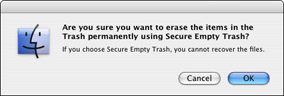
Figure 3-35: Secure Empty Trash is a better way to ensure that your unwanted data is erased permanently, as a determined person can often very easily undo the normal Empty Trash command.
EAN: 2147483647
Pages: 290