Hack 14. Give All Enemies Active Camouflage
|
If Legendary is too easy for you, use the Assassins skull to activate the most challenging way to play Halo 2. This skull is located in the "Pass through the submerged structures" portion of the Regret level. To activate this skull, you will need to play through the level on the Legendary setting. Once activated, the skull will cause the notification text "Assassins" to appear. The effect of the Assassins skull is that all enemies have permanent Active Camouflage (see Figure 2-24; note that the Blind skull [Hack #8] is also active; therefore, there is no visible HUD). This skull is for those Halo 2 gamers out there who feel that Legendary mode is just too easy. Personally, I can't imagine anything worse than invisible sniper Jackals. This hack gets a medium rating because you will need to play through a lot of the level to get to the skull. In addition, this skull requires that you defeat a considerable number of Jackal snipers. For this reason, I suggest that you first retrieve the Envy skull [Hack #13]. When I first went for this skull, I had Grunt Birthday Party skull [Hack #11] active. I thought that it would help me get through the Covenant in no time. However, there are quite a few Jackal snipers on this level. The problem with snipers is not killing them; they are relatively weak. The key is to see them before they see you. For this reason, Active Camouflage is invaluable on the Regret level. Figure 2-24. The Assassins skull rendered this Hunter nearly invisible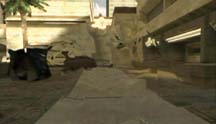 The only issue with using the Envy skull is that it will make finding a hidden ledge much more difficult, since that skull replaces your flashlight with the Active Camouflage. You may want to use Envy to get to a checkpoint near the right room and then restart your Xbox. After you restart the box, the Envy skull will no longer be active and you will have your flashlight back. Move through the Regret level until you find the gondola and defeat the Hunters (see Figure 2-25). Immediately after the gondola ride, there is a building with two turrets on it. Figure 2-25. Looking back at the gondola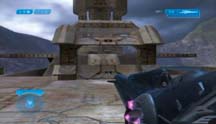 When you first enter the building, you are in a small dark room with a slab of stone in the middle (see Figure 2-26). Jump onto the stone and turn to face the light fixture on your left (see Figure 2-27). Jump onto the light fixture. From the light fixture, you need to jump to a small ledge. Figure 2-26. The entrance to the building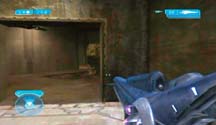 Figure 2-27. Standing on the stone, looking at the light fixture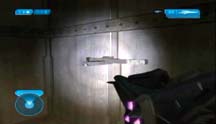 The ledge is tough to see, so use your flashlight (see Figure 2-28). Even with the light, it may not be immediately visible. This is why it's easier to find the ledge if you don't have the Envy skull active. Without your flashlight, you will have considerable trouble seeing anything. Of course, you could just ump in all four directions and hope for the best. Figure 2-28. The hidden ledge that leads to the turrets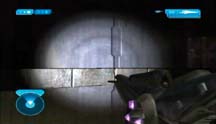 The ledge leads to an opening that allows you to get up onto the roof of the structure. Once outside, you will be near the two turrets. From this area, use jumps and crouch jumps [Hack #1] to follow the right perimeter of the building. You won't need to use any grenades if you use a small lip on the right side of the turret level. When you have gone as far as you can go, look down the side of the building. Just below you, there will be a small grassy area. If you're in the right place, you will see two cloaked Elites dancing on either side of the Assassins skull (see Figure 2-29). Activate the skull, and get ready for a world of hurt that you won't even see coming! Figure 2-29. The location of the Assassins skull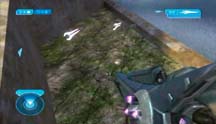 |
EAN: 2147483647
Pages: 166