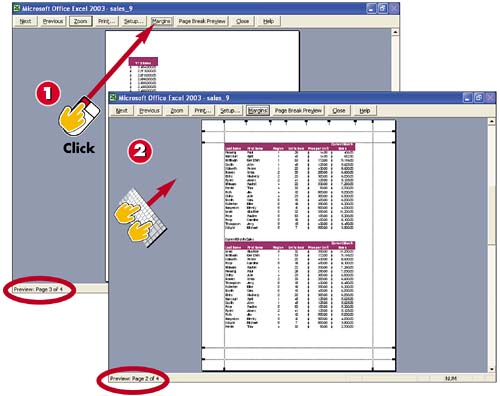
In Print Preview mode, if you find a page whose print area exceeds the page margins, click the Margins button.
Excel activates Print Preview's margin lines.
INTRODUCTION
Margins affect where data is printed on a page. They also determine where headers and footers are printed. Occasionally, margins might need to be changed to make room for a letterhead or logo on preprinted stationery. When in Print Preview mode, Excel allows you to alter your column widths at the same time as the margins.
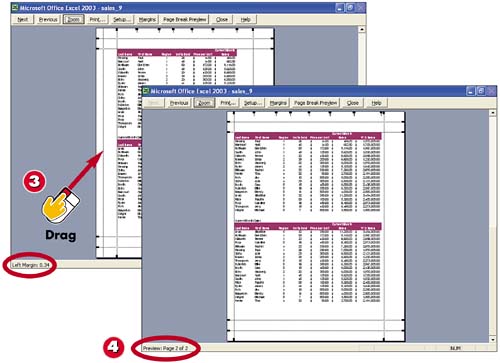
Drag the Left Margin line from the default 1" to 0.34" (you can see the exact measurement in the bottom-left corner of the screen).
Thanks to the margin change, the total number of pages to print is reduced from four to two. The column that exceeded the margins in the print area now fits on the page.
TIP
Entering Specific Margins
There might be times when you need to set your worksheet margins to a specific measurement. Perhaps your worksheet data is being placed in a binder, and you need to have a left margin of 1.25". You can either alter this in Print Preview mode or select File, Page Setup, click the Margins tab, and alter the margins as necessary (Left, Right, Top, Bottom, Header, or Footer). Click the OK button to return to your worksheet, or click the Print button to print immediately.
TIP
Removing Margin Lines
If you no longer want to see the margin lines in Print Preview mode, click the Margins button on the Print Preview toolbar to toggle the margins off.