Using the WebClient Class
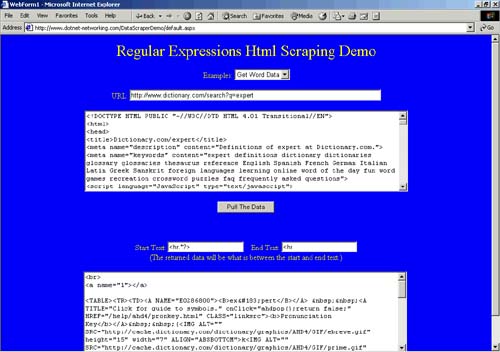
Using the WebClient ClassThe WebClient class provides common methods for sending data to and receiving data from a resource identified by a URL. Underneath the covers, the WebClient class uses the WebRequest class (which is covered in more detail later in this chapter) to provide access to Internet resources. For this reason, the WebClient class is easier to use than the WebRequest class because it encapsulates the WebRequest class at a higher level and abstracts much of the detail out. The WebClient class has four methods for performing data transfer. They are the OpenWrite() method, which sends a stream to the resource; the UploadData() method, which sends a byte array to the resource and returns the byte array with any response; the UploadFile() method, which sends a local file to the resource and returns a byte array with any response; and the UploadValues() method, which sends a name value collection to the resource. Three other methods are even easier to use than the four just mentioned. These are the DownloadData() method, which downloads data from a resource and returns a byte array; the DownloadFile() method, which downloads data from a resource to a local file; and the OpenRead() method, which returns the data from the resource as a stream. I have created a page in the NetworkingDemoApplication named WebClientDemo. This page enables users to retrieve a Web page with either the OpenRead() method or the DownloadFile() method. You can see the application in Figure 13.2. Figure 13.2. The WebClient Class Lets You Easily Download Data from the Web.
The code shown ahead in Listing 13.2 is what is behind the .aspx file that you can see in Figure 13.2. There are two buttons that users can click. The first button takes the resource identifier (and this is some kind of URL) that the user specifies and retrieves the data. The data is placed into a text box. In Listing 13.2 you should first see the ReadData_Click() method. The method starts off by setting a Label1.Text so that it is empty. The next line instantiates a WebClient object. This object is used to read the data from the remote server. You can then see where the OpenRead() method is called. The single argument to the OpenRead() method is the URL that the user has given. The OpenRead() method returns a Stream object. Listing 13.2 The Source Code for the WebClient Demo private void ReadData_Click(object sender, System.EventArgs e) { try { Label1.Text = ""; WebClient client = new WebClient(); Stream response = client.OpenRead( URL1.Text ); Content1.Text = ""; Content1.Visible = true; int nByteData; do { nByteData = response.ReadByte(); if( nByteData > 0 ) { Content1.Text += Convert.ToChar( nByteData ); } } while( nByteData > 0 ); response.Close(); } catch( Exception ex ) { Content1.Visible = false; Label1.Text = ex.Message.ToString(); } } private void Button2_Click(object sender, System.EventArgs e) { try { Label2.Text = ""; WebClient client = new WebClient(); string strDest = Request.MapPath( @"TempFiles\Temp" + Convert.ToString( DateTime.Now.Millisecond + DateTime.Now.Second * 1000 ) + ".tmp" ); client.DownloadFile( URLSource.Text, strDest ); FileDest.Text = strDest; Label2.Text = "Done!"; } catch( Exception ex ) { Label2.Text = ex.Message.ToString(); } } The text box that is used to display data that has been retrieved is named Content1. Its Text property is cleared and set to be empty before the retrieval process starts. The text box should be empty in case there is some sort of retrieval error and an exception is thrown. The text box's Visible property is set to true. Initially, the Visible property is set to false, and the text box cannot be seen until a file is successfully retrieved. A simple do/while construct retrieves the data one byte at a time and then appends that byte of data to the text box's Text property. This way, all the retrieved data will be placed into the text box so the user can view it. After all the data is read, the Stream object is closed. Note that if an exception is thrown, the text box's Visible property is set to false and the exception error message is output to the message label so that the user can see the error that was generated. You can then see the Button2_Click() method. This method starts off in much the same way as the Button1_Click() method did. The label's Text properties are emptied and a WebClient class is created. The next thing that happens, though, is that a string is created that contains a destination path for the file. This is necessary because the DownloadFile() method requires a destination file name on the local hard drive. The application contains a directory named TempFiles, which has the necessary permissions so that these temporary files can be written. The WebClient class's DownloadFile() method is then called, which downloads the file to the server and not the client. This method requires two arguments: the source URL and the destination file name. These are both passed as string arguments. As a convenience to users, the temporary file name is displayed in a read-only text box on the Web Form. Then, the status label (named Label2) indicates that the transfer is done. If for some reason an error occurs and an exception is thrown, the status label reflects the error message. |
EAN: N/A
Pages: 175
