Writing and Deploying Windows Services in .NET
| Windows Services (formerly called NT Services) are applications that perform a set of tasks behind the scenes. They allow optimal performance and convenience. If a service fails, Windows can automatically restart it, leaving your application available 24/7. Windows Services are also independent of the logged-on user, and they run under an identity that the machine administrator can select. Your service can be run in the background, regardless of whether a user is logged into Windows. This can be a mission-critical capability. In times past, writing Windows Services required advanced knowledge of C and the Windows APIs. To use Visual Basic, a C++ "wrapper" had to be constructed. With Visual Studio .NET, you can write powerful Windows Services, in the language of your choice, with no more effort than writing other applications. Writing a Windows Service in Visual Studio .NETTo demonstrate the ease of writing a service in Visual Studio .NET, let's create a sample service. Our new service will delete the contents of the C:\TEMP folder on a timed basis. It will also notate this event in the EventLog (accessible in the Event Viewer). To begin, we'll select File, then New, and then Project from the Visual Studio .NET IDE menu. The project type we'll be selecting is Windows Service, and I named the project Service1, as shown in Figure 12.4. Figure 12.4. Select "Windows Service" in the Project Selector.
A Windows Service cannot be run without being installed on the test machine. Fortunately, Microsoft has automated this process. You must add an installer. To do this, follow these steps:
NOTE: You can also set the StartType property. This dictates whether the service is disabled by default, requires manual starting, or starts automatically with Windows. You'll want to select this based on your project's demands. The next thing we'll do is add a timer. Go back to the Design view of Service1.vb, and add a Timer from the tool box. Open the properties for the new timer, and set the interval to 1000, which will be 10 seconds. In Service1.vb design mode, right click and select View Code. You will see there are two preset methods here: OnStart() and OnStop(). The OnStart() method fires when the service runs. The OnStop() method fires when necessary to cleanly stop the service when a stop request is received. The work of this service will be performed in two methods: DeleteFiles() and WriteLog(). We'll create those methods now by adding empty methods to the code module, as follows: C# public void DeleteFiles() { } public void WriteLog(string LogEntry) { } VBPublic Sub DeleteFiles() End Sub Public Sub WriteLog(ByVal LogEntry As String) End Sub The first method, DeleteFiles(), will perform the temp file deletion. The second method will receive the text of a log entry passed in and write the entry out. Add the following code to the DeleteFiles() method: C# try { // Delete temporary files foreach( string strFile in Directory.GetFiles( "C:\\temp" ) ) { File.Delete( strFile ); } // Send log entry info to WriteLog function WriteLog( "Files deleted on: " + DateTime.Now.TimeOfDay.ToString() ); } catch( Exception ex ) { WriteLog( "Error:" + ex.ToString() ); } VB Try ' Delete temporary files Dim strFile As String For Each strFile In Directory.GetFiles("C:\temp") File.Delete(strFile) Next ' Send log entry info to WriteLog function WriteLog("Files deleted on: " & CStr(TimeOfDay)) Catch ex As Exception WriteLog("Error:" & e.ToString()) End Try To protect against unforeseen errors, I inserted the code in a try/catch block. The code declares a string and uses For Each to gather the list of files for deletion. It then uses this array to delete the files, one by one. Consider this a hard-wired while statement.
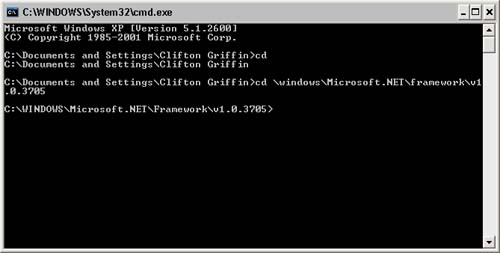
NOTE: Subdirectories and their contents will not be deleted with this code. Because this is for demonstration purposes, the simplest method was chosen. C# WriteLog( "Files deleted on: " + DateTime.Now.TimeOfDay.ToString() );VB WriteLog("Files deleted on: " & DateTime.Now.TimeOfDay.ToString()) The above code provides the necessary information as a string to the WriteLog() method. In the code that follows, a custom log is being created named ServiceCS. This log can be read, just like the Application, System, and Security logs, by selecting ServiceCS in the tree control of Event Viewer. Here is the code that should be added to the WriteLog() method: C# // Check for existence of current log if( !EventLog.SourceExists( "ServiceCS" ) ) { EventLog.CreateEventSource( "ServiceCS","ServiceCS Log" ); } EventLog.Source = "SampleServiceCS"; // Write entry EventLog.WriteEntry( "ServiceCS Log", LogEntry, EventLogEntryType.Information ); VB ' Create event log Dim Log As New EventLog() ' Check for existents of current log If Not Log.SourceExists("SampleServiceVB") Then Log.CreateEventSource("SampleServiceVB", "SampleServiceVB Log") End If Log.Source = "SampleServiceVB" 'Write entry Log.WriteEntry("SampleServiceVB Log", LogEntry, EventLogEntryType.Information) This gathers the string passed into LogEntry and writes out an appropriate log entry with the data. C# if( !EventLog.SourceExists( "ServiceCS" ) ) { EventLog.CreateEventSource("ServiceCS","ServiceCS Log"); } VB Dim Log As New EventLog() ' Creates new EventLog object. If Not Log.SourceExists("SampleServiceVB") Then Log.CreateEventSource("SampleServiceVB", "SampleServiceVB Log") End If The following code checks for an existing log. If there isn't any, we create one. C#EventLog.Source = "SampleServiceVB"; // Write entry EventLog.WriteEntry( "ServiceCS Log", LogEntry, EventLogEntryType.Information );VB Log.Source = "SampleServiceVB" ' Write entry Log.WriteEntry("SampleServiceVB Log", LogEntry, EventLogEntryType.Information) And last, we set the Source property of our Log object to our created Log entitled SampleServiceVB. We then write out the appropriate Log Entry. This takes care of deleting the files and writing to the log file; but until we add a timer action, none of this will happen. Back in Design view of Service1.VB, double-click Timer1. Add DeleteFiles() to this new function. It should look like this: C# private void timer1_Elapsed(object sender, System.Timers.ElapsedEventArgs e) { DeleteFiles(); } VBPrivate Sub Timer1_Elapsed(ByVal sender As System.Object, _ ByVal e As System.Timers.ElapsedEventArgs) Handles Timer1.Elapsed DeleteFiles() End Sub DeploymentBecause a service is a special application, it cannot be run by simply double-clicking it from File Explorer. This is where our ServiceInstaller comes into play. From the Build menu, select Build Solution. Ensure that it finishes without errors. To install the service, open up the command prompt by clicking Start >Run. Type cmd in the box, and press OK. Switch directories to C:\WINDOWS\Microsoft.NET\Framework\v1.0.3705. The exact directory will be different, depending upon the installed version of the .NET Framework and your version of Windows.
RUNNING THE InstallUtil PROGRAM: InstallUtil is contained in the CLR Framework directory. It opens up the assembly, looks for Installer derived classes, and runs the entry points in some order to install the item without requiring the user to build an MSI (see Figure 12.5). Figure 12.5. Command Prompt
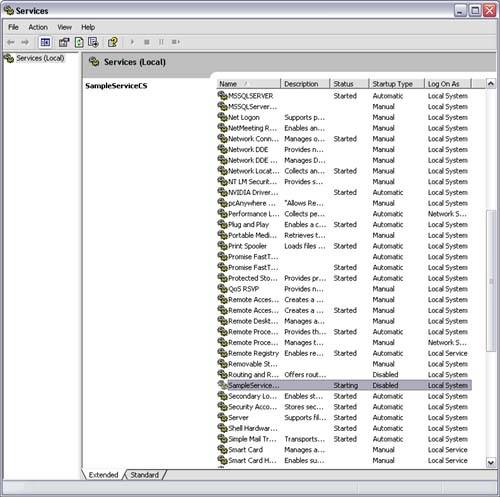
Once you're in the proper directory, type InstallUtil "c:\My Documents\Visual Studio Projects\Service1\bin\service1.exe". The actual path to your executable will vary on your setup. Pressing enter will register the service with Windows. To start the service, open up the Services control panel from Administrative Tools in the Control Panel as shown in Figure 12.6. Click your new service and press the Play button above. WARNING: This will as specified in the program delete the contents of the C:\Temp folder. Be sure your directory is free of important files OR select a different directory in the application and redeploy. Figure 12.6. Services Control Panel
To stop the service, press the Stop button. To view the created log, open up the Event Viewer under Administrative Tools in the Control Panel. The BannerBuddy ServiceI created an NT Service that sends out e-mails once a day to advertisers to let them know their statistics. The code is simple and can be seen in Listing 12.11. It simply formats the numerical data for each day and time so that it can easily be read. Listing 12.11 The NT Service Code for Sending Out E-mails to Advertisers public void SendReports() { // Create the database connection. SqlConnection objConnection = new SqlConnection( "data source=localhost;initial catalog=Bannerbuddy;" + "persist security info=False;user id=sa;pwd=" ); // Create a reader and set it to null. SqlDataReader objReader = null; try { // Open the database connection. objConnection.Open(); // Create the command object. SqlCommand objCommand = new SqlCommand( "select ID from Advertiser", objConnection ); // Execute the reader and get the recordset. objReader = objCommand.ExecuteReader(); while( objReader.Read() ) { string strEmail; string strEmailContent = FormatReportInfo( Convert.ToInt32( objReader["ID"] ), ref strEmail ); MailMessage message = new MailMessage(); message.Body = strEmailContent; message.BodyFormat = MailFormat.Html; message.From = "BannerBuddy<Reports@ASPNET-Solutions.com>"; message.Subject = "BannerBuddy Report"; SmtpMail.SmtpServer = "mail.aspnet-solutions.com"; message.To = strEmail; SmtpMail.Send ( message ); } objReader.Close(); } catch( Exception ex ) { // Alert the user to the error. // Check for existents of current log if( !EventLog.SourceExists( "BannerBuddy" ) ) { EventLog.CreateEventSource( "ServBannerBuddyiceCS","BannerBuddy Log" ); } EventLog.Source = "BannerBuddyServiceCS"; // Write entry EventLog.WriteEntry( "BannerBuddy Log", ex.Message.ToString(), EventLogEntryType.Information ); } finally { // If the reader is non-null we'll // need to close it. if( objReader != null ) { objReader.Close(); } // If the database connection is open, // close it. if( objConnection.State == ConnectionState.Open ) { objConnection.Close(); } } } |

EAN: N/A
Pages: 175