7.4 Infrared File Transfer
| Imagine that you are at a conference and would like to send a couple of files to someone that you have just met. There might not be a network available, and it is unlikely that you lug a serial cable with you when you travel. If both of you are using notebook computers, the best solution is to use infrared to send the files. When two computers are within communicating range of each other (with the infrared port of each computer pointing at each other), Windows XP will automatically activate the irFTP application, which is found in the C:\Windows\system32 directory. The irFTP application allows two computers to exchange files using infrared. You can use this utility at the command prompt. To see a list of options, enter the command irftp /h.
7.4.1 Computer to Pocket PCMost Pocket PCs contain a built-in infrared port for communicating with the outside world. Using the infrared port, you can transfer files from the Pocket PC to the computer (and vice versa) without using a cable. Figure 7-4 shows the iPaq 3870 with the infrared port located at the top. Figure 7-4. The infrared port located at the top of the iPaq 3870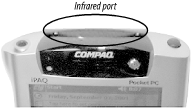 When you align the infrared ports of both the Pocket PC and your computer, Windows XP will inform you that a Pocket PC is nearby (see Figure 7-5). Figure 7-5. Discovering a nearby computer using infrared The Send files to another computer icon (a shortcut to the irFTP application) also appear on your desktop (see Figure 7-6). Figure 7-6. The shortcut to the irFTP application You can double-click on the icon shown in Figure 7-6 to send files to your Pocket PC (see Figure 7-7). Figure 7-7. Sending files using infrared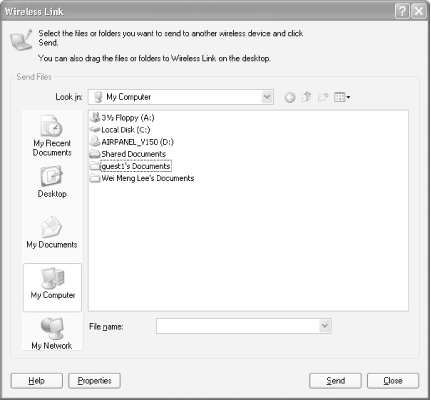 Select the file that you want to send and click on the Send button. 7.4.2 Pocket PC to ComputerTo send files from the Pocket PC to the computer, go to File Explorer on the Pocket PC, then tap and hold on to the file that you want to send, to bring up the context menu. Select Beam File... as shown in Figure 7-8. Figure 7-8. Sending a file on a Pocket PC using infrared On your computer, you will receive a prompt seeking your permission to accept the file. Click on Yes to receive the file, or click Cancel to reject it (see Figure 7-9). Figure 7-9. Requesting permission to accept or reject a file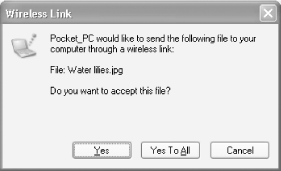
You can configure the default directory for file transfer by right-clicking on the infrared icon in the tray (shown in Figure 7-10) and selecting Properties from the pop-up menu. Figure 7-10. The infrared icon in the Tray This brings up the Wireless Link dialog, shown in Figure 7-11. Figure 7-11. Configuring the properties for infrared communication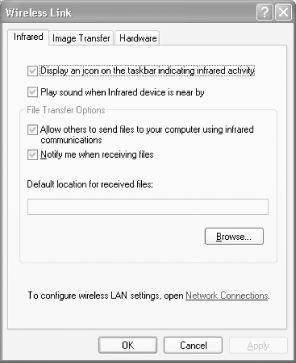 If you did not configure a default location for received files, the incoming file(s) will be saved on the desktop. 7.4.3 ActiveSyncAnother use of infrared is synchronizing your Pocket PC with your computer. With ActiveSync, you can use infrared to connect to your Pocket PC without a syncing cradle or cable. To use infrared for ActiveSync, launch Microsoft ActiveSync on your computer and click File Figure 7-12. Configuring Microsoft ActiveSync for infrared communication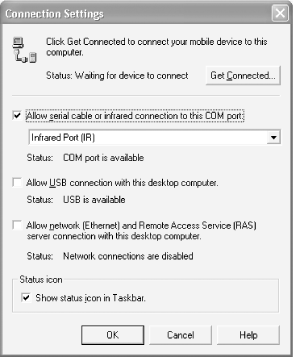 Align the infrared port of the Pocket PC to that of the computer and on the Pocket PC, launch ActiveSync and select Tools Figure 7-13. Invoking Microsoft ActiveSync using infrared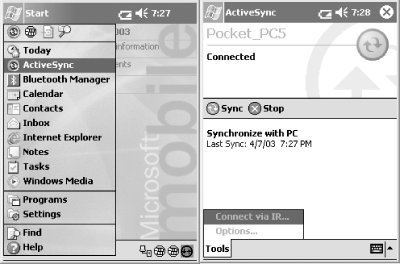 Microsoft ActiveSync should now start connecting to the Pocket PC. 7.4.4 Connecting to the Internet Via InfraredIn this section, I illustrate how you can connect to the Internet using a mobile phone. The phone used in this example is the Nokia 6610 (see Figure 7-14), which supports GPRS data access. Figure 7-14. The Nokia 6610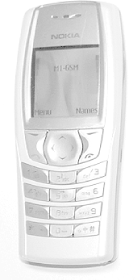
Invoke the Infrared option (go to Menu Align the phone's infrared port (see Figure 7-15) to that of your computer's. Figure 7-15. The infrared port for the Nokia 6610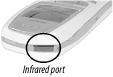 Windows XP will automatically detect the Nokia 6610 (see Figure 7-16). Figure 7-16. Detecting the Nokia 6610 Windows XP will also query the device for the services that it provides. In the case of the Nokia 6610, a classic phone (with modem capability) is detected, and Windows XP automatically installs a standard modem over the IR link (see Figure 7-17). Figure 7-17. Installing a standard modem over the IR link for the Nokia 6610 You are now ready to set up your computer to use the Nokia 6610 as a modem:
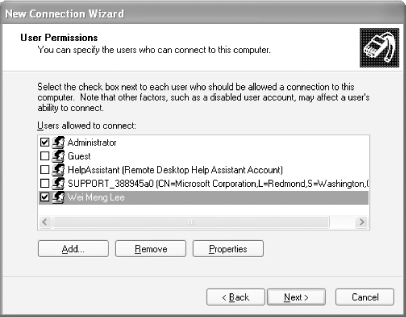
A list of available modems will be displayed (see Figure 7-18). Choose the standard modem over the IR link. Figure 7-18. Selecting the IR modem for dial-up access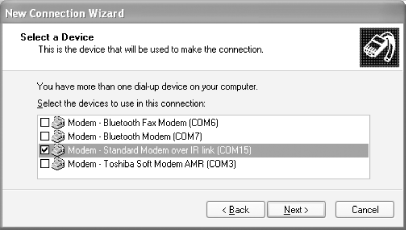 You will be prompted to enter the ISP name, username, and password. You need to obtain all this information from your ISP. Finally, turn on the "Add a shortcut to this connection to my desktop" checkbox. Double-click on the connection icon, and a connection window appears as shown in Figure 7-19. Figure 7-19. Dial-up access using the Nokia 6610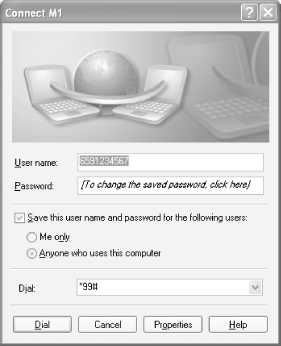 7.4.5 Sharing Internet Connection Using InfraredUsing an infrared connection, two computers can share an Internet connection. Assuming that one computer with an infrared port is connected to the Internet via an Ethernet connection, another computer that is also equipped with an infrared port can establish a connection with it and share the connection to the Internet. On the computer that is connected to the Internet:
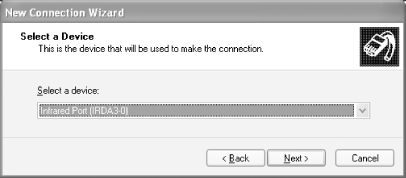
Figure 7-22. Installing the protocols for the shared connection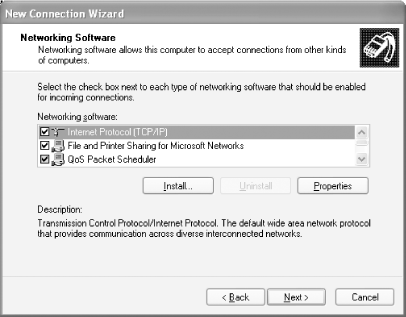 That's it! Your computer is now ready to accept incoming connections. On the computer that is going to use the shared Internet connection, you need to perform these same steps. However, in step 4, instead of configuring an incoming connection, select the option "Connect directly to another computer" (see Figure 7-23). Click Next. The "Host or Guest?" dialog appears. Do the following: Figure 7-23. Creating a connection to the host computer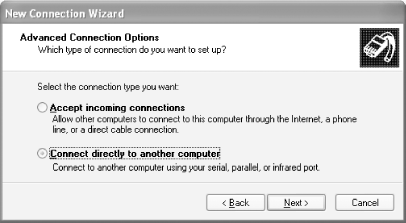
Figure 7-25. Connecting to the host computer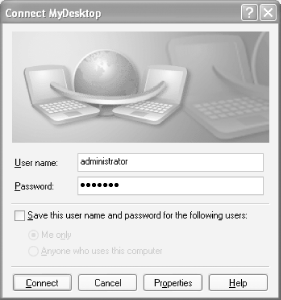 You can now connect to the Internet using the infrared port. Subsequently, you can connect to the Internet by aligning the infrared ports of the two computers and double-clicking on the icon bearing the remote host computer's name (located in the Network Connections window).
|

 Connection Settings.... Turn on the "Allow serial cable or infrared connection to this COM port" checkbox (see Figure 7-12) and click OK.
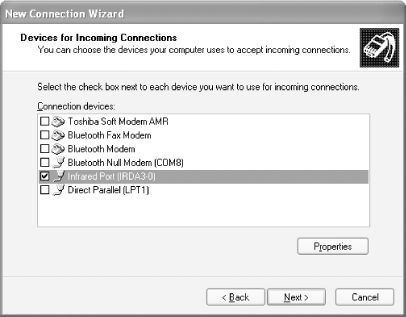
EAN: N/A
Pages: 92