Section 1.4. New Color Screen
1.4. New Color ScreenThe greatest enhancements to the iPod photo are the new color screen and its re-organized menu structure. In the iPod photo, the top level menu allows you to choose between Music and Photos. In the Music menu, you can view by Playlists, Artists, Albums, etc (see Figure 1-9).
Figure 1-9. The new menu structure in the iPod photo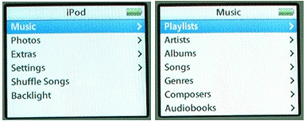 Contrast this to the older iPod, where there is a Browse menu for you to browse songs by Artists, Albums, etc (see Figure 1-10). Figure 1-10. The menu structure in the older iPods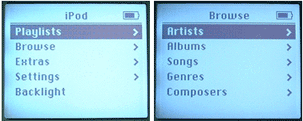 |
