Have Your Way with Buttons
| You have even more flexibility designing your buttons than you do with your menus. You can move them, pick new shapes, and use still or moving images for the actual button. And there's one extra trick: You can choose one frame from a movie as the button image. But I digress we'll get to that one in a minute.
First, the basics. To move buttons, first you must free them from their locked position choose Free Position from the Settings pane of the Customize drawer. Then drag them as you please. To make sure the buttons (and the title, for that matter) don't drop off the edge of the screen for viewers watching your DVD on a television, select Show TV Safe Area from the Advanced menu or use the keyboard shortcut Command-T. iDVD helps you out by drawing a box on your menu screen to show you where to confine your elements, as shown in Figure 6.4. Figure 6.4. This menu screen (left) looks OK, but notice that the Dorky Chapters and Dorky DVD Extras buttons are almost entirely outside the TV Safe Area. Those buttons won't be visible when this DVD is viewed on a TV.
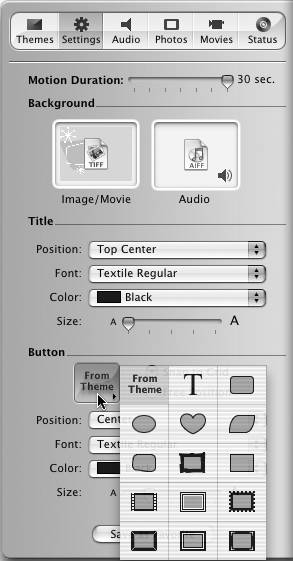
To change the shape of buttons, choose from among the shapes in the shape pop-up menu in the Button pane of the Customize drawer. The shapes are self-explanatory clicking one makes the buttons on the current screen menu that shape. Choosing the letter "T" makes text buttons with no shape or image attached. Finally, if you hate what you've done, choose From Theme to go back to the button shape the theme's designer specified. For heaven's sake, change the titles of your buttons to something more meaningful than Slideshow or the file name of your movies click the button title and type.
You can also move the button titles to sit under, above, on the side, or on top of their buttons by choosing the position you want from the Position pop-up menu in the Button pane of the Customize drawer. You can also change the font if you like, but beware of the same problem that plagued desktop publishing. Having different fonts for buttons and menu titles could clash. One more option with fonts is to increase or decrease their size using the Size slider in the Button area. If you've come up with an overall design you might want to use again, save it as a Favorite (click the Save as Favorites button at the bottom of the Customize drawer). When you do, iDVD adds it to the theme choices.
To share your fantastic new theme with everyone who uses your computer, click the "Shared for all users" checkbox when you name your new favorite. Select Favorites in the Themes pane's pop-up menu to find a favorite quickly.
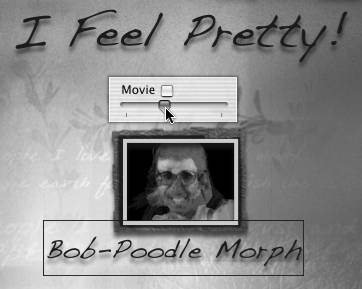
Probably the most fun about fiddling with buttons is deciding what image to use. As I said, you have even more options than with the background for menus. The simplest option is to use a still image. Just drag an image file to the button on the iDVD menu. For slideshow buttons, you can also choose any of the slides in the show as the button image. Click on the button to select it and then move the slider above the button until you find the image you want. You can apply a moving image by dragging a movie file on top of a button. Another cool trick is to use one of the frames of your movie as the image for a button. Just drag a movie file onto the button and click the button to highlight it and make a slider appear above it. Uncheck the Movie option above the slider, then move the slider until you find the frame you want, as shown in Figure 6.6. Click anywhere on the menu to get rid of the slider. This technique only works for movie buttons, not slideshow buttons. Figure 6.6. Using frames from your movies increases your options for custom button images; choose a frame by moving the slider above the movie button.
To add a little variety, you can also change the duration of a movie that's playing on a motion button. One way is to move the Motion Duration slider in the Settings pane. But moving the duration will affect the length of clips playing on the menu as well.
So, here's a different technique to try instead: Play just a few frames of a video on a movie button over and over by selecting the button and dragging the slider almost all the way to the right (but not all the way to the right, which will cause the last frame of the movie to appear as a still frame on the button instead the very short movie you desire). Make sure the Movie option is checked. Turn on Motion (click the button or use the shortcut Command-J) and you'll see a very short clip that plays over and over quickly on this button. Depending on your footage it might look like a short slideshow that toggles between one or two images. If you need to remove a button, just click it and press Delete on the keyboard. Buttons can also be copied, pasted, and deleted the same way you copy, paste, and delete text in a word processor. |