Section 4.6. Other Services
4.6. Other ServicesAs you might expect, your Fedora Core system installs with a full set of graphical tools to ease the administration of various services on the system. There are too many tools to cover in depth here; instead, we'll look at the tools you'll use most frequently to configure and maintain both your system and the services it provides. Tip: In Linux, the general convention is to call user-specific options "preferences." Those that affect the whole system are called "settings." 4.6.1. SambaSamba allows you to share directories and printers with other machines. Typically, these machines are Windows machines, though they don't have to be. To start up the Samba Server Configuration tool shown in Figure 4-16, select Desktop > System Settings > Server Settings > Samba. Figure 4-16. The Samba Server Configuration tool.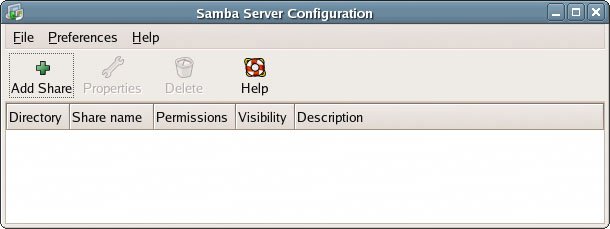 To share a directory on your Linux server with others, click the Add Share button. The dialog shown in Figure 4-17 will display. Figure 4-17. The Create Samba Share dialog.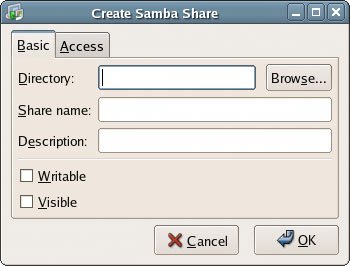 The main Samba Configuration window displays a list of all the shares you've defined. By highlighting a share, you can glean more information about it; you can adjust its settings by clicking on the Properties button. 4.6.2. NFSNFS , or Network File System, is the Linux-native equivalent to Samba. It allows client machines to mount parts of your machine's filesystem as if they were other devices. The interface for the NFS configuration (accessible via Desktop > System Settings > Server Settings > NFS) is much the same as that provided for Samba configuration. The directory, the allowed hosts, and the permissions are all displayed in the main window. You can add or delete a share and, as with the Samba configuration, check and alter the properties of existing shares. Tip: You can mount NFS shares quickly and easily using the mount command. Instead of specifying a device file, such as /dev/fd0, you simply specify a server name and the name of the shared directory, separated by a colon. 4.6.3. Apache Web ServerFigure 4-18. The graphical HTTP configuration tool.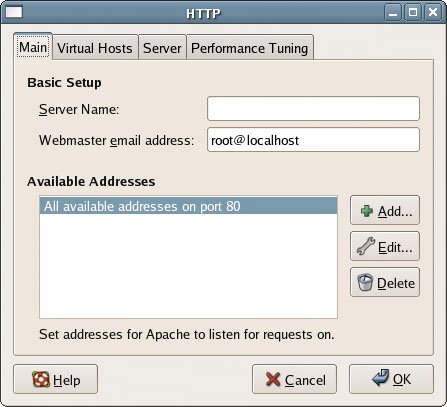 The Server Settings menu includes an HTTP option, which launches the graphical tool shown in Figure 4-18, allowing you to configure your Apache server. We won't dig too deeply into the configuration tool here: we'll cover it in depth in Chapter 5. However, you can see that nearly every configuration option for your Apache server is available in this window. 4.6.4. Package ManagementFigure 4-19. The Package Management tool.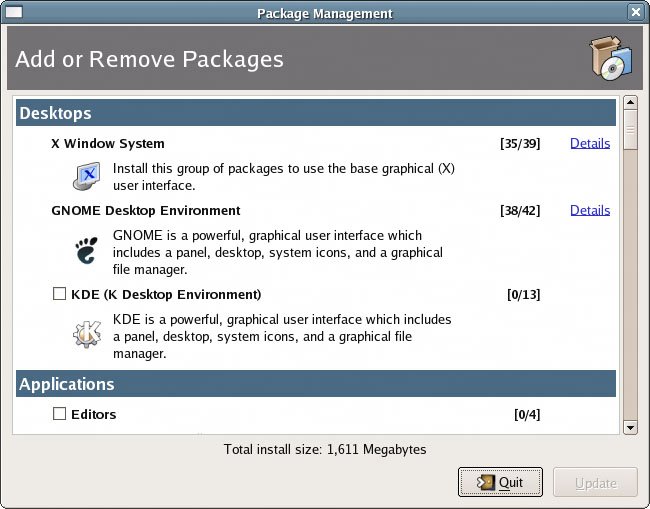 The Package Management tool shown in Figure 4-19 is available by selecting Desktop > System Settings > Add/Remove Applications. This tool provides a means to add and remove applications from your system. You can adjust individual packages within groups, or remove an entire group. 4.6.5. Boot ConfigurationFigure 4-20. The bootloader configuration tool.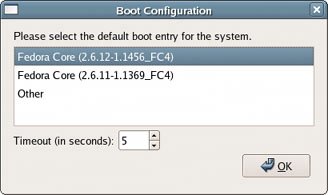 The Boot Configuration tool shown in Figure 4-20 is available from Desktop > System Settings > Bootloader. It's a very simple tool for configuring the GRUB bootloader we discussed in Chapter 1, allowing you to select the kernel your system will use at boot. When automatic updates to the Linux kernel are allowed, it's likely you'll end up with multiple kernels on the system. By default, the system will choose the newest kernel version when booting, but this tool allows you to select from any of the kernels installed on the system. It also provides a tool to set the boot timeout: the period of time the system will wait for you to select a kernel during boot before automatically booting the default kernel version. 4.6.6. Date and TimeFigure 4-21. The Date/Time Properties window.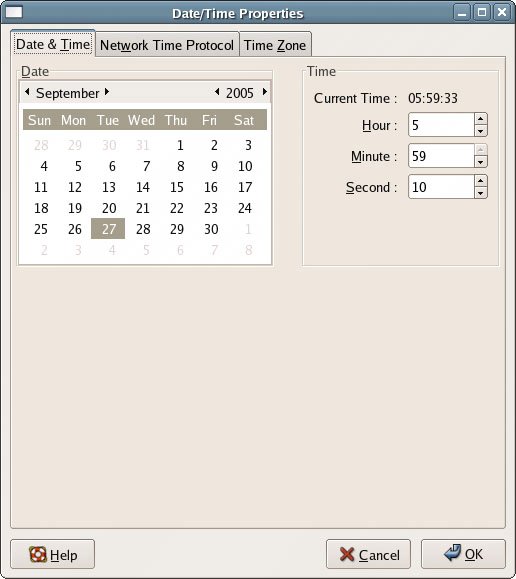 The Date/Time Properties tool (Desktop > System Settings > Date & Time), shown in Figure 4-21, serves several purposes. First, it provides a means to immediately adjust the system date and time. This is important for time-stamping and logging activity on the server. In the Network Time Protocol tab, you can configure the server to make use of the Network Time Protocol (NTP) so that your system will connect with NTP servers around the world to automatically adjust its own internal clock. This will help ensure near-atomic-clock time accuracy on the server. To make use of NTP, check the Enable Network Time Protocol checkbox in the Network Time Protocol tab. Below this checkbox is a list of NTP servers to use; you can manage this list with the Add and Delete buttons. Finally , in the Time Zone tab, the Date/Time Properties tool allows you to select the time zone in which the server is located. If you prefer that the server keep time based on the Coordinated Universal Time (UTC) , check the System clock uses UTC checkbox. 4.6.7. Display SettingsFigure 4-22. The Display settings dialog.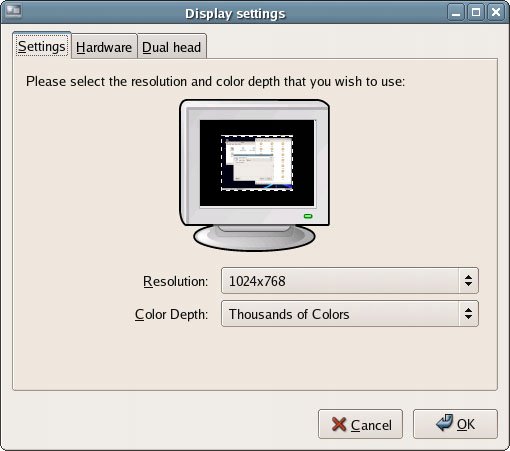 The Display settings tool in Fedora Core (Desktop > System Settings > Display), shown in Figure 4-22, allows you to set the resolution and color depth, identify the hardware you're using (which has probably been auto-detected by the system), and set up "dual head" (or dual monitor) systems. 4.6.8. Network SettingsThe network settings on your machine can be configured via the graphical Network Configuration tool shown in Figure 4-23 (Desktop > System Settings > Network). This tool allows you to configure all elements of your network devices, from the actual hardware, to IP addressing , to DNS and DHCP. Additionally, the devices can be activated or deactivated from within the graphical interface. Advanced operations, such as configuring individual interfaces to allow activation by normal users, or on system start, can also be performed. Figure 4-23. The Network Configuration tool.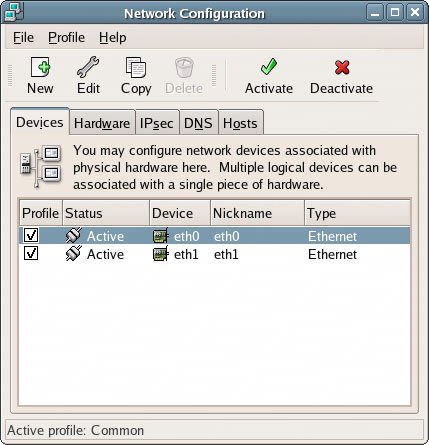 4.6.9. PrintersFedora provides the tool depicted in Figure 4-24 to configure the printers on your system (Desktop > System Settings > Printing). Figure 4-24. The Printer configuration tool.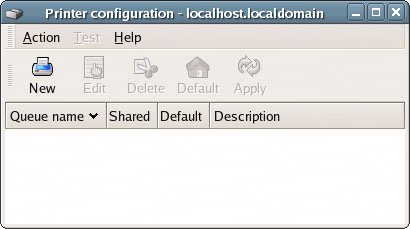 The New button will launch a wizard that allows you to use a printer that's connected directly to the server, or one that's on the network. 4.6.10. Security Level ConfigurationFigure 4-25. The Security Level Configuration tool.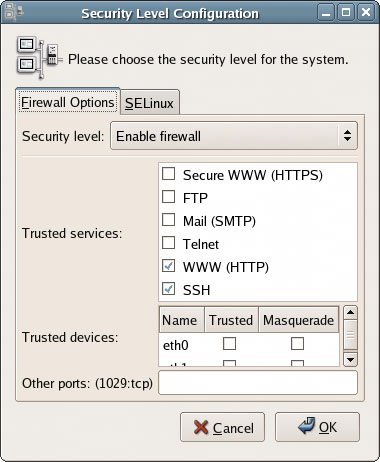 The firewall and Security Enhanced Linux (SELinux) are configured using the Security Level Configuration tool shown in Figure 4-25. To launch it, select Desktop > System Settings > Security Level. This tool is a graphical front end for the iptables command-line tool and SELinux configuration. iptables provides the capability to limit the network traffic coming in and out of your system to known traffic types, to specific ports, and/or to specific devices. This is all configured in the Firewall Options tab of the Security Level Configuration window. Clearly, if you're configuring and administering a Web server, it's important to allow WWW (HTTP) traffic on the machine. You can also optionally allow Secure WWW (HTTPS) traffic. For remote administration, it's useful to allow SSH (Secure Shell) traffic : this will allow you to log into the machine from a remote location and perform administrative duties securely, as if you were sitting at the server. Telnet should seldom be allowed: this protocol has many, many known security issues. If, instead of allowing traffic types, you'd prefer to allow all traffic across a specific interface (the first ethernet device, for example, or eth0), select that option from the Trusted devices list. Note that this is less secure than limiting traffic to specific protocols, as all traffic across the chosen interface will be allowed. You may also want to allow traffic through specific ports. You can define these ports in the Other ports text field of the Security Level Configuration window, separated by commas. Of all the options in the Firewall Options tab, this is the most secure, as it limits traffic to very specific entry points. We'll look at this in more detail in Chapter 9. SELinux is a new addition to Fedora Core, available as a standard option only since Fedora Core 3. It's a series of security related enhancements to the Linux kernel, largely written by the US National Security Administration (NSA). SELinux is such a rich tool that detailed configuration information is beyond the scope of this book. You can access more information about SELinux, including an extensive FAQ list, online at http://www.nsa.gov/selinux/. 4.6.11. Archive ManagerFigure 4-26. The Archive Manager application.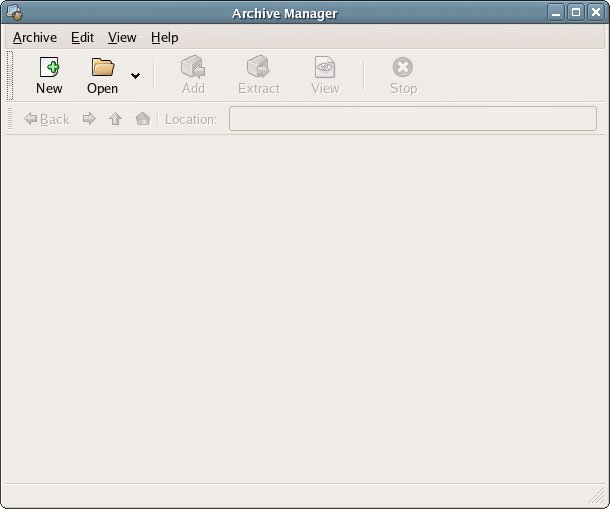 The Archive Manager depicted in Figure 4-26 is used to create archives of files on your system. It can handle a number of different archive formats, from the .zip format with which Windows users will be familiar, through to Java's .jar format, and Unix's .tar. It's available from Applications > System Tools > Archive Manager. The Archive Manager can be used to create a new archive or to add files to an existing archive. It's also used to view the contents of existing archives. To create a new archive, click on the New icon, then select the name and location of the new archive. Next, you'll want to click the Add button in the main Archive Manager toolbar. In the resulting window, click to the location in which you'd like to store the new archive, and give it a name. You can add files one at a time by clicking the Add button, or by dragging and dropping files or folders from Nautilus, as shown in Figure 4-27. Figure 4-27. Adding a directory.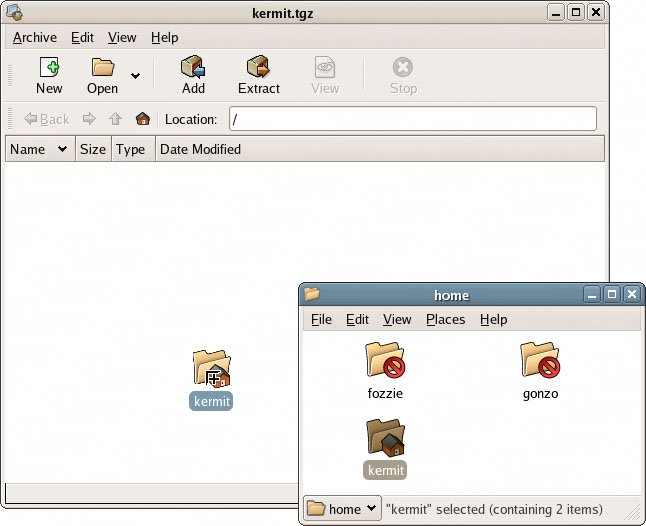 Figure 4-28. Archive Manager's Extract dialog.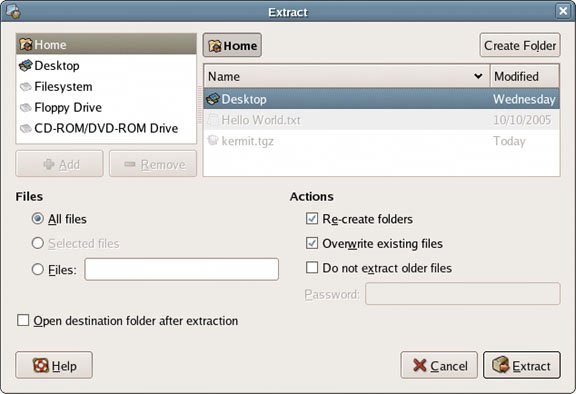 The Archive Manager can also be used to view or extract the contents of an archive. Click Open and select an archive, then click Extract on the toolbar. Archive Manager will display the Extract dialog which, as you can see in Figure 4-28, contains many options for extracting archived files. 4.6.12. Floppy FormatterFigure 4-29. The Floppy Formatter.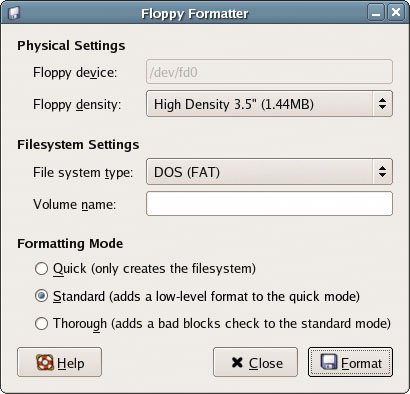 To format a floppy disk, enter the path to the floppy device in the Floppy device text box; if the machine has only a single floppy, /dev/fd0 will be grayed in this text field. Select the density, the filesystem type and, if desired, add a volume name. You can also select the mode for formatting, including quick, standard, or thorough. When all the parameters are complete, click the Format button to complete the format. The Floppy Formatter, which is shown in Figure 4-29, is available from Applications > System Tools > Floppy Formatter. 4.6.13. Hardware BrowserFigure 4-30. The Hardware Browser.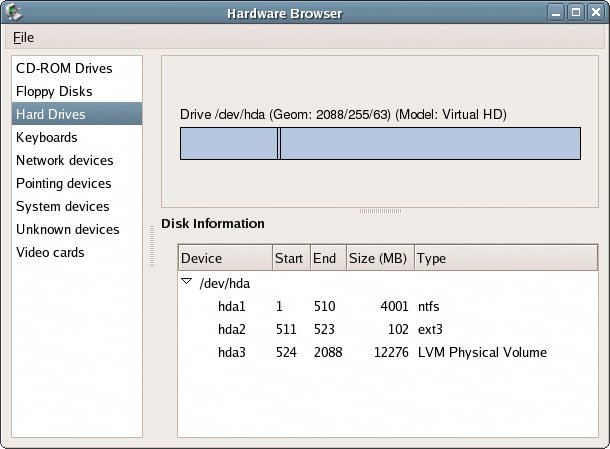 Fedora Core's Hardware Browser provides a view of all the hardware installed on your system. Detailed views can be gained by highlighting a device, as seen in the Hard Drive view in Figure 4-30. Pointing devices, network devices, printers, and all other hardware devices are viewable from this window. You can launch the Hardware Browser by selecting Applications > System Tools > Hardware Browser. 4.6.14. Network Devices and Internet ConnectionFedora , of all the Linux distributions, is especially easy to configure for Internet access. The Internet Configuration Wizard shown in Figure 4-31 (Applications > System Tools > Internet Configuration Wizard) provides a complete, step-by-step walkthrough for configuring Ethernet cards , dialup and DSL modems, wireless cards, and other connection types. Figure 4-31. The Internet Configuration Wizard.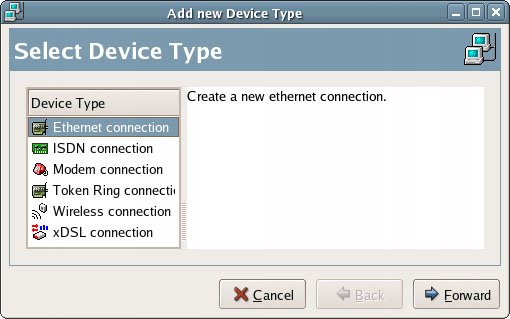 Fedora's parent distribution, Red Hat, pioneered the process of probing and detecting hardware devices. Network devices are no exception, as can be seen in Figure 4-32. The majority of commercially available network devices can be detected and displayed within this window. Figure 4-32. Probing network devices.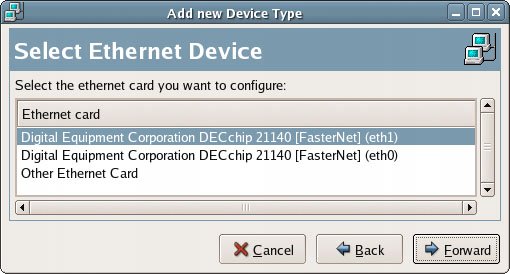 The Configure Network Settings dialog (shown in Figure 4-33), within the Internet Configuration Wizard, allows you to select your connection typeDHCP or staticand to provide a hostname for identification on the network. Figure 4-33. The Configure Network Settings dialog.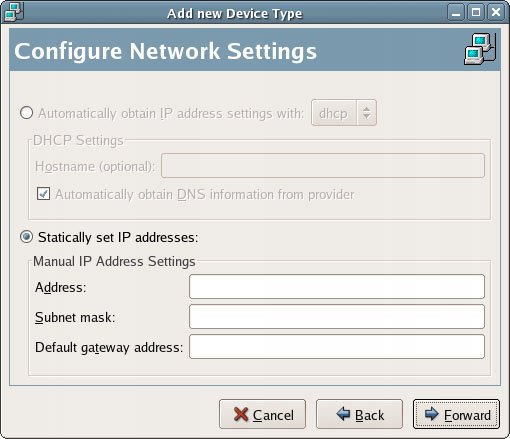 4.6.15. KickstartFedora provides a tool that's intended primarily for administrators in a large environment: the Kickstart Configurator shown in Figure 4-34. Tip: Kickstart is not included in the standard server installation of Fedora Core 4. If you need to install it, run the Package Management application discussed previously, and select the system-config-kickstart package from the Administration Tools group. Figure 4-34. The Kickstart Configurator.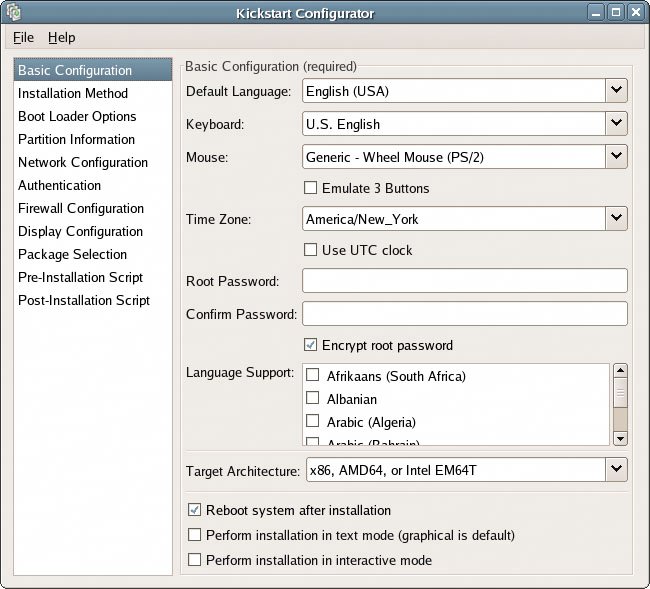 Kickstart provides a way to create a common system configuration that can later be leveraged in the installation of Fedora on multiple systems across a network. All the installation options are contained in a single text file that's written by the Kickstart Configurator tool. The parameters of the text file include boot loader options, partition information, network configuration, authentication, firewall configuration, display, RPM package selection, and other items. This is a favorite Fedora tool, as the Configurator makes it possible to install Fedora on all the machines in an entire office without ever leaving the server room. 4.6.16. System MonitorThe System Monitor shown in Figure 4-35 provides a constantly updated view of the processes running on your system. This can be useful when you sense, but can't quite quantify, a lag in your system. The listing displays the process name, the user under which the process is running, the memory used, and the process ID for each application currently in use. As an administrative user, you can view your processes, all processes, or only the active processes. Figure 4-35. The System Monitor.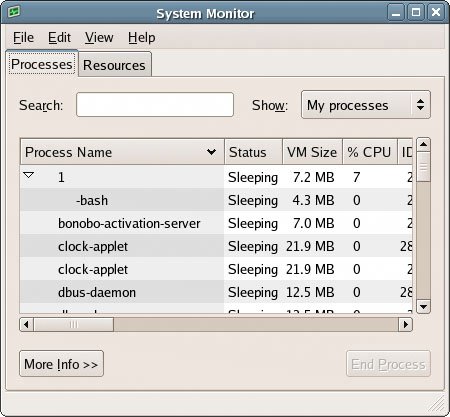 You can obtain detailed information on any process by highlighting the process and clicking the More Info button in the process listing window. If necessary, a running process can be stopped by highlighting the process and clicking the End Process button. Figure 4-36. The Resources tab of the System Monitor.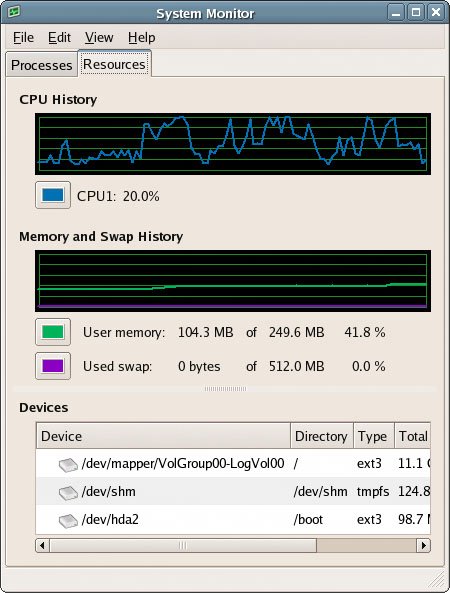 The Resources tab of the System Monitor provides high-level, real-time graphs of your system's resource usage, like those shown in Figure 4-36. CPU and memory usage are shown in graphs that are updated at regular intervals. The lower pane in the window contains a view of hard drive usage, including the percentage of space used on each device. |
EAN: 2147483647
Pages: 92