| Erasing an image is the opposite of painting in the sense that it removes the current pixel values in the image window, based on the brushstrokes. When you erase, consider which Eraser tool you should use and what you want to erase. The Eraser Options bar offers three Eraser tool options: Brush, Block, and Pencil. The Brush eraser lets you erase using a brush preset, as described in Part 2, Task 6, "How to Create Custom Tool Presets." The Block eraser offers a flat, geometric effect that's perfect for hard-edged erasures, and the Pencil eraser lets you erase a single pixel at a time. Select the Erase Tool With the image you want to modify open onscreen, click the Eraser tool in the toolbox and drag to select the desired tool. Choose from the Eraser, Background Eraser, or Magic Eraser tool. 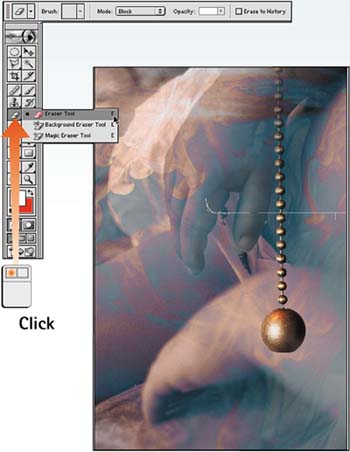
Choose an Eraser Type From the Mode menu in the Options bar, select the desired eraser type. Your options are Brush, Pencil, and Block. 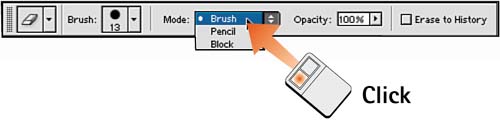
Set the Pressure If Necessary For all brush types except Block, click and drag the Opacity slider to set the desired opacity of the erasure effect. A lower value creates transparency; a high value erases the image more completely. If you want to soften an image rather than erase it, set a low value and brush over it several times. 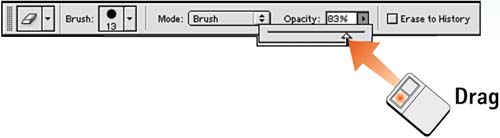
Choose a Brush Size For all eraser types except Block, select the desired brush size from the menu in the Options bar. Select from a preset, or drag the Master Diameter slider to set the brush size. When using the Block eraser, select the Magnify tool and click to zoom in (to zoom out, Mac users can press the Option key, Windows users can press Alt key, and click again); this action creates the desired brush size relative to the image. 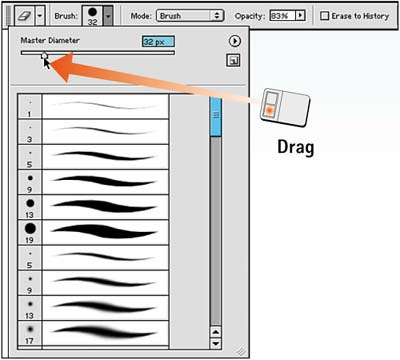
Erase the Image Move the cursor into the image window and click and drag to erase the image. If you're using the Block eraser, you can click once to erase a clean square corresponding to the Block eraser size. 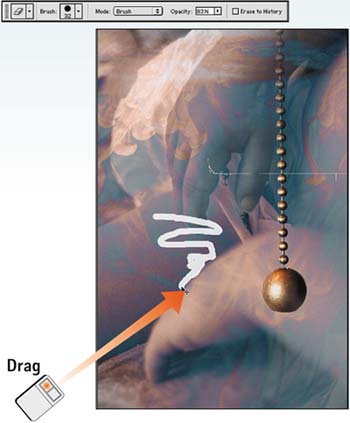
How-To Hints Zooming for the Block Eraser Although you cannot select smaller brush sizes for the Block eraser, you can click the Magnify tool in the toolbox and zoom in to erase tight areas. Erasing to History Enable the Erase to History check box in the Eraser Options bar to erase the image back to the History palette state, as specified by the History Brush selection setting. See Task 4, "How to Use the History Brush," for more information on using the History Brush. |
|