Task 3 How to Crop an Image
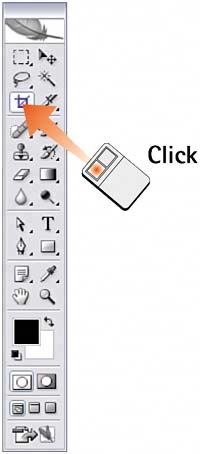
| Cropping an image involves cutting an image down to a specific square or rectangular section, excluding all other unwanted areas. You can crop an image to fit a specific dimension or to enhance its composition. Sometimes cropping involves trimming away a little detail around the edges. At other times, cropping can isolate a small component of an image and discard everything else. Cropping an image does not change the resolution or image quality; it only shrinks the canvas size as unwanted areas are eliminated. 1. Open the ImageSelect File, Open or click the Go to Bridge button on the Options bar and double-click to open the desired image file. 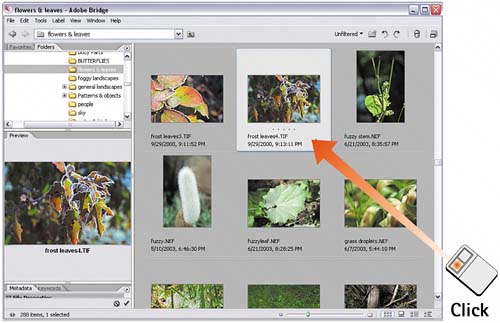 2. Select the Crop ToolSelect the Crop tool from the toolbox. Click and drag the Crop tool over the image to specify the area to be cropped. A dotted line appears, showing what has been selected.
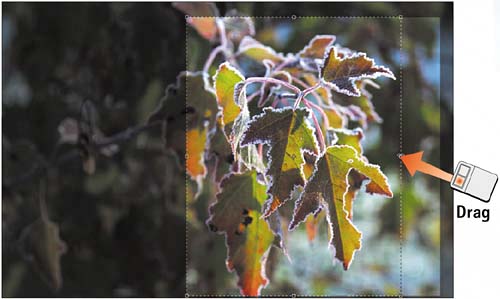
3. Define the Crop AreaIf the Shield check box is selected in the Options bar, the area outside the crop area is covered with a mask color (click the color swatch in the Options bar to change the color). Everything outside the dotted rectangular area will not appear in the finished image area. If the selection is wrong, click the Cancel button (the circle-with-a-slash button) in the Options bar to deselect and then drag again to specify the area. 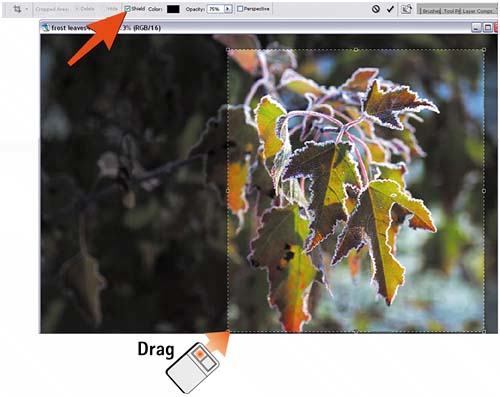 4. Modify the Crop AreaNotice that the crop area has handles at the corners and on the sides. To modify the crop area by extending a side, drag a side handle. To extend the crop area from two adjoining sides, drag a corner handle. To move the entire crop area, click inside the selected crop area and drag the box to a new position.
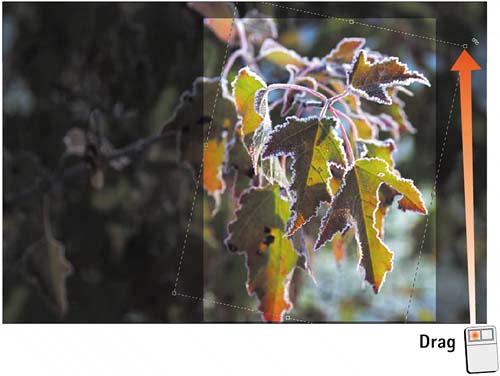
5. Rotate the Crop AreaYou can even rotate the crop area. To do this, position the cursor outside of a corner handle until it changes to a rotate icon. Click and drag to rotate the crop box.
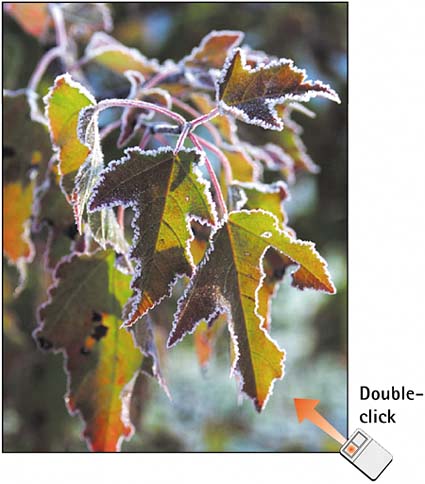
6. Crop the ImageWhen the rotated crop selection is where you want it, double-click in the selection to crop the image, press Enter in Windows or Return on the Mac, or click the check mark button in the Options bar.
|
EAN: 2147483647
Pages: 184