Task 1 How to Measure and Compare Pixel Values
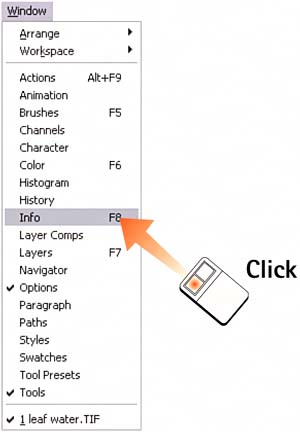
| Knowing how to accurately measure pixel values is an important first step in being able to evaluate and correct digital images. Many times, you have to determine the tonal value of an image area or compare the value of two different areas. It is important to measure these values numerically because pixel values change from monitor to monitor based on contrast settings, ambient light, and monitor brands. Photoshop uses the Info palette to measure pixel values; the Eyedropper and Color Sampler tools also are helpful aids. 1. Open the Info PaletteWith the image open, select Window, Info. The Info palette opens on the desktop.
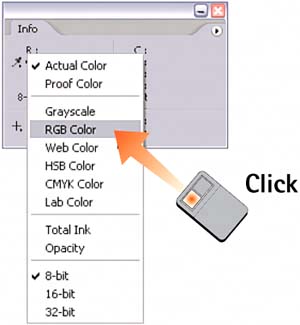
2. Select a Color ModelThe upper-left section of the Info palette represents the color value of the currently selected pixel. Click and hold the Eyedropper icon to display a menu of color modes from which you can select to see the pixel's color specified. (Refer to Part 1, Task 6, "How to Select a Color," for information about color modes.) The Actual Color option refers to the document's current mode. If you want to measure the degree of transparency in a given layer, select the Opacity option from this menu.
3. Select a Variable Color ModelThe upper-right section of the Info palette tracks a second set of color values, which allows you to compare the same pixel value with two different modes. Click and hold the Eyedropper icon, and select the desired color mode from the list. Move the mouse cursor over the image (don't click) and watch the corresponding readings appear in the palette. 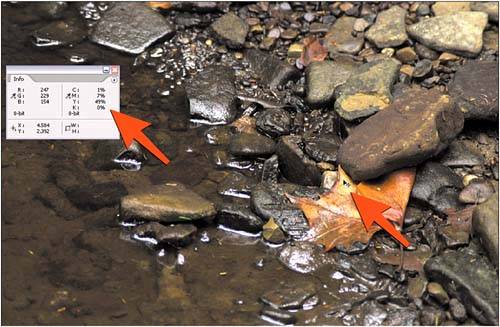 4. Enter Coordinate UnitsWith so many pixels in an image, it can be hard to sample the same one more than once. The pixel coordinates section in the lower-left corner of the Info palette tracks the exact cursor position based on the x,y axis. Click and hold the cursor icon to select the units of measure. 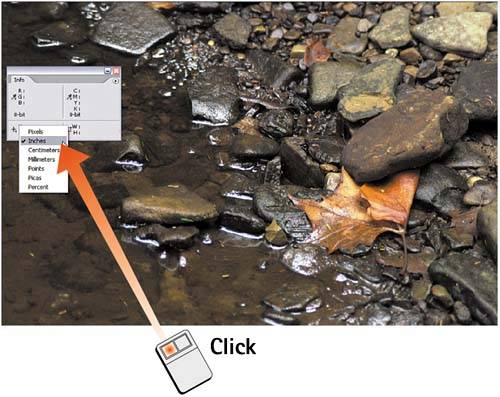 5. Create Sample PointsTo accurately track the same value through the course of your imaging session, use eyedropper sample points. Click the Eyedropper tool in the toolbox; a submenu of two eyedroppers appears. Select the Color Sampler tool (the second tool). Click the tool on the image to place a sample point. A new section is created in the Info palette for each sample point you create. 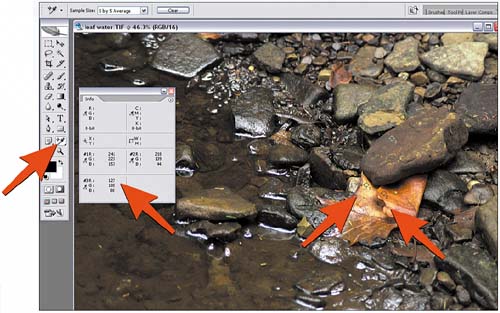 6. Track Sample ValuesDrag the sample point to move it; drag the point off the image to delete it. Alternatively, hold down the Alt key (Window users) or the Option key (Mac users), hover the pointer over the sample point, and click to delete the point from the image (the pointer changes to a scissors when it's on top of the sample point). Remove all sample points by clicking the Clear button in the Options bar; hide all sample points without removing them by selecting View, Extras. Each image supports up to four sample points, which can be saved with the image (if you use a file format such as PSD). If you want, set a color mode for each point area in the palette, just as you did in steps 2 and 3. 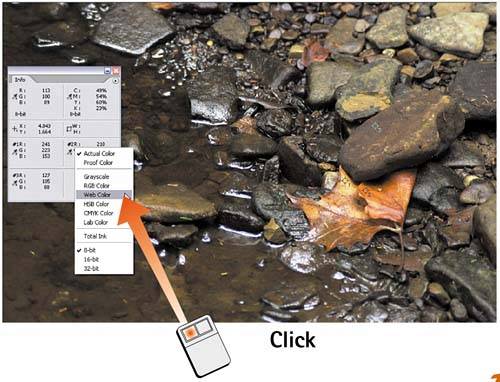
|
EAN: 2147483647
Pages: 184