.Mac
| .Mac is a file sharing, storage, and communication tool that both Mac and Windows users can take advantage of. .Mac can be useful for designers and creative professionals. A lot of people talk about how $99 a year is expensive for an e-mail address, which is one of the benefits of .Mac, but they're missing the point. Let's say you need to get a 20 MB file to a designer in another city immediately. Twenty megabytes is larger than most ISPs will allow you to send. Instead, you can put the file in your .Mac Public folder so that the designer can download it. Most people never back up critical data. .Mac includes Apple's Backup application, which gives you an easy-to-use interface for backing up files to your .Mac account, CDs, DVDs, and hard drives. Most files you create are probably worth more than $99.
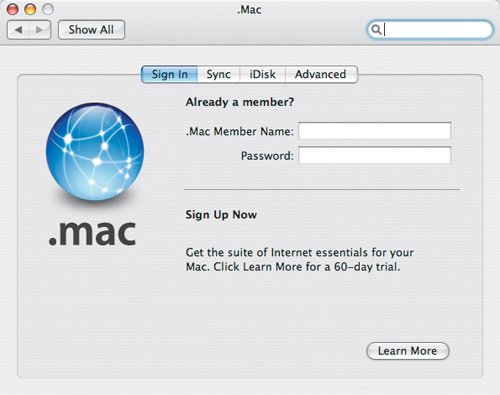
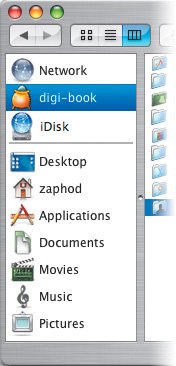
If you have a .Mac account, make sure your member name and password are entered in the .Mac preference pane. To check, launch System Preferences, and then click .Mac. Once your information is entered, you can mount your iDiskyour personal storage space on Apple's serverson your Desktop as you would any other hard drive. Connecting to an iDiskTo connect to your iDisk, click the iDisk icon in the sidebar of any Finder window (Figure 6.29). If you want to connect to someone else's iDisk to download a file, here's how:
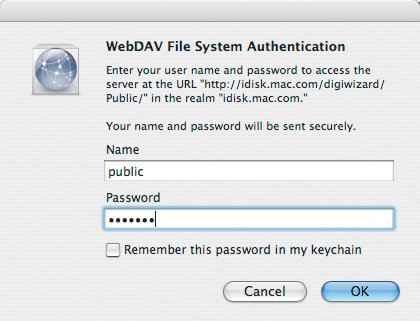
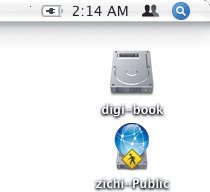
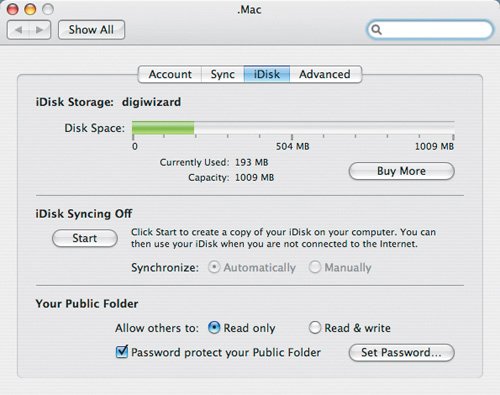
Figure 6.29. To connect to your own iDisk, click the iDisk icon in the sidebar in any Finder window. Figure 6.30. If the .Mac Public folder you are connecting to is password-protected, an authentication dialog will open. Enter the password, and click OK. The password you enter is created by the .Mac account owner in the .Mac preference pane. The Public folders from other .Mac members' iDisks will show up on your Desktop just like any other hard drive (Figure 6.31). Figure 6.31. The Public folder from a .Mac member's iDisk will appear on your Desktop just like any other hard drive. You can copy any files from others' Public folders to your Mac and, depending on their iDisk settings, copy files back to their Public folders. Windows users need Apple's iDisk Utility for Windows XP to connect to an iDisk. They can download it from Apple's .Mac Web site (www.apple.com/dotmac). Tip You can eject an iDisk just as you would any other removable hard drive, CD, or DVD: Simply drag its icon from the Desktop to the Trash in the Dock. Assigning a Password to Your Public FolderSome .Mac users assign passwords to their Public folder to keep prying eyes out. In some cases, it's because they plan to use their iDisk as if it were a hard drive that they can access from anywhere on the Internet, and they want to share the files it contains with a specific group of people. Others assign a password so that they can use their Public folder as a kind of file-transfer way station: They drop off files that other designers or clients can pick up when it's convenient. Tip Sharing files through an iDisk is a great way to avoid file-size limitations that many ISPs place on e-mail attachments, but those files are visible to anyone who cares to look for them. If you assign a password to your iDisk Public folder, only authorized people can access the files inside. Let's walk through assigning a password to an iDisk's Public folder.
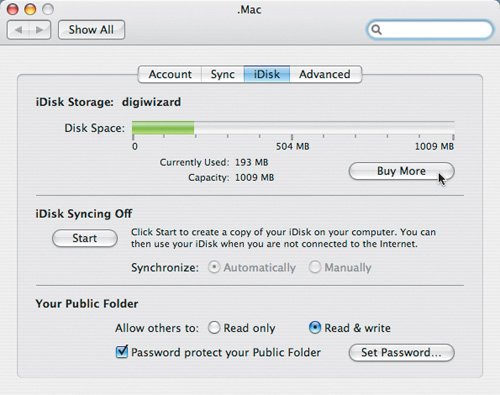
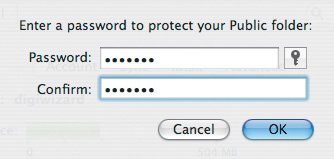
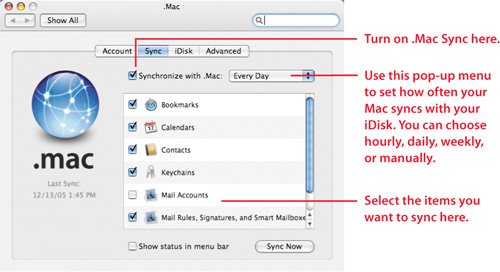
Figure 6.36. Enter the password you want others to use to access your Public folder. This is the password you give to everyone who needs access to your Public folder. If you need to change the password to your Public folder, click the Set Password button on the iDisk tab of the .Mac preference pane. Disabling password protection is a simple process, too. Just go back to the iDisk tab in the .Mac System Preferences pane and uncheck the "Password protect your Public Folder" box. Letting Others Add Files to Your iDiskBy default, your Public folder acts similarly to the Public folder in your home directory. People can copy files from it, but they can't copy files into it. If you want to let other users copy files into your iDisk Public folder, launch System Preferences and then click the .Mac icon. In the .Mac preference pane, click the iDisk tab, and then click the "Read & write" radio button next to "Allow others to". Turning on "Read & write" is a quick and cheap way to create a simple file server so that you can share project files with people who aren't on the same network as you. Remember that your files are visible to anyone on the Internet unless you assign a password to your Public folder. You also have only 1 GB of storage (unless you have purchased additional storage), so don't plan on keeping all of your projects on your iDisk. .Mac SyncIf you use one Mac when you are designing projects at work, and a different Mac at home, .Mac's Sync feature lets you synchronize your Address Book information, Safari bookmarks, iCal calendars, and e-mail accounts, rules, and signatures from Mail between the two Macs. That will save you from double-entering information or getting home and discovering that the important client contact information you need is still on your agency Mac. It's also a handy way to make sure you have the information that usually stays on your Desktop Mac or your MacBook Pro when you travel. Tip .Mac Sync requires that you have an active .Mac membership because it stores the information you sync on your iDisk. Here's how to set it up:
Tip You can synchronize information with up to five Macs as long as they all use the same .Mac account information. Now go to the Mac where you want your synchronized information to go, and enter the same information in the .Mac preference pane on that machine. You also need to make sure that each Mac you are synchronizing has the same .Mac account information. If you aren't sure how to enter your account information, take a look at the sidebar "Setting Up a .Mac Account," earlier in this chapter. Building Your Own NetworkAlthough most designers would prefer to let their Mac consultant or IT department build and maintain their computer network, it's still a good idea to know how your network functions in case you have to do a little troubleshooting yourself, or if you don't have someone that can take care of your network for you. In fact, most of your network needs are probably limited to sharing an Internet connection with other Macs, using a network printer, and exchanging documents with other designers in your agency. Knowing how your network devices connect can save you troubleshooting time if you suddenly find that you can't send documents to your laser printer, or one of your Macs loses its Internet connection.
Take a look at the special online feature called "Building Your Own Network" for a step-by-step walk-through that begins with selecting your own network equipment and guides you through connecting your Macs and printers, and configuring an AirPort Base station. The time you spend learning how to assemble your own network now will help you avoid missing an important deadline later.
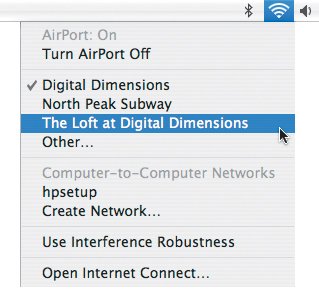
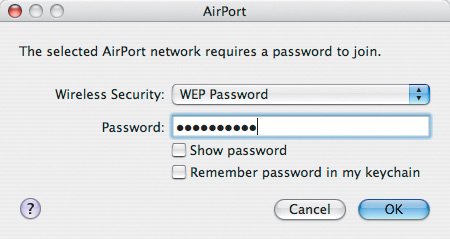
Going WirelessNow that all of your equipment that uses Ethernet cables to talk on the network is up and running, it's time to add the PowerBook to the mix. Although you used the PowerBook to configure the Base Station, it's not actually using the new wireless network until you join it and enter the network password you just created. Start by making sure the AirPort icon is visible in your menu bar. If it isn't, add it. If you aren't sure how, check the "AirPort and Ethernet" section of the "Manually Setting Up a Connection" section, earlier in this chapter. Once the AirPort icon is visible, you're ready to go.
You should now be able to surf the Web and print to the laser printer, like you can with the PowerMac G5. One of the great things about AirPort is that you aren't tethered to your desk. I enjoy taking my PowerBook to other parts of my office or house and working where I'm most comfortable. Summer afternoons on the patio are always great for spurring creative ideas, and I can still check e-mail and print, even though I'm outside. Understanding a little about how networks function goes a long way toward eliminating the intimidation that most people feel when confronted with Ethernet cables, AirPort Base Stations, and broadband modems. If you travel for work, your Mac consultant probably isn't there with you to help set up your Mac for the hotel you are staying in or to add a new dial-up Location. Knowing how to set up a new Location with the appropriate network settings will save you time and frustration.
|
EAN: 2147483647
Pages: 107