5.2 Configuring WebSphere with LDAP
|
| < Day Day Up > |
|
5.2 Configuring WebSphere with LDAP
Before continuing with the configuration steps for this task, it is necessary to ensure that the following installation tasks have been carried out:
-
On the Application Node
-
Installation of WebSphere Portal Server as per 4.2, "Installing WebSphere Portal Server" on page 47.
-
Installation of IBM Directory Client as per 4.4, "Installing IBM Directory Client" on page 88.
-
-
On the Security Node
-
Installation of IBM Directory Server as per 4.3, "Installing IBM Directory Server" on page 77.
-
5.2.1 Creating LDAP directory objects
On the Application Node, insert the Portal Setup CD and copy the \PortalUsers.ldif file to a temporary folder on the local hard drive.
Open the properties for this file and uncheck the Read-Only option within the Attributes section. Open the file using WordPad, search for all occurrences of dc=yourco,dc=com and replace with the suffix as chosen in the LDAP server install section (in our environment, dc=ibm, dc=com).
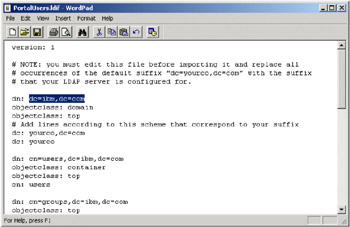
Figure 5-1: Editing the Portal Users.ldif file
You should also search for dn: uid=wpsadmin,cn=users,dc=ibm,dc=com to find the userpassword property associated with this and change it (in our environment, we used sah309r). Do the same for the entry uid=wpsbind,cn=users,dc=ibm,dc=com.
Save the changes. If prompted to save the file in a text only format, click Yes.
Open a command prompt window and change to the directory to which you copied the file. To create in the LDAP directory all the objects that WebSphere portal requires, run the following ldapadd command from within that directory:
ldapadd -h ldap_server_hostname -p port -c -D cn=root -w sah309r -f PortalUsers.ldif
| Note | The ldap_hostname is the name of the host where the directory server is installed (security node) and the default port is 389. The password sah309r is the password in our environment. |
The output obtained should be similar to that shown in the following figure.
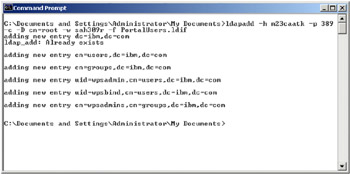
Figure 5-2: Configuring Portal and LDAP - ldapadd
To test that the objects have been added correctly, run the ldapsearch command as follows:
ldapsearch -h ldap_server_hostname -p port -b dc=ibm,dc=com objectclass=*
| Tip | You may need to bind as cn=root to see the full list. |
The output obtained should be similar to what is shown in the following figure.
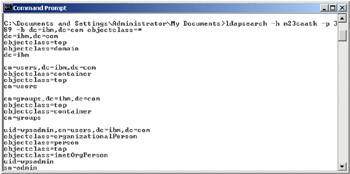
Figure 5-3: Configuring Portal and LDAP - ldapsearch results
| Tip | If the LDAP server crashes after an anonymous bind (that is, after the ldapsearch) you may need to install patch P410x-02D/P411W-02D. This patch is available at:
|
5.2.2 Modifying LDAP Access Control
The Tivoli Access Manager installation/configuration secures the LDAP namespace by modifying the LDAP Access Control List of all suffixes that are defined to Tivoli Access manager. This includes the suffix used by WebSphere Portal to store users and groups.
The WebSphere Application Server uses a defined binding user (stored in the Bind DN and Bind DN Password properties in the LDAP Security Settings) to connect to the LDAP server. This binding user must have sufficient access rights within the directory (at least under the subtree specified by the BaseDN property) to at least perform searches in both the user and group subtrees.
When the directory is secured by Tivoli Access Manager, only TAM-specific accounts are granted access to the suffix configured in TAM as LDAP DN for the GSO Database. The Bind DN user (configured in WebSphere Application Server by the WebSphere Portal LDAP configuration task) no longer has the necessary rights within the directory. To correct this situation, WebSphere Application Server can use an identity that is already set up with the necessary read permission in the ACL of the directory, or you can add a new entry for the Bind DN user to the ACL for the specified suffix within the directory. In our environment, we have chosen the latter option, which entails performing the following actions.
On the Security Node, select Start -> Programs -> IBM Directory Server 4.1 -> Directory Management Tool. Confirm that the Server tab is set to ldap://localhost:389. If not, click Add server and connect to this server.
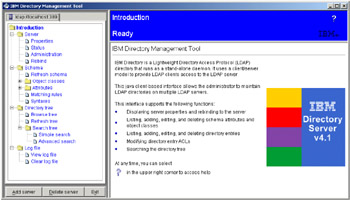
Figure 5-4: IBM Directory Management
Under the Server folder, click Rebind in the left pane. Select the Authenticated radio button. Type in cn=root as the User DN and sah309r (in our environment) as the User password (this is the LDAP admin password set earlier).
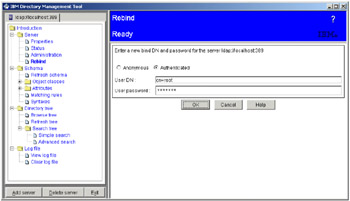
Figure 5-5: Rebind to Directory
Click OK.
Click Browse tree under the Directory tree folder in the left pane. Expand the tree under the suffix dc=ibm,dc=com which appears in the right pane.
Select the entry cn=users and click the ACL button. The window shown in Figure 5-6 will appear.
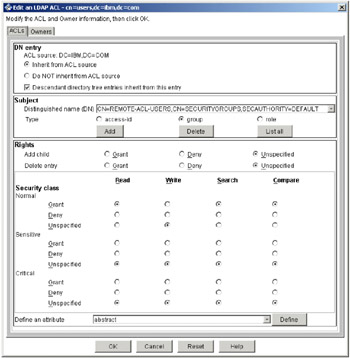
Figure 5-6: Edit on LDAP ACL - cn=users
In the Distinguished name(DN) drop-down list, clear the existing entry and type in UID=wpsbind,CN=users,DC=ibm,DC=com. Set Type to access-id. Verify that the rest of the sections are set as appears in Figure 5-7 on page 124.
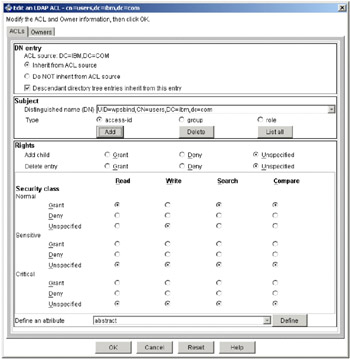
Figure 5-7: Adding a Subject to the Edit on LDAP ACL - cn=users
Once you are done, click the Add button and then OK.
Select the cn=groups entry and click the ACL button. The window shown in Figure 5-8 on page 125 will appear.
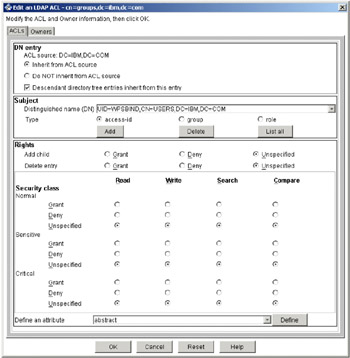
Figure 5-8: Edit on LDAP ACL - cn=groups,dc=ibm,dc=com
Check that the Distinguished name(DN) is set to UID=wpsbind,CN=users,DC=ibm,DC=com and Type is set to access-id. Verify that the rest of the sections are set as appears in Figure 5-9 on page 126.

Figure 5-9: Final edit on LDAP ACL for groups
Once you are done, click the Add button and then on OK.
You can now close this tool by clicking the Exit button at the bottom of the left pane.
To ensure that all the changes have been successfully implemented, if any of the WebSphere Application Servers are running, restart them so that they reconnect to the LDAP server with the new security settings in place.
5.2.3 Setting up LDAP over SSL
On the Security Node, run the Global Security Kit key management utility (gsk5ikm.exe) from C:\program Files\IBM\GSK5\bin (as in our environment).
| Note | You may notice that on the Application Node you have two applications called IBM Key Management Utility. These are:
Note that these applications are not the same even though the user interface is very similar. In particular, IKeyMan supports the Java Key Store file formats used by WebSphere Application Server and WebSphere Portal, whereas IKM supports the CMS Key Database file formats used by the other IBM products. In the following steps, always be sure to use the correct key management utility. |
Select KeyDatabase File -> Open.... In the browse dialog, navigate to C:\keytabs (in our environment) and select the pd_ldapkey.kdb file. Click Open.
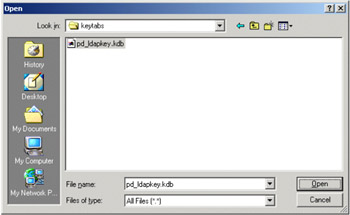
Figure 5-10: Open pd_ldapkey.kdb file
When prompted for the password, enter gsk4ikm.
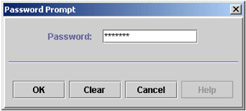
Figure 5-11: Password prompt
Click OK. The pdldap certificate should appear on the screen.

Figure 5-12: pdldap certificate
Select Personal Certificates from the drop-down list. Select the * PDLDAP certificate and click Extract Certificate. Make sure the data type is set to Base64 encoded ASCII data. Choose the location as C:\keytabs\ and type in pd_ldapkey.arm in the certificate file name box.
Click OK. You can now exit the key management utility.
| Note | The EZ_install_ldap.bat file, provided with Tivoli Access Manager and used to install IBM Directory Server automatically, configures IBM Directory Server for LDAP over SSL using the PDLDAP certificate mentioned above. If you have not used EZ_install_ldap.bat to install IBM Directory Server, you will have to manually configure IBM Directory Server to use LDAP over SSL. If you need more information on how to perform this task, refer to the Administration Guide for IBM Directory Server. |
Using a secure transport mechanism, copy the file generated above, pd_ldapkey.arm, from the Security Node to a secured temporary directory on the Application Node.
| Note | We are now moving to the Application Node. |
Start the WebSphere key management utility ikeyman.bat from the directory C:\Program Files\WebSphere\AppServer\bin (in our environment).

Figure 5-13: Key management utility Console
Select Key Database File -> Open. Ensure that the Key database type is set to JKS. Click the Browse button and navigate to C:\Program Files\WebSphere\AppServer\etc then select the DummyServerTrustFile.jks file and click Open. Then click the OK button.
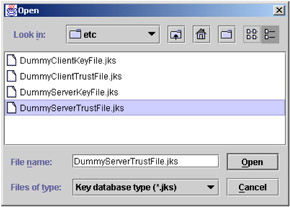
Figure 5-14: Open DummyServerTrustFile.jks
You will be prompted for the password. Type in WebAS and then click OK. The complete set of certificates that the key file contains should appear as in Figure 5-15 on page 132.
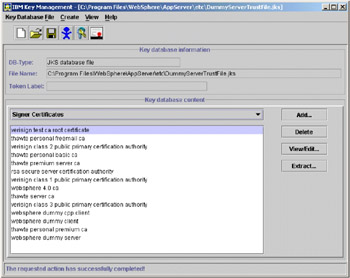
Figure 5-15: Key file Certificates List
Make sure that the category Signer Certificates is selected from the drop-down box and then click the Add button. Click Browse and navigate to the temporary directory where you stored the pd_ldapkey.arm file. Select that file and choose Open.
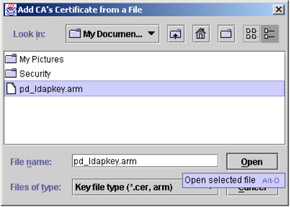
Figure 5-16: Adding CA's Certificate
Click OK. You will be prompted for a label for the Signer Key you are adding. Type in PDLDAP and click OK. This label should appear in the list of Signer Certificates available in the file.

Figure 5-17: List of Signer Certificates
There is no need to save the file because the utility autosaves any modifications to key database files.
Select Key Database File -> Open. Ensure that the Key database type is set to JKS. Click the Browse button and navigate to C:\Program Files\WebSphere\AppServer\java\jre\lib\security. Change the Files type of drop-down list to All Files (*.*) then select the cacerts file and click Open.
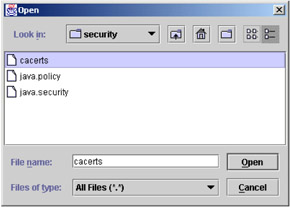
Figure 5-18: Open cacerts file
Click OK.
You will be prompted for the password; type in changeit and then click OK. The complete set of certificates that the key file contains should appear as in the following figure.

Figure 5-19: Complete set of keyfile certificates
Be sure that signer certificates is selected then click Add. Click Browse and navigate to the temp directory where you stored the pd_ldapkey.arm file; select it and choose Open.
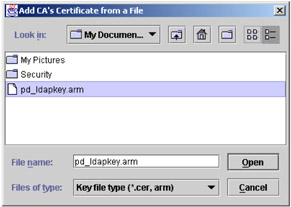
Figure 5-20: Open pd_ldapkey.arm file
Click OK. You will be prompted for a label for the Signer Key you are adding. Type in PDLDAP and click OK. This label should appear in the list of Signer Certificates available in the file.
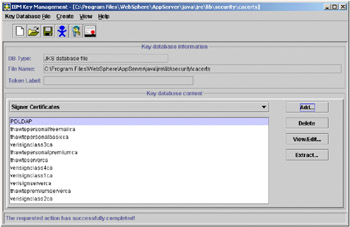
Figure 5-21: Check Signer Certificates list
Close the key management utility.
5.2.4 Configuring Portal for LDAP using IBM Directory Server
On the Security Node, navigate to the folder C:\program files\IBM\LDAP\etc and edit the slapd32.conf file.
Find ibm-slapdSslCipherSpecs in the file and change its value to 15360.
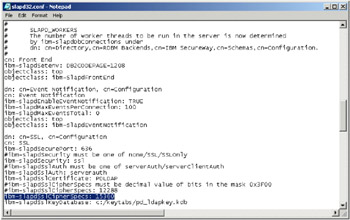
Figure 5-22: Edit the slapd32.conf file
Save the file and exit. Restart IBM Directory Server V4.1.
| Note | We now move to the Application node. |
On the Application Node, navigate to the folder <PortalServer_Root>\config\helpers and edit the security_ibm_dir_server.properties file. Change the properties as specified in Table 5-1.
| Parameter | Default Value | New Value |
|---|---|---|
| WasPassword | (blank) | sah309r (in our environment) |
| WpsHostName | <WpsHostName> | your_hostname |
| PortalAdminPwd | (blank) | sah309r (in our environment) |
| LTPAPassword | (blank) | sah309r (in our environment) |
| SSODomainName | <SSODomainName> | your_dns_domain |
| LDAPHostName | <LDAPHostName> | your_ldap_hostname |
| LDAPPort | 389 | 636 |
| LDAPAdminUId | <LDAPAdminUId> | cn=root |
| LDAPAdminPwd | (blank) | sah309r (in our environment) |
| LDAPBindPassword | (blank) | sah309r (in our environment) |
| LDAPSuffix | dc=yourco,dc=com | dc=ibm,dc=com |
| LDAPsslEnabled | false | true |
where:
-
your_hostname is the computer hostname where the Portal Server is installed
-
your_dns_domain is the domain portion of your fully-qualified DNS hostname
-
your_ldap_hostname is the computer hostname where the LDAP server is installed
After this, search for dc=yourco,dc=com and replace it with your specific domain suffix (as noted above in the table dc=ibm). There should be five replacements. Save the file.
Open a command prompt window and change directory to <Portal_Root>\config then run the wpsconfig.bat command as follows:
wpsconfig -DparentProperties=config/helpers/security_ibm_dir_server.properties
This will modify the wpsconfig.properties file with the parameters specified in the modified helper file. At the end of the execution, you should get the output Build Successful.
Change to the AppServer_Root\bin directory and run the startServer command as follows:
startServer server1

Figure 5-23: Start WebSphere Application Server
Change back to the Portal_Root\config directory and run the wpsconfig command with the validate-ldap option as follows:
wpsconfig validate-ldap
You should receive the output Build Successful. After this, run the wpsconfig command again as follows:
wpsconfig enable-security-ldap
If you receive the output "Build Failed" do not be overly concerned.
On the Application Node, navigate to the folder <wp_root>\shared\app\wmm and edit the wmm.xml file.
Search for the ldapPort line and insert the following after this line:
java.naming.security.protocol=" ssl"
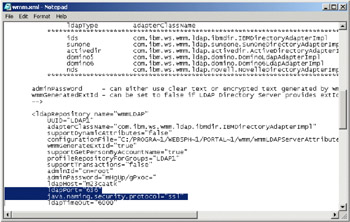
Figure 5-24: Edit wmm.xml file
Save and exit the file.
Change to directory <was_root>/bin and enter the following command:
stopServer WebSphere_Portal -username wpsbind -password sah309r
After the stopServer command completes, change back to the <Portal_Root>\config directory and run the wpsconfig command with the action-create-deployment-credentials option as follows:
wpsconfig action-create-deployment-credentials
Change to directory <was_root>/bin, and enter the following commands:
stopServer server1 -username wpsbind -password sah309r stopServer WebSphere_Portal -username wpsbind -password sah309r startServer server1 startServer WebSphere_Portal
Test that the above changes have worked by launching the WebSphere Administrative Console application and checking a Portal session. That is, select Start -> IBM WebSphere -> Application Server V5.0 -> Administrative Console and ensure that a browser window appears prompting for the user ID and password to log in. Also, select Start -> IBM WebSphere -> Portal Server v5.0 -> First Steps -> Launch WebSphere Portal and ensure that a working portal session displays.
|
| < Day Day Up > |
|
EAN: 2147483647
Pages: 73