Installing the Ubuntu Live DVD
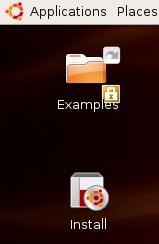
| After you have played with your Ubuntu Linux live DVD for awhile, I'm confident that you are going to want to make the experience permanent. Linux is far superior to your old OS in many ways and after you install it to your hard drive, Ubuntu Linux will run much faster. Luckily, the process of installing Ubuntu Linux is practically pain free with Ubiquity. Answer a few simple questions and in a few minutes, you'll have Ubuntu installed on your hard disk. On your desktop, directly below the Examples folder, is an icon labeled Install(see Figure 2-12). Double-click the icon to start the Ubiquity Installer. Figure 2-12. Double-click the Install icon to start the Ubiquity installer. When you do this, the Ubiquity Installer window appears. The first screen is a welcome screen, but it is also a warning that installation is a process that will overwrite your current hard drive configuration (see Figure 2-13). Figure 2-13. Ubiquity's first screen is mostly a welcome screen, but take note of what it has to say, especially when it comes to backups.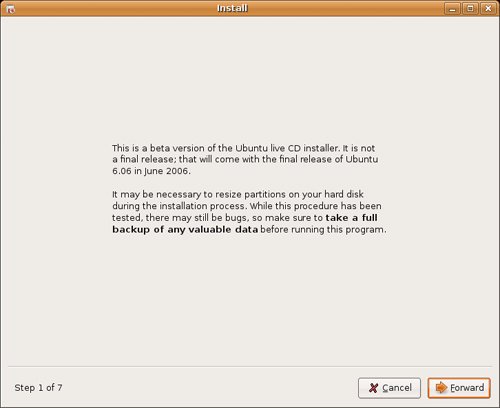 The warnings about making sure you have taken a backup of your data cannot be repeated too many times. Make a backup, then make another backup. Click the Forward button and you are taken to the installation language selection screen (see Figure 2-14). This language will also be the default language when the system is fully installed. English is selected by default, but Ubuntu has been internationalized for dozens of languages. There's no Klingon here, but Esperanto is available. Figure 2-14. It's time to select your language of choice.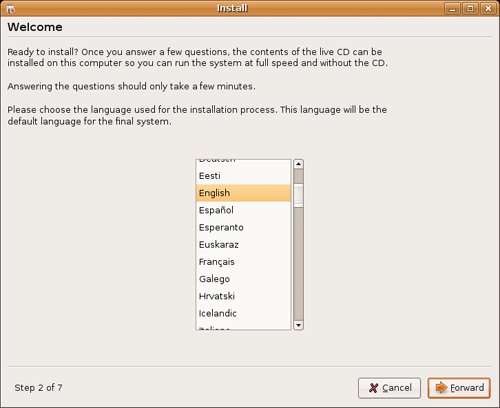 Make your choice, then click Forward to continue. The next screen is labeled "Where are you?" This is where you set your location and time zone. Select your location by clicking on the map. One click will zoom you in to an area from which you can fine tune your selection. There's also a drop-down box labeled "Selected City" that you can use to the same effect but clicking on the map is more fun. Click Forward to continue. Figure 2-15. Select your location and time zone by clicking the map.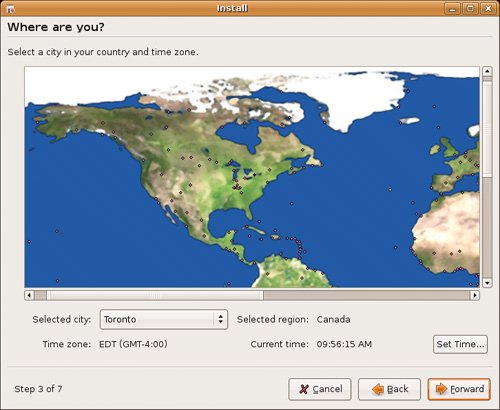 The next screen, labeled "Keyboard layout" sounds very much like the language selection screen (see Figure 2-16). Nevertheless, your keyboard layout may not necessarily reflect your language of choice. As a bilingual Canadian, I still use a keyboard with an "American English" layout because that selection most closely reflects my notebook's keyboard. If you have an alternative keyboard, make your selection, then use the input box at the bottom of the screen to test your selection. Figure 2-16. The keyboard selection screen provides a text box so you can test your hardware. When you are satisfied, click Forward. A new window labeled "Who are you?" will appear. This is the personal identification window, from which your initial user login will be created (see Figure 2-17). Figure 2-17. Both you and your computer need a name. The username you specify here is that of the primary user. You can add users later.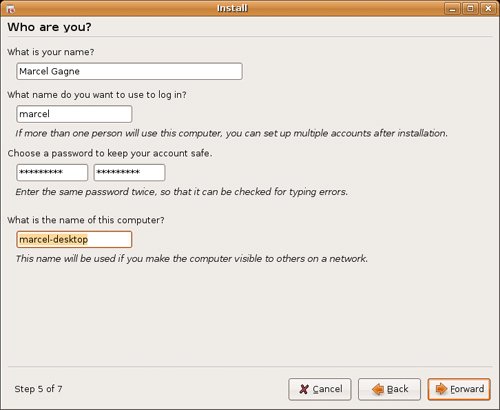 Enter your full name in the "What is your name?" field. In the second field labeled "What name do you want to use to log in?" select a username, preferably eight characters or fewer (although this isn't a hard and fast rule), and tab to the Password field. When you enter the password, it is echoed back as stars (or asterisks) so don't worry if you can't see what you are typing. After this, you must enter the password again. This is to make sure that you typed what you thought you typed in the first password field. Finally, under the heading "What is the name of this computer?" enter a hostname for your system. By default, the installer appends "-desktop" to your username, but you are free to select something else. Click Forward and Ubiquity's partitioning tool starts. A small window appears titled Starting up the partitioner. A progress bar keeps you posted as your disks are scanned and analyzed. A few seconds later, the main partitioning window appears. It is labeled "Select a disk". Most people will have just one disk but if you have multiple disks, select one here and click Forward. The next window, labeled "Prepare Disk Space", lets you select the amount of space you are willing to allocate (see Figure 2-18). Figure 2-18. The partitioner's job is to help you create a place on your disk (or disks) to install your Ubuntu system.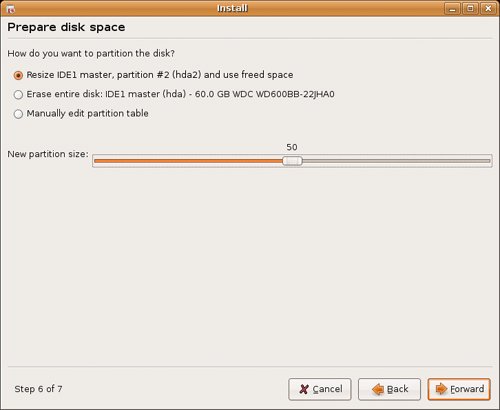 The information you see on the partitioning screen will vary from system to system. My test system has two hard drives to choose from. Yours may have a single drive with a Windows partition that you are happy to overwrite. Notice the first option in the list. It provides an option for resizing the current partition. This is particularly useful for those who are running Windows on their system and would like to have Ubuntu and Windows co-exist (yes, it is possible). If you select this option, the slider at the bottom of the list activates and you can use it to select the percentage of space you would like to have freed up. Tip
For this example, I've chosen to use the entire first disk (the biggest on this old computer). After clicking forward past this point, a warning window appears asking if you are "Ready to install". The choices you have made up to this point, including language, username, and so on, are all repeated for you here. If you chose to use the entire disk, like me, this is your last chance to stop before your hard drive is erased in preparation for installation. Read the dialog box carefully as it will also confirm the partitions to be createdthis is particularly important if you chose to use the available free space or you opted for custom partitioning. If you are ready, have a good backup, or you simply don't care about what's on the PC, click Install to continue. Tip
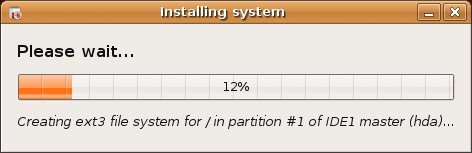
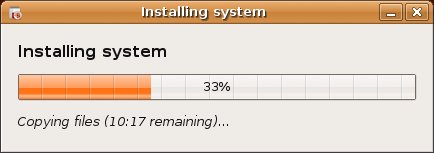
A dialog box appears informing you of the progress as your disks are partitioned and formatted (see Figure 2-19). Figure 2-19. A status bar informs you of the progress as your disks are partitioned and formatted. Although the excitement may be running high at this point, what happens next is only so exciting, and the amount of time it takes depends largely on how fast your processor is, how much memory your system has, and how fast your disk drives are. This is usually a good place to walk away and get a snack and something to drink. If you feel so inclined, you can watch the progress bar as your system is prepared and installed (see Figure 2-20). Figure 2-20. Besides providing a graphical status on the install process, the window also tries to provide a time estimate to completion. Some time before that bar hits 100 percent, you'll see a message at the bottom of the progress window informing you that it is configuring the system, creating the user, and configuring hardware, network, bootloader, and so on. These are the final steps in creating your new Ubuntu Linux system from the live DVD. When the installation completes, a final dialog appears. Click "Reboot the computer" to finish the process. The system shuts down and the DVD is ejected. Make sure you remove the DVD, then press Enter to reboot your system. |
EAN: 2147483647
Pages: 201