A Multipass Sharpening Workflow
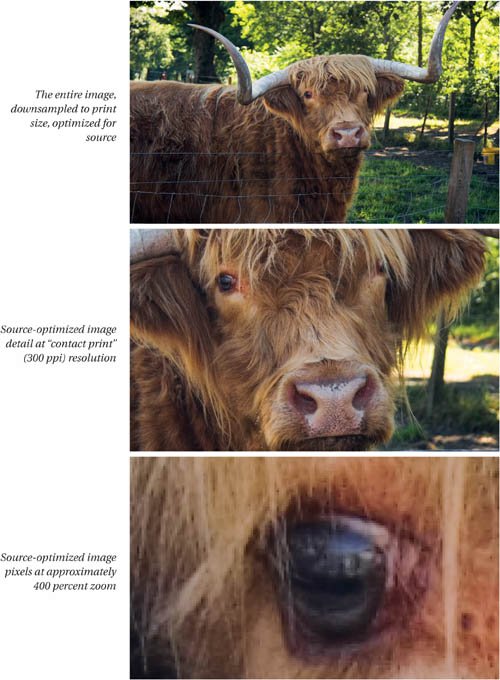
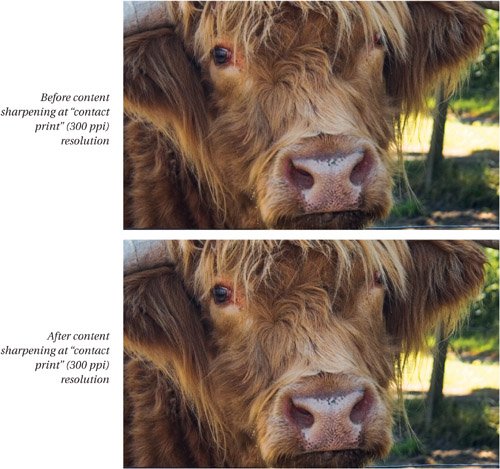
| It's impossible to address the varying needs of the image source, the image content, and the output process in a single pass, because each imposes requirements that can contradict the others. The solution, then, is to build a multipass sharpening workflow that addresses the individual needs separately. Each component has its own requirements, and by ignoring everything else, we can tailor each sharpening pass to address a specific issue. Optimizing for the Image SourceOptimization for the image source is dictated by two factorsthe noise signature, and the amount of detail the system can record. The goal of the first pass is to create an image that responds well to subsequent rounds of sharpening aimed at the image content, and at the output process. I recommend performing any major tonal correction before doing any sharpening or noise reduction, because major tonal manipulations can easily undo the sharpening or noise reduction if it's done beforehand. The inherent softness of most digital captures (due to the antialiasing filter) requires actual sharpening, where with film the emphasis may be on grain reduction instead. Optimizing Digital CapturesWith digital capture, the lens is more often than not the practical limiting factor on the amount of detail the system can record, but the optical low-pass (antialiasing) filter found in the majority of digital SLRs sets an absolute limit. For those few cameras that lack an antialiasing filter, it may be worthwhile making lens-specific settings, but in general we can come up with a single sharpening routine that is optimal for a given camera. High-ISO shots and significantly underexposed images may need special handling of noise, in either the raw converter or in Photoshop. Severe noise may call for a dedicated third-party noise reduction plug-in. With normal exposures at low ISO settings, it's often enough to simply avoid sharpening the noise by protecting the extreme shadows. Any special noise reduction should always be applied before any sharpening! Optimizing Film CapturesIt's a little more difficult to make generalizations about film capture since the scanner represents a huge variable in both tonal rendering and resolution. With film, the amount of resolvable detail may be limited by the film grain or by the lens. On most film captures, the first pass is less about sharpening the image and more about mitigating the film grain. At one extreme, 35mm color negative requires strong grain reduction, while at the other extreme, large-format (4 x 5 or 8 x 10) transparencies can usually skip the first pass altogether. Practical Source OptimizationFigure 3-4 shows three views of a well-exposed digital capture before and after treatment for the image source. Figure 3-4. Source optimization for a digital raw capture
The difference between the unsharpened and sharpened versions is imperceptible on the image downsampled to print size, and barely perceptible on the "contact print" detail. On the 400 percent zoom view, however, the difference should be obvious. This is a very gentle sharpen indeed! The salient features of this sharpening are:
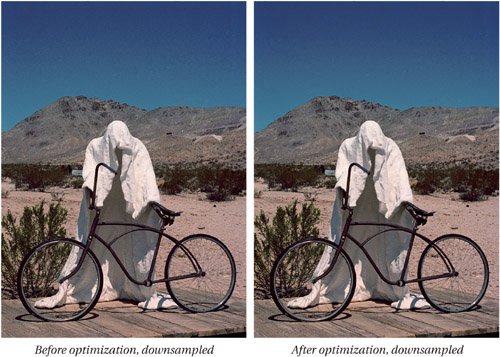
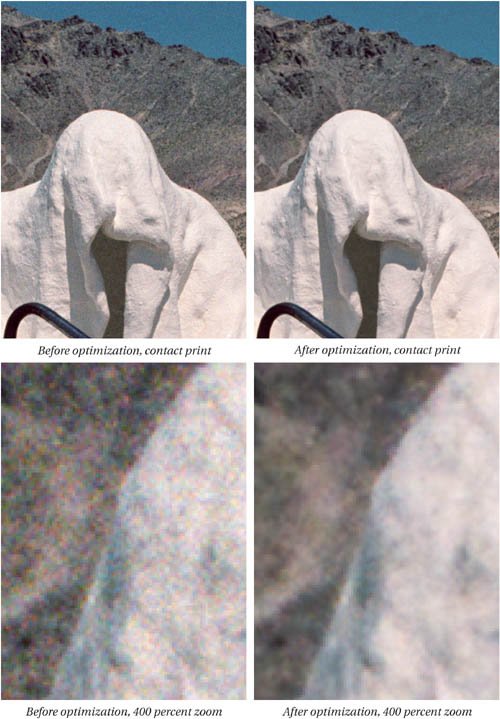
Figure 3-5 shows the source optimization for a color negative. In this case, the focus is on noise reduction rather than sharpening. The goal in both cases is to improve the relationship between image detail and system noise, but the different capture media demand different treatments. Figure 3-5. Source optimization for color negative
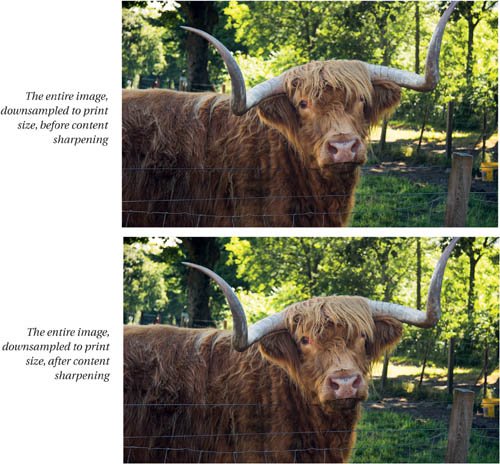
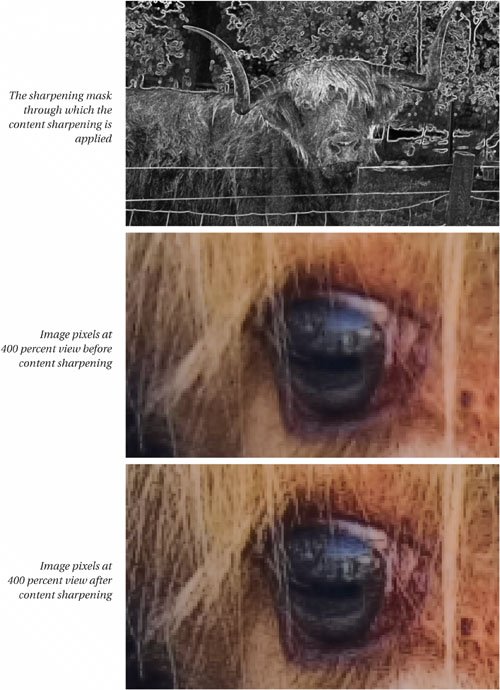
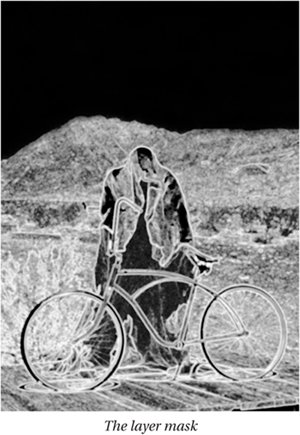
I'll discuss specific techniques you can use to achieve these ends in Chapter 4, Sharpening Tools and Techniques. Photoshop invariably offers several different ways to accomplish any given task, and for the moment it's more important to understand the goals of the different stages in the workflow than it is to focus on the details of the techniques needed to attain those goals. Reasonable people may question whether such barely perceptible edits as the ones shown in Figures 3-4 and 3-5 are actually useful. Bear in mind that the real goal of this step in the workflow is to improve the relationship between edges and noise so that the next step, sharpening for content through an edge mask, works optimally. So it's less about the image, and more about setting the image up to make a good sharpening mask! Optimizing for Image ContentAs you saw in Chapter 2, Why Do We Sharpen, a busy, high-frequency image with lots of fine detail demands a different kind of sharpening than does a low-frequency image with soft, wide edges. This phase of the sharpening workflow is where that difference is taken into account. Figure 3-6 shows the image from Figure 3-4 before and after content sharpening, along with the mask that was used to isolate the sharpening to the edges. The mask plays a dual roleit prevents sharpening areas of flat texture, leaving headroom for the final output sharpening, and it provides some control over the width of the sharpened edges. Figure 3-6. Content optimization for a high-frequency image
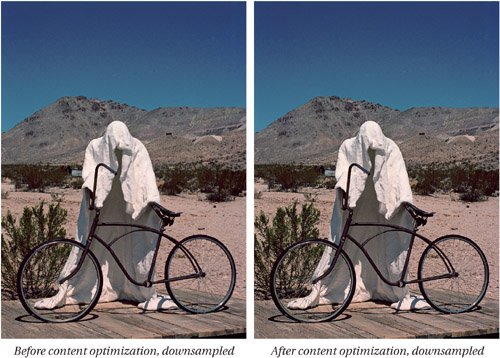
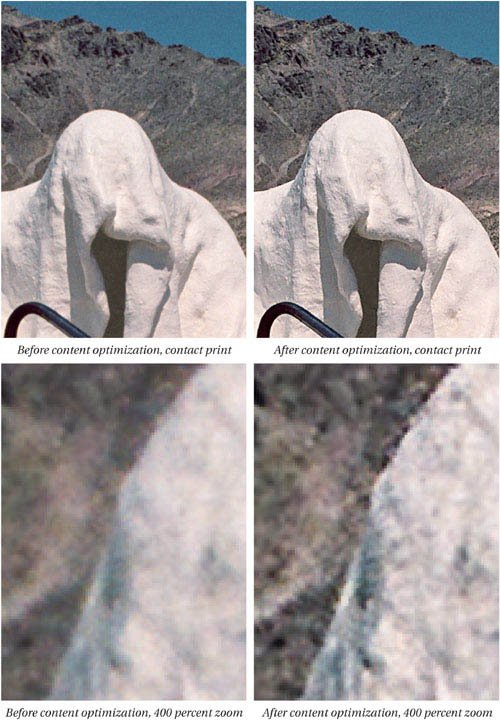
The layer mask offers some limited control over the width of the sharpening halo, but it's vital to match the actual sharpening settings to the image content rather than relying on the mask. I'll discuss techniques for building and applying layer masks, and applying sharpening through them, in Chapter 4, Sharpening Tools and Techniques. For now, it's enough to remember the simple rule that white reveals and black conceals. (Intermediate shades of gray, logically enough, apply varying opacities to the masked layer proportional to the shade of gray.) The layer mask's real job is to protect the areas we don't want to sharpen at this stage, which is everything except the obvious edges. Note the qualifier, "obvious"almost all images contain a mixture of low-frequency, mid-frequency, and high-frequency edges. You need to decide the dominant tendency and sharpen accordingly in this phase of the workflow. Figure 3-7 shows the image from Figure 3-5 before and after sharpening for content through a layer mask. While the image contains mid-frequency and high-frequency details, the dominant tendency I chose to emphasize is the low-frequency edges, which are the most important in this image. Figure 3-7. Content optimization for a low-frequency image
The effect of content sharpening is much more noticable, even on the downsampled image, than that of source optimization. Content optimization shares some of the properties of source optimizationthe sharpening is applied in luminosity blend mode to eliminate the possibility of color shifts, and the sharpening is focused on the midtones, with nothing being sharpened below level 25 or above level 200but in this step of the workflow, the sharpening radius is tuned to the image content we wish to emphasize rather than being dictated by the properties of the sensor. Content sharpening sets the image up for output sharpening for specific uses, but it also provides two useful and important benefits. Use-Neutral Master ImagesThe combination of source and content optimization produces a "use-neutral" master image that can be repurposed for different outputs. The optimized image can be downsampled or, to a lesser extent, upsampled, then sharpened for the specific use at hand. This is a very different model from the traditional sharpening workflow, where sharpening starts from scratch at every different use. The presharpened image becomes a digital asset, ready for a wide range of output uses. Of course, there are limits. Film grain makes scanned images less amenable to resizing than digital captures, but experience suggests that I can upsample presharpened digital captures to 200 percent or downsample to 10 percent without additional handling beyond output sharpening. Fixed Output SharpeningA second benefit of this workflow is that, since all the image-specific and source-specific issues have already been addressed, output sharpening becomes a fixed, determinate process that requires no decision making. Since the relationship between input pixels and output dots (or output pixels if the output is to the display) is fixedthat is, it doesn't vary from image to imageit becomes possible to create optimal routines for output sharpening that do not and need not vary with image source or content. In the future, such sharpening routines may be embedded in printer drivers or RIPs, where they can be applied automatically. (Many workflows already rely on in-RIP separations and in-RIP trapping, so in-RIP sharpening doesn't seem like much of a stretch.) At this stage in the workflow, the only factors that influence sharpening are
All these factors are known at print time, so output sharpening becomes a simple matter of selecting and running the appropriate routine. But before we get to output sharpening, there's another optional stage in the workflow, that of creative sharpening. |

EAN: 2147483647
Pages: 71