| Dynamic- and input-text fields within Flash can be set up to interpret basic HTML code which means you can display text containing hyperlinks and various colors and styles. Flash is able to interpret the HTML tags in the following table. | TAG | DESCRIPTION | | <a> | For setting an anchor (hyperlink) value | | <b> | For bolded text | | <br> | For creating a break (starting a new line) | | <font color> | For setting text color | | <font face> | For setting text font style | | <font size> | For setting text size | | <i> | For italicized text | | <p> | For starting a new paragraph | | <u> | For underlined text | To be able to display HTML-rendered text, a text field must be made HTML-aware (as described in Step 3 of the "Validating Strings" section of this lesson). Once you've set a text field to render HTML text, you would use the following syntax to display formatted HTML: myText.htmlText = "<b>Hello! </b><br>Thank <u>you</u> for visiting our site."; This script tells the myText text field instance to display the string shown as rendered HTML-formatted text. The rendered HTML is simply a string of text containing the aforementioned supported HTML tags.  NOTE You cannot type HTML-based code directly into a text field and expect Flash to interpret it.
The htmlText property represents the actual HTML code that a text field contains, thus using the example from above, the following: myVariable = myText.htmlText; would set myVariable to contain a string value of "<b>Hello! </b><br>Thank <u>you</u> for visiting our site." Whereas the following: myVariable = myText.text; would set myVariable to contain a string value of "Hello! Thank you for visiting our site." Same text, but because we referenced the text property, the string value returned does not include HTML tags. You can use variable values in conjunction with HTML tags to create truly dynamic text messages. Take, for example, the following: myText.htmlText = "<b>Hello " + name + "!</b><br>Thank <u>you</u> for visiting our site."; If name has a value of "Jack," the above line would look like the following: myText.htmlText = "<b>Hello Jack!</b><br>Thank <u>you</u> for visiting our site."; You can even set which tags are used dynamically. For example: tagToUse = "u"; myText.htmlText = "<" + tagToUse + ">Hello Jack!</" + tagToUse + ">"; The above would be rendered as the following: <u>Hello Jack!</u>"; This will cause "Hello Jack!" to appear with an underline. Now take a look at the following: tagToUse = "b"; myText.htmlText = "<" + tagToUse + ">Hello Jack!</" + tagToUse + ">"; This would be rendered as the following: <b>Hello Jack!</b>"; Thus, "Hello Jack!" will appear bold. NOTE Once you've selected a dynamic or input text field, you can assign a variable reference to that text field from the Property inspector. This means that the value contained by that variable will automatically be displayed in the text field. If the variable value is a string of text containing HTML tags, the field will automatically render the text properly if, that is, you've selected the "Render text to HTML" option for the field. Because the text field references the value of a variable, the contents of that text field (that is, what's displayed there) will change whenever that value changes. This is different than assigning a text field an instance name and then using the htmlText property (as shown above) to display formatted text in the field. The former method exists primarily to make MX's implementation of displaying HTML-formatted text compatible with Flash 5 (because this is the way it was accomplished in that version); the latter is the preferred way.
In the following exercise, we'll use some of the validated values entered into the form in the previous exercises to generate a custom confirmation page. -
Open validate6.fla in the Lesson13/Assets folder. We will continue building on the project from the last exercise. While most of the work in this exercise will take place in the Confirm scene, we must first make several simple additions to the validateForm() function (on the Registration scene) we've been working on. -
With the Actions panel open, select Frame 1 of the Actions layer and insert the following lines of script after where it says }else{ but just above where it says gotoAndStop ("Confirm", 1); in the validateForm() function definition: name = name.text; email = email.text; state = state.text; zip = zip.text; You'll remember that the else part of this statement deals with what happens if all of the entered data is valid. Prior to the addition of the above lines of script, this statement had just a gotoAndStop() action that sent the movie to the Confirm scene. These lines of script create four variables before the movie is sent to that scene. The values assigned to these variables represent the text values entered into the form's text fields. The reason for creating variables to hold the various text values is because we want to use those values in the next scene, and while variables and their value persist in a timeline even when moving between scenes, text field property values do not. Thus, the variables are used as a way of transferring the text values from the Registration scene to the Confirm scene. -
With the Scene panel open, navigate to the Confirm scene. This scene contains four layers, named according to their content. The Background layer contains the scene's graphical content with the exception of buttons, which exist on the Buttons layer. The Text Fields layer contains one text field, confirmText, which is placed in the middle of the scene. This text field will display a custom confirmation message about the registration process. -
With the Property inspector open, select the confirmText text field in the middle of the stage. If you look at this text field's settings, you'll note this is a dynamic text field. Because the Multiline option is selected, this field will be able to display more than a single line of text. You'll also note that the "Render text as HTML" option has been selected for this field. By selecting this option, you tell Flash to let this text field interpret HTML sent to it rather than display the actual code.  You will also notice the following character settings: Font _sans Size 12 Color Black These are the default settings for this text field. In the absence of any HTML font tags to style it, text displayed in this field will appear with these characteristics. However, you can override these settings at any time, using the <font face> , <font size>, or <font color> tags which we'll do in this exercise. Let's begin the scripting process. -
With the Actions panel open, select Frame 1 on the Actions layer and add this script: confirmMessage = new Array(); This action creates a new array, named confirmMessage , which will hold the sentences that make up our confirmation message. This action along with all of the other actions created in this exercise will be placed on Frame 1 of this timeline so that it will execute as soon as the movie reaches this scene. -
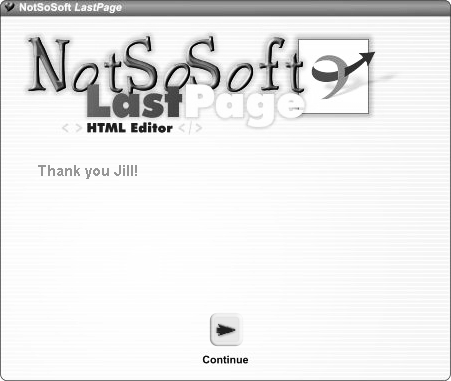
Add this script just below the current line of script: confirmMessage.push("<font size = \"15\" color = \"#FF9900\"><b>Thank you " + name + "!</b></font><br>"); This action pushes a coded sentence into the confirmMessage array, making it the first element in that array. This sentence is simply a string of text that contains a reference to the name variable created in Step 2, as well as various HTML tags. You may find this string's use of quotation and backward-slash (\) marks confusing. To better understand this text string, let's break it into sections the first of which contains font and bold tags as well as the text "Thank you," all within quotes: "<font size = \"15\" color = \"#FF9900\"><b>Thank you " The important thing to note here is the use of \" in the code (in four places). This is known as an escape sequence and is necessary to differentiate HTML code from ActionScript code. Normally, the above code would be written as the following: "<font size = "15" color = "#FF9900"><b>Thank you " Here, regular quotes are used in the size and color settings. However, because ActionScript also uses regular quotes to define string values (as shown on either side of the string), you need a syntactical mechanism to differentiate between the two without one, you'll get an error when Flash reads the code as the following: ("<font size = ") (15) (" color = ") (#FF9900) ("><b>Thank you ") Using the escape sequence as shown, Flash knows to convert \" first to regular quotes when the code is rendered in the text field. Doing so will render that section of code as the following: "<font size = "15" color = "#FF9900"><b>Thank you " Following this section of code in the push() action above, you will see the following code: + name + Using concatenation, this inserts the value of name into the middle of this string of HTML code. This is followed by the ending section of the script, which reads as follows: "!</b></font><br>" This section contains the closing font and bold tags, as well as a break tag. Assuming the value of name is "Jill," the complete string would be rendered as follows: <font size = "15" color = "#FF9900"><b>Thank you Jill!</b></font><br> In an HTML-enabled text field, the text "Thank you Jill!" would be displayed in orange at a font size of 15.  NOTE Don't be surprised if you need to rework your scripts several times to get its syntax correctly formatted. Mixing ActionScript and HTML can be confusing at first, but with a little experience, it gets easier. -
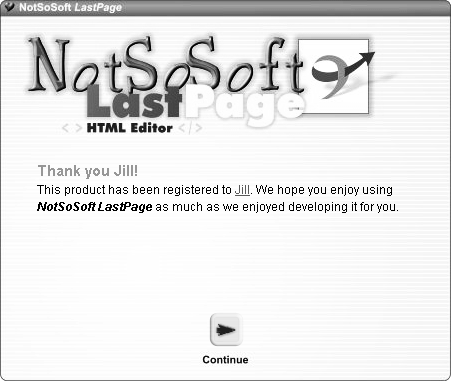
Add the following script just below the current line of script: confirmMessage.push("This product has been registered to <font color = \"#3399CC\"><u><a href = \"mailto:" + email + "\">" + name + "</a></u></font>. "); This action pushes another coded sentence into the confirmMessage array, making it the second element in that array. This sentence is a string of text that contains a reference to both the email and name variables created in Step 2, as well as various HTML tags. If name had a value of "Jill" and email had a value of "jill@mydomain.com", this line would be rendered as follows: This product has been registered to <font color = "#3399CC"><u><a href = "mailto:jill@mydomain.com">Jill</a></u></font>. In an HTML-enabled text field, the text would read, "This product is registered to Jill." In the preceding, Jill would appear as a blue, underlined hyperlink, linked to her e-mail address. TIP When viewed in browsers, hyperlinks defined in typical HTML pages are underlined and displayed in a different color than the rest of the text. However, this process is not automatic when inserting links in HTML code rendered in a Flash text field. If you want to identify a section of text as a hyperlink, you need to set those attributes manually using the <font color> and <u> underline tags, as shown above. -
Add the following script just below the current line of script: confirmMessage.push("We hope you enjoy using <b><i>NotSoSoft LastPage</i></b> as much as we enjoyed developing it for you.<br>"); This action pushes another coded sentence into confirmMessage array, making it the third element in the array. This text string does not contain any references to variables. In an HTML-enabled text field, the text would read, "We hope you enjoy using NotSoSoft Last Page as much as we enjoyed developing it for you," with NotSoSoft LastPage in bold and italics, followed by a line break.  -
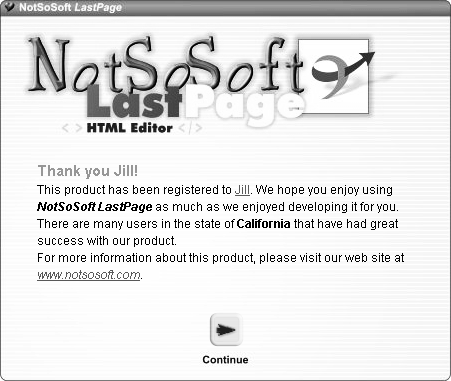
Add the following script just below the current line of script: confirmMessage.push("There are many users in the state of <b>" + state + "</b> that have had great success with our product.<br>"); This action pushes another coded sentence into confirmMessage array, making it the fourth element in the array. This text string contains a reference to the state variable, as well as various HTML tags. If the state variable contained a value of "Indiana", this line would be rendered as follows: There are many users in the state of <b>Indiana</b> that have had great success with our product.<br> In an HTML-enabled text field, that text would read, "There are many users in the state of Indiana that have had great success with our product," with Indiana appearing in bold, followed by a line break. -
Add the following script just below the current line of script: confirmMessage.push("For more information about this product, please visit our website at <font color = \"#3399CC\"><u><i><a href =\"http:\\www.notsosoft.com\">www.notsosoft.com</a></i></u></font>."); This action pushes another coded sentence into confirmMessage array, making it the fifth element in the array. This text string does not contain any references to variables. This line is rendered as follows: For more information about this product, please visit our site at <font color = "#3399CC"><u><i><a href="http:\\www.notsosoft.com"> www.notsosoft.com</a></i></u></font>. In an HTML-enabled text field, this text would read, "For more information about this product, please visit our site at www.notsosoft.com," with www.notsosoft.com appearing as a blue, underlined hyperlink, linked to http://www.notososoft.com.  TIP As you have seen, using an array, then pushing individual sentences into it, is a great way to limit the confusion that comes with entering too much information into a single line of script. -
Add the following script just below the current line of script: i = -1; while (++i < confirmMessage.length) { confirmText.htmlText += confirmMessage[i]; } This part of the script is used to loop through the confirmMessage array, adding each sentence in the array to the confirmText text field using by-now-familiar ActionScript. Because the array contains strings of text with HTML tags, you must use htmlText to output the message so that it's rendered with the appropriate HTML formatting. -
Choose Control > Test Movie to test the project up to this point. Complete the registration form with valid data, then press the Submit button to move the timeline to the Confirm scene, where the confirmation message we scripted appears in the middle of the page. You can see how the various HTML tags affect the look of the text. -
Close the test movie to return to the authoring environment and save this file as validate7.fla. This completes this exercise. As you've seen, mixing dynamic data with HTML syntax enables you to provide your user with more pleasing and interesting textual information. You can also use this mix to highlight portions of text in various ways. |


