Building an Event Example Project
You're now going to create a very simple project in which you'll use the event procedures of a text box. Specifically, you're going to write code to display a message when a user presses a mouse button on the text box, and you'll write code to clear the text box when the user releases the button. You'll be using the e parameter to determine which button the user has pressed.
Creating the User Interface
Create a new Windows application titled Events Example. Change the form's Text property to Events Demo.
Next, add a text box to the form by double-clicking the TextBox tool in the toolbox. Set the properties of the text box as follows :
| Property | Value |
|---|---|
| Name | txtEvents |
| Location | 48 , 120 |
| Size | 193 , 20 |
| Text | Click Me! |
The only other control you need on your form is a label. Label controls are used to display static text; users cannot type text into a label. Add a new label to your form now by double-clicking the Label tool in the toolbox and then setting the Label control's properties as follows:
| Property | Value |
|---|---|
| Name | lblMessage |
| Location | 48 , 152 |
| Size | 192 , 16 |
| Text | ( make blank ) |
| TextAlign | MiddleCenter |
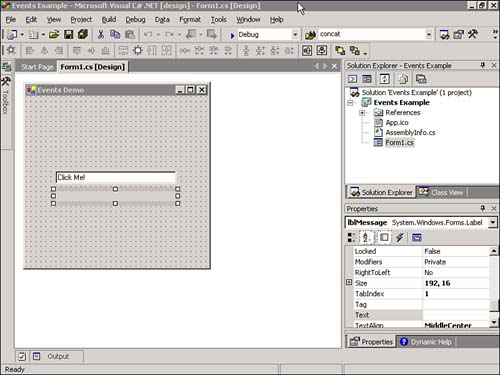
Your form should now look like the one in Figure 4.5. It's a good idea to save frequently, so save your project now by clicking the Save All button on the toolbar.
Figure 4.5. A Label control that has no value in its Text property can be hard to see unless selected.
Creating Event Handlers
The interface for the Events Example project is complete ”on to the fun part. You're now going to create the event procedures that empower your program to do something. The event that we're interested in first is the MouseDown event. Select the TextBox on your design form, and then click the Events icon on the Properties window toolbar.
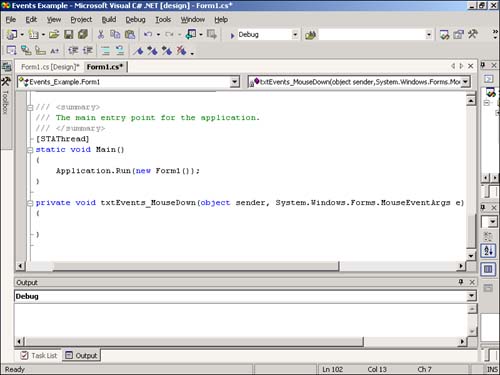
The default event for text boxes is the TextChanged event, so it's the one now selected. You're not interested in the TextChanged event at this time, however. Scroll through the event list for the MouseDown event. Double-click MouseDown; C# then creates a new MouseDown event procedure for the text box (see Figure 4.6).
Figure 4.6. Each time you double-click a new event, C# creates an empty event procedure if one hasn't been created previously for the event.
Enter the following code into the MouseDown event procedure:
switch(e.Button) { case MouseButtons.Left: lblMessage.Text = "You are pressing the left button!"; break; case MouseButtons.Right: lblMessage.Text = "You are pressing the right button!"; break; case MouseButtons.Middle: lblMessage.Text = "You are pressing the middle button!"; break; } The Switch construct, which is discussed in detail in Hour 14, "Making Decisions in C# Code," compares the value of an expression to a list of possible values. In this instance, the expression is the value of e.Button (the Button property of the object e ). When this code executes, the expression is compared to each Case statement in the order in which the statements appear. If and when a match is found, the code immediately following the Case statement that was matched gets executed. Therefore, the code you wrote looks at the value of e.Button and compares it to three values, one at a time. When the Switch construct determines which button has been pressed, it displays a message about it in the Label control.
 | In a more robust application, you would probably perform more useful and more complicated code. For instance, you may want to display a custom pop-up menu when the user clicks with the right button and execute a specific function when the user clicks with the middle button. All this is possible, and more. |
The nice thing about objects is that you don't have to commit every detail about them to memory. For example, you don't need to memorize the return values for each type of button (who wants to remember MouseButtons.Left anyway?). Just remember that the e parameter contains information about the event. When you type e and press the period, the IntelliSense drop-down list appears and shows you the members of e, one of which is Button.
Don't feel overwhelmed by all the object references you'll encounter throughout this book. Simply accept that you can't memorize them all, nor do you need to; you'll learn the ones that are important, and you'll use Help when you're stuck. Also, after you know the parent object in a situation, such as the e object in this example, it's easy for you to determine the objects and members that belong to it by using the IntelliSense drop-down lists.
You're now going to add code to the MouseUp event to clear the label's Text property when the user releases the button. First, you'll need to create the MouseUp event procedure. To do this, return to the Form Design view (click the Form1.cs[Design] tab). The Properties should still have the txtEvents object's events listed. If the events aren't shown in the Properties window, select txtEvents from the drop-down list box in the Properties window and click the events icon. Locate and double-click the MouseUp event from the events list.
All you're going to do in the MouseUp_event is clear the label. Enter the following code:
lblMessage.Text = "";
Testing Your Events Project
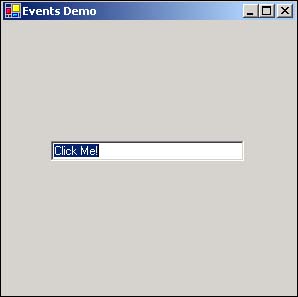
Run your project now by pressing F5. If you entered all the code correctly and you don't receive any errors, your form will be displayed as shown in Figure 4.7.
Figure 4.7. A simple but functional example.
| | Remember that C# is case sensitive. Entering only one character in the wrong case will cause your project to fail to compile. |
Click the text box with the left mouse button and watch the label. It will display a sentence telling you which button has been clicked. When you release the button, the text is cleared. Try this with the middle and right buttons , as well. When you click the text box with the right button, Windows displays the standard shortcut menu for text boxes. When this menu appears, you have to select something from it or click somewhere off the menu to trigger the MouseUp event. In Hour 9, "Adding Menus and Toolbars to Forms," you'll learn how to add your own shortcut menus to forms and controls. When you're satisfied that your project is behaving as it should, from the Debug menu choose Stop Debugging to stop the project (or click the Close button on your form), and then save your work by clicking Save All on the toolbar.
| Top |
EAN: 2147483647
Pages: 253