CREATING A NEW ADDRESS ENTRY
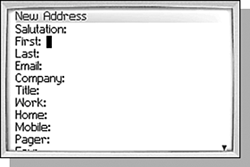
| To create a new address in the Address list, click the New Address menu item. This will show the New Address screen, shown in Figure 10.2. Figure 10.2. Creating a new address entry.
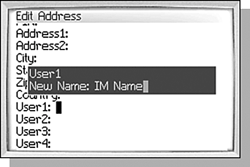
tip When entering a phone number with an extension, the X character may share a key with a number. In this case, the roles are reversed so that pressing the key causes the number to be added to the field and pressing the Alt key then the key causes the X to be added to the field. This screen is where you can add all of the pertinent information about a person. Every field is optional, but you must at least put something in the First Name, Last Name, or Company field so that a name can be displayed in the Address list. Some of the fields have special features that make entering the data easier. For instance, there are five fields that store phone numbers. In these fields, pressing a key with a number does not require you to press the Alt key as you normally would. Simply pressing the key enters the number into the field. These fields also allow you to enter characters that are not normally part of a phone number such as parentheses and dashes. You can also enter an X to indicate that the numbers following it are part of an extension. The Email field also handles keyboard input in a special way. Pressing the Space key causes an @ to be added to the field if you haven't manually typed one. If an @ is already in the field, then pressing the Space key causes a . (period) to be added to the field. Using the Space key allows you to quickly enter an email address without having to use the Alt key to get those special characters. ADDING MULTIPLE EMAIL ADDRESSESSome people have more than one email address and you may need to have access to each of them. The New Address screen initially shows only one field for Email; however, there are really three Email fields that you can access. You can add Email fields one at a time by clicking the Add Email Address menu item. If you decide you don't need one of the fields, you can remove it by scrolling to the field you want to delete and then clicking the Delete Field menu item. CUSTOMIZING ENTRIES WITH USER-DEFINED FIELDSAt the bottom of the screen there are four fields labeled User1 through User4. These are user-defined fields to hold any additional information you might want to keep on a contact. The field name User1 isn't very descriptive, however. Fortunately, you can change these names to something more appropriate. To do this, scroll to the user field you want to change and then open the menu and click the Change Field Name menu item. A dialog appears (see Figure 10.3) with the default field name and a field where you can enter the new field name. Figure 10.3. Change the name of a user-defined field by selecting the Change Field Name menu item.
caution These user-defined field names are applied to the Address Book as a whole, so changing the user field name once applies it to all addresses. |

