Configuring ColdFusion for Multiple Hosts
| The ColdFusion installer utilizes the JRun 4 Web Server Configuration tool (wsconfig) to install the connector into the Web server. The connector is a filter that intercepts ColdFusion template requests from the Web server and passes them to the ColdFusion engine. The wsconfig tool (cf_root\runtime\bin\wsconfig.exe in Server configuration and jrun_root\bin\wsconfig.exe in Multiserver configuration) has a GUI and a command-line interface. Previously, the ColdFusion MX 6.0 installer when installing on multi-homed servers only configured the first virtual server instance. For IIS, this is usually the Default Web Site, and for Sun ONE it is the first configuration directory (in alphabetical order). Since Apache's virtual host configuration is contained in one file (apache_root\conf\httpd.conf), the installer correctly configures all Apache virtual hosts. Although later versions of the installer now correctly configure multi-homed Web servers, you may still need to configure the remaining virtual sites for the IIS and Sun ONE server platformsand any new additions. The following sections explain how to do this. TIP Think of the connector as the Web server stub in ColdFusion 4.x/5.0. Microsoft IIS 5.x/6.0To properly integrate with ColdFusion, you must make these configuration changes to your IIS server:
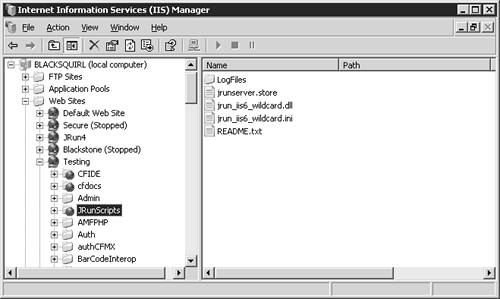
NOTE ColdFusion MX 6.1 was the first version to officially support Windows 2003 and IIS 6.0. If you are upgrading from CFMX 6.1 to 7, the CFMX 7 installer should properly configure your IIS for multi-homing. Creating the JRun Connector ISAPI Filter and the JRunScripts Virtual DirectoryThe ColdFusion installer uses the wsconfig tool to implement these changes. However, it only adds the ISAPI filter and JRunScripts virtual directory to the Default Web Site. These need to be configured at the WWW Master property sheet level in order to propagate to all sites (existing and new). Because the ColdFusion filename extensions are mapped at the WWW Master property sheet level, the individual virtual servers properly handle all ColdFusion template requests. NOTE On IIS 6.0, the JRun Connector ISAPI filter is replaced by the wildcard application mapping to provide connect to the Flash Remoting gateway. For IIS 5.x, you need to configure a JRunScripts virtual directory for each of your virtual sites. Macromedia has created batch files in the cf_root\bin\connectors directory for removing and adding the Web server (Apache, IIS, and iPlanet/Sun ONE) connectors. Follow these steps to correct your IIS 5.x configuration:
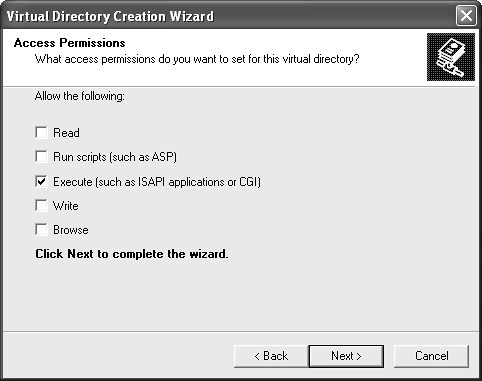
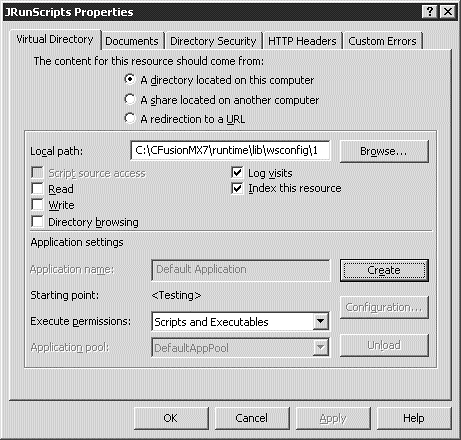
Adding the ColdFusion ExtensionsNewly created virtual servers will inherit the ColdFusion filename extension mappings and ISAPI filter. However, you will need to manually configure the JRunScripts virtual directory for IIS 5.x using the following steps:
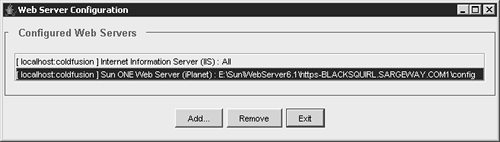
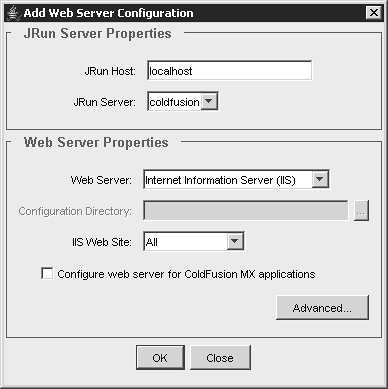
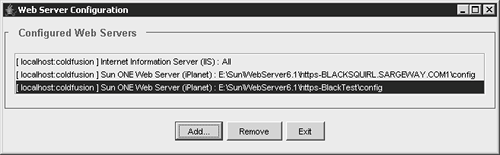
You'll need to repeat these steps each time you add a new virtual server. Sun ONE/iPlanetWhether the ColdFusion installer actually configures all of your Sun ONE servers depends on how you have them set up. Sun ONE 6.x allows for multiple Web servers via two configurations: virtual servers, and multiple Web server instances. You configure virtual servers on a single IP address and port of an individual, installed Web server instance. All of the virtual server's configuration parameters are stored in the server.xml file in the configuration directory of the Web server instancefor example, sunone_root\https-<server_id>\config\server.xml. Web server instances are typically installed on a particular IP addressalthough they can work on different ports with the same IP address, as well. In addition, they have their own autonomous configuration directory (sunone_root\https-<server_id>\config). They exist for backwards compatibility with earlier Netscape/iPlanet builds. Multiple virtual servers configured per Web server instance is Sun's preferred way to implement multi-hosting. NOTE KISS it! If you want centralized management of your multi-homed configuration, install a single Sun ONE instance on a static IP address, and configure multiple virtual instances. ColdFusion will correctly install the connector to integrate with all your virtual hosts. See the Sun ONE Web Server Enterprise Edition Administrator's Guide for more details on the recommended Sun ONE configuration. If you have configured multiple virtual servers against a single Web server instance, then the ColdFusion MX 6.0 installer has properly configured your Web sites. This is because the configuration parameters for each individual virtual server are contained in the server.xml of the Web server instance. If you have installed multiple Web server instanceseach with its own configuration directory (sunone_root\https-<server_id>\config)then the ColdFusion installer only configured the first configuration directory it found alphabetically. You will need to run the wsconfig tool to properly install connectors for ColdFusion. The following steps illustrate how to use the wsconfig tool GUI to make your configuration changes:
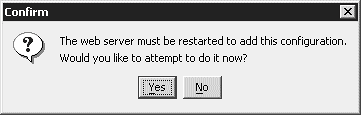
NOTE For each Web server instance, you'll have to go to the Sun ONE Server Manager and apply the configuration file edits. Click the Apply button to restart the Web server. |
EAN: 2147483647
Pages: 240