Creating Queries
| With all the preliminaries taken care of, you can roll up your sleeves and start writing SQL. The SQL statement you will use most is the SELECT statement. As its name implies, you use SELECT to select data from a table. Most SELECT statements require at least the following two parameters:
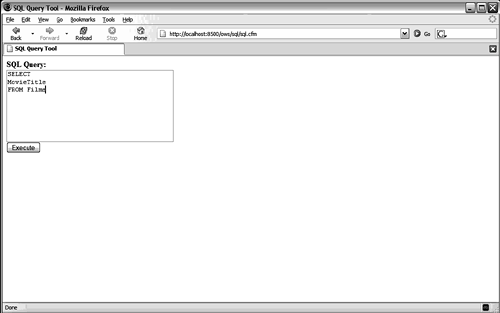
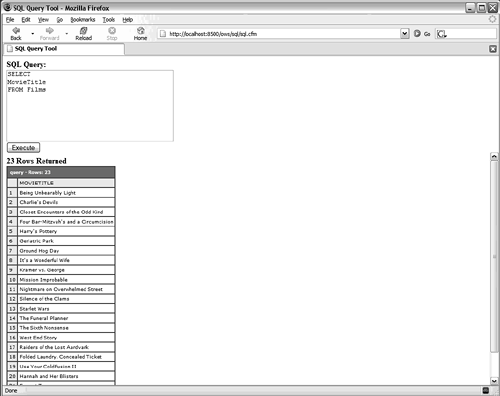
The first SQL SELECT you will create is a query for a list of movies in the Films table. Type the code in Listing 6.1 as seen in Figure 6.12, then execute the statement by clicking the Execute button. Listing 6.1. Simple SELECT StatementSELECT MovieTitle FROM Films Figure 6.12. SQL statements are entered in the SQL Query Tool's SQL Query field. That's it! You've written your first SQL statement. The results will be shown as seen in Figure 6.13. Figure 6.13. The SQL Query Tool displays query results in the bottom half of the screen. TIP You can enter SQL statements on one long line or break them up over multiple lines. All white-space characters (spaces, tabs, newline characters) are ignored when the command is processed. Breaking a statement into multiple lines and indent parameters makes it easier to read and debug. Here's another example. Type the code in Listing 6.2, then click the Execute button to display two columns as seen in Figure 6.14. Listing 6.2. Multi-column SELECT StatementSELECT MovieTitle, PitchText FROM Films Figure 6.14. The SQL Query Tool displays the results of all specified columns. Before you go any further, take a closer look at the SQL code in Listing 6.2. The first parameter you pass to the SELECT statement is a list of the two columns you want to see. A column is specified by its name (for example, MovieTitle) or as table.column (such as Films.MovieTitle, where Films is the table name and MovieTitle is the column name). Because you want to specify two columns, you must separate them with commas. No comma appears after the last column name, so if you have only one column in your select list, you don't need a comma. Right after the select list, you specify the table on which you want to perform the query. You always precede the table name with the keyword FROM. The table is specified by name, in this case Films. NOTE SQL statements aren't case sensitive, so you can specify the SELECT statement as SELECT, select, Select, or however you want. Common practice, however, is to enter all SQL keywords in uppercase and parameters in lowercase or mixed case. This way, you can read the SQL code and spot typos more easily. Now modify the SELECT statement so it looks like the code in Listing 6.3, then execute it. Listing 6.3. SELECT All ColumnsSELECT * FROM Films This time, instead of specifying explicit columns to select, you use an asterisk (*). The asterisk is a special select list option that represents all columns. The data pane now shows all the columns in the table in the order in which they are returned by the database table itself. CAUTION Don't use an asterisk in the select list unless you really need every column. Each column you select requires its own processing, and retrieving unnecessary columns can dramatically affect retrieval times as your tables get larger. |
EAN: N/A
Pages: 282