Using the WSDL Files
You should now have a thorough understanding of WSDL. You’ve seen how .NET creates the WSDL file for a Web service and the options available for modifying the WSDL that’s produced. We’ll now take a look at the ways you can use WSDL.
Wsdl.exe
Wsdl.exe is a command-line tool provided with the .NET Framework SDK that generates the proxies for a specified WSDL file. Here’s the basic format for using this command:
wsdl.exe http://localhost/HelloWorld.asmx
This command generates a proxy in C# for the given URL and saves the file at the current location with the same name as the service we created the proxy for.
A plethora of options are available for the wsdl.exe tool—16 in the current release of the SDK. You’ll probably never use most of the options, but as you’ll see in Chapter 4, you might need some of them. One important option allows you to specify the language you want the proxy built in.
By specifying the /l: flag, you can specify whether you want the proxy to be built in C# (cs), Visual Basic .NET (vb), or JScript .NET (js). C# is the default language, so you need not specify it. JScript .NET doesn’t support attributes, so for most purposes it is impossible to use it to build a proxy for a Web service; JScript. NET is therefore best ignored.
Once you have the proxy built, you can include it in any project you want because it’s simply a normal code file. We’ve already talked endlessly about Web services being language agnostic, but as you can see in Figure 3-7, it makes no difference what language the developer wants to use. We’ve created a Visual Basic. NET proxy from a C# Web service.
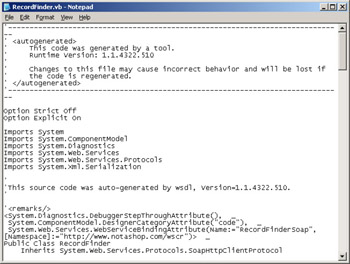
Figure 3-7: Proxy code created by wsdl.exe
It’s fine to create proxies for Web services in this way, but Visual Studio .NET offers a graphical interface to perform the same operation and also offers a few maintenance advantages along the way.
Visual Studio .NET
Visual Studio .NET provides a graphical tool for performing the same task that wsdl.exe performs—creating the proxies for Web services. It also provides a few other helpful features.
Adding a Web Reference
To add a reference to a Web service to a .NET application, you can simply choose the Add Web Reference command from the shortcut menu for the project or from the Project menu. A dialog box appears that contains a built-in Web browser, as shown in Figure 3-8.
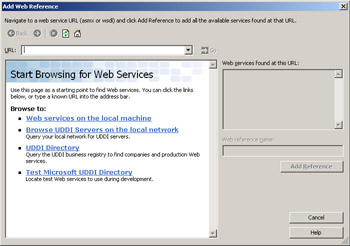
Figure 3-8: The Add Web Reference dialog box
You’re immediately presented with several options for finding Web services. We’ll deal with discovering Web services and UDDI in Chapter 4, so we’ll ignore these options for now.
At the top of the dialog box is a URL text box. You can use the browser pane of the dialog box to navigate the Internet to find the appropriate Web service. As you know, this kind of search can be tedious, so the text box also allows you to type a URL to get to the Web service. If we enter the URL for the RecordFinder service, it appears in the left pane, as shown in Figure 3-9.
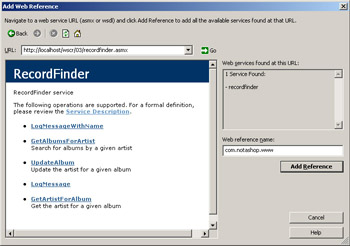
Figure 3-9: Finding the RecordFinder service
We now have the view of the Web service we know and love. However, we’re more interested in the right pane, which has some details in it plus an Add Reference button. When the dialog box finds a page with the necessary details to allow the creation of a proxy, the right pane displays the details of the services that are available and the Add Reference button is enabled.
We can click the Add Reference button to create the proxy for the RecordFinder service and add it to the project.
Viewing the Proxy Code
When we add a reference to the Web service to our project, Visual Studio .NET does the job of wsdl.exe in the background and creates the proxy for the Web service. However, in the default setup of Visual Studio .NET this process is not visible. To view the proxy that has been created, you must show all files for the project by clicking the Show All Files button when an item in the project is selected. This displays all the files that are part of the project. If you take a close look at the Reference.map file, you can see that it has a child, as shown in Figure 3-10.
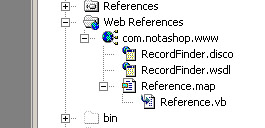
Figure 3-10: Viewing the proxy code
We happened to add the Web service to a Visual Basic .NET project, so the proxy was built in Visual Basic .NET. If we had added the Web service project to a C# project, the proxy would have been built in C# and would have had a .cs extension. If we open the Reference.vb file, as shown in Figure 3-11, we can see that it bears a remarkable resemblance to the proxy code we created with wsdl.exe.
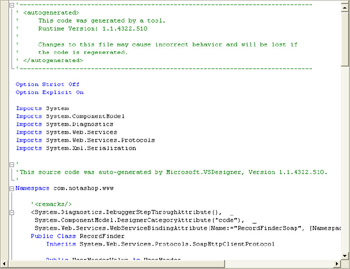
Figure 3-11: Proxy code created by Visual Studio .NET
Updating the Web Service
One problem with using wsdl.exe occurs when a Web service is updated. We created a proxy locally, and any changes are not reflected in the proxy we have. Using wsdl.exe, we’d need to rerun the command line and replace the proxy in our project with the new one we generated. As with most things, Visual Studio .NET provides a quick and easy way to update the proxy to match the new version.
We can select the relevant reference and choose Update Web Reference from the shortcut menu, as shown in Figure 3-12, to update the proxy to match the version currently on the server. It’s as simple as that!

Figure 3-12: Updating a Web reference
EAN: 2147483647
Pages: 172