3.8. Updating the Kernel
| | ||
| | ||
| | ||
3.8. Updating the Kernel
By updating programs you can obtain new features and correct bugs in their previous versions. The Linux kernel is the core of the operating system and it is updated frequently because of the dynamic development of this operating system. Do not be scared upon learning that such an important piece of software as the kernel has bugs in it: All software does. (I will cover the question of bugs in Section 14.1 .) To fix bugs in the kernel, you should be able to install a new kernel in your system.
At present, most software is supplied as RPM packages, which are easy to install. The same applies to the Linux kernel. But the newest kernel versions are only available as source codes. This makes the kernel-update process more difficult, but it also gives you an opportunity to tune the system for the maximum productivity. You can install only the necessary kernel components and optimize it for your specific hardware.
Developers of different Linux distributions supply their products with a universal kernel, which can work equally well on various platforms. Also, all distributions that I am familiar with use modules to add new features to the kernel. This is convenient but not always wise from the security standpoint.
Only a few years ago hackers would switch system files with doctored versions that had built-in exploits (programs allowing vulnerabilities in software to be exploited, hence the name ) or backdoors. To fight this plague, numerous utilities to prevent changing of the system files and to monitor their checksums have been developed.
This did not stop hackers because they switched to using Linux modules. It is more difficult to monitor their integrity, and their execution produces the same results as the system files; moreover, they can be used to perform any tasks . This hole in system security can be closed by disabling the use of modules, but you should keep in mind that this may also cause problems in the operating system's work. Some hardware manufacturers and utility developers also like to use modules. This can be understood , because modules are easy to install and make it possible to add new or improved kernel features without recompiling the latter. But you already know that the security and the convenience are two incompatible concepts.
3.8.1. Getting Ready to Compile
Before undertaking any steps to compile the kernel, you should prepare for the worst, namely, for the chance that instead of increased performance your update may crash the system. The kernel is the core of the operating system, and any errors while updating it can degrade its operation or even cause the system to become unbootable.
You should also back up any data that you may have on the server. In addition, it is a good idea to make sure that you have a working bootable diskette to help you if after the update you cannot boot the system from the hard drive.
You can create a bootable diskette by executing the following command:
/sbin/nkbootdisk ver
Here, ver is the number of the kernel version installed on your system. If you do not know the kernel version installed, you can find it out by executing the following command:
uname -r
Suppose that your kernel version is 2.4.20-8. To create a bootable diskette for this kernel, execute this command:
/sbin/mkbootdisk 2.4.20-8
If the wrong version is specified, the diskette will not be created, because the program looks for the necessary files in the /lib/modules/ver directory, where ver is the version number. In this example, this directory will be /lib/modules/2.4.20-8.
3.8.2. Updating the Kernel Using an RPM Package
The simplest way to install a new kernel is to do this using an RPM package. Installing a kernel is no different than installing any other program. To update the kernel, the following command is executed:
rpm -Uvh Package_Name
If you want to install a new kernel, the U option has to be replaced with the i option. One of the advantages of Linux is that several kernels can be installed at the same time. Only one of them can be booted into at any given time.
Only the necessary files, modules, and the boot loader are installed from the RPM package, but to be able to boot into the new kernel it has to be registered in the LILO boot loader.
Updating the kernel from an RPM package adds new functions to the kernel and fixes the bugs that it may contain. The main capabilities of the kernel remain the same. The maximum benefits from an updating can only be achieved by recompiling the kernel.
3.8.3. Compiling the Kernel
When updating the kernel from an RPM package, device drivers may be compiled as part of the kernel or loaded separately from it. This kernel is slower but allows drivers to be updated by simply changing the appropriate modules.
When upgrading the kernel by compiling, it can be made monolithic. This means that all drivers will be compiled as part of the kernel, which will increase the kernel's efficiency. This will also make it impossible to update the kernel without totally recompiling it.
I recommend that you learn how to compile, because all new kernel versions are first released as source codes, with the corresponding RPM packages lagging by a week or even longer. All this time, your system will remain vulnerable.
As a rule, the source codes for the kernel are supplied as a tar archive. It is unarchived by executing the following command:
tar xzvf linux-2.6.10-rc2.tar.gz
The archive name in your particular case most likely will be more sophisticated than in the example. I used the current kernel version at the time this book was being written. You can download the latest kernel versions from the www.redhat.com site.
The archive is unpacked into the linux-2.6.10-rc2 directory (which is the same as the archive's name without the tar.gz extension). Open this directory to perform the further steps necessary to compile the kernel.
First, you need to configure the kernel, that is, to specify what functions and features you want to obtain. This can be done using one of the following four utilities:
-
oldconfig This is a script that installs the default settings values without requiring any user participation. It is invoked by executing the make oldconfig command.
-
config This is a script that asks you questions concerning the parameters of the future kernel and, depending on your answers, constructs a configuration file to be used during the compilation. It is invoked by executing the make config command.
-
menuconfig This text mode utility (Fig. 3.6) is the most convenient way to configure the compilation from the console. It is invoked by executing the make menuconfig command.
-
qconf (xconfig) This graphical utility (Fig. 3.7) is the most convenient way to configure the compilation from the Linux graphical shell. It is invoiced by executing the make xconfig command.
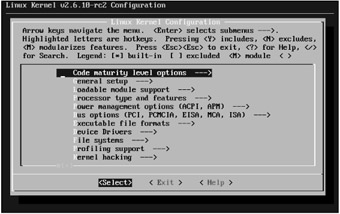
Figure 3.6: The menuconfig utility
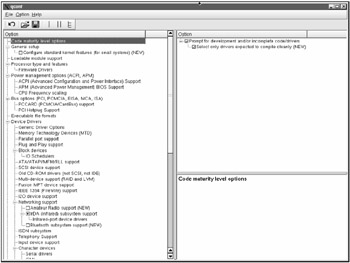
Figure 3.7: The gconf utility
When configuring the compilation using one of the mentioned utilities, you have to specify whether the resulting kernel is to support modules.
If you want to have two same-version kernels, one supporting modules and the other not, specify different values for the EXTRAVERSION parameter in the makefile file:
-
EXTRAVERSlON=-rc2-module To compile a modularized kernel
-
EXTRAVERSlON=-rc2-nomodule To compile a monolithic kernel
In addition to -rc2-module option, you can add a short remark in this parameter, explaining the particularities of the specific kernel version.
Now, execute the following commands to prepare for the compilation:
make dep make clean
The following command will take quite a long time to execute, because it will actually be compiling the kernel. While it is occupied with this, you can go and drink a few cups of coffee. The procedure will take an especially long time if you have an underpowered processor and less than 256 MB of RAM.
The compilation is invoiced by executing the following command:
make bzImage
If you opted to compile a modularized kernel version, the following two commands carry out this operation:
make modules make modules_install
If you are building a monolithic module use, you can skip these commands, because in this case they are not needed while they take a long time to execute.
All modules are stored in the /lib/modules directory. The make modules command builds the modules of the new kernel, and the make modules_install command installs them into the /lib/modules directory. This directory also contains subdirectories for each of the kernel versions installed in the system.
The compiled kernel is installed by executing the following command:
make install
This command will copy all files necessary for booting into their proper places. Take a look in the /boot directory. You can see several files in there, including the boot loader for the new kernel version. You can easily tell these files by the number in their names . For example, when I compiled kernel version 2.6.10, files vmliuz-2.6.10 and initrd-2.6.10.img were added to this directory.
3.8.4. Configuring the Boot Loader
Now, look at how to configure the LILO boot loader to load the new kernel, along with the old kernel versions. This is done by adding the following entries at the end of the /etc/lilo.conffile:
iinage=/boot/vmlinuz-2.6.10 label=Linux Kernel 2.6.10 initrd=initrd-2.6.10. img read-only root=/dev/hda0
The first entry specifies the path to the new kernel. You should specify the correct path , or rather, the file name with its own version number. The label entry specifies the text to be displayed for the new kernel option in the boot loader menu. The initrd parameter is defined by the boot loader. The last entry specifies the root disk and should be the same as for the old kernel versions, which already are in the lilo.conf file.
After updating the /etc/lilo.conf configuration file, the changes must be recorded in the boot area. This is done by executing the lilo command.
Reboot the system; the new boot loader menu will now have the option for the new kernel in addition to the old kernel versions' boot options. But any of the kernels, the new as well as the old, will be loaded using the same configuration files, which is convenient. Should the new kernel compilation turn out to be nonviable, all you have to do is reboot the computer into an old kernel and start troubleshooting the new kernel.
3.8.5. Handling the Modules
The advantage of the modularized kernel compilation is that you can enable only the most necessary functions at boot, thereby decreasing the number of potential vulnerabilities than can be exploited by hackers. But you should be able to control modules (in the same way that you can control services).
The system should boot only with those modules that are used. All other modules are loaded dynamically as the need arises, and unloaded when no longer needed. The following are descriptions of main commands used to control modules.
lsmod
The list of the loaded modules can be viewed using the lsmod command. The result of the command's execution looks similar to the following:
Module Size Used by Not tainted binfmt_misc 7428 1 autofs 11812 0 (autoclean) (unused) tulip 42240 1 ipchains 42216 6 ide-cd 30240 0 (autoclean) cdrom 32000 0 (autoclean) [ide-cd] ext3 62284 1 jbd 39804 1 [ext3]
modinfo
Deciding which modules should be included into the start-up and which should not is not an easy task. And it is important to be able to do this, because every extra module loaded increases the boot time, requires its share of system's resources, and so on. So how are you to decide what is needed and what is not? You should intimately know each module and understand its function.
Information about a module can be obtained using the modinfo command executed with the module in question as the parameter. For example, the following command requests information about the ext3 module from the system:
modinfo ext3
The results of its execution look similar to the following:
filename: /lib/modules/2.4.18-5asp/kernel/fs/ext3/ext3.o description: "Second Extended Filesystem with journaling extensions" author: "Remy Card, Stephen Tweedie, Andrew Morton, Andreas Dilger, Theodore Ts'o and others" license: "GPL" parm: do_sync_supers int, description "Write superblocks synchronously"
Some of the information displayed is the file's name and location, the file description, the author, and the license type. The amount of information depends on the module; to tell the truth, in some cases it is so scant that it is impossible to tell the module's function by it.
modprobe
The modprobe command is mainly used by the system to load the installed modules, but it can also be used manually. The command is executed with the name of the module to be loaded as its parameter.
For example, the following command loads the iptable_nat module (it will be considered in Section 4.12 ):
modprobe iptable_nat
rmmod
The rmmod command unloads the module specified in its argument. When you are finished using a module, do not forget to unload it. Otherwise, it may turn out to be the proverbial straw that broke the camel's back, or, more pertinent, the loophole that hackers use to penetrate your system.
- ERP Systems Impact on Organizations
- Enterprise Application Integration: New Solutions for a Solved Problem or a Challenging Research Field?
- Context Management of ERP Processes in Virtual Communities
- Distributed Data Warehouse for Geo-spatial Services
- Intrinsic and Contextual Data Quality: The Effect of Media and Personal Involvement