| The concepts of combining and layering report objects becomes relevant when you need to precisely control the relationship between two or more objects occupying a common space on the report. For example, assume that rather than having your country field read USA, you would like to combine the Country database field with a text object so that it reads Country/Pays: USAdisplaying the textual description for country in both English and French. To accomplish this, you can easily combine a text and a database field into one common report object. The previous exercises can be enhanced by adding a more descriptive text object to your report as that described earlier. To complete this, start by adding a group definition to your report. The group definition enables you to logically present each customer within the country in which they are located. To add this grouping, perform the following steps: 1. | From the Insert menu, select Group to present the Insert Group dialog. Select the Country field (located under the Customer table) from the uppermost drop-down list. Leave the sort order as Ascending and click OK to return to the report.
| | | 2. | Verify that you are working in the Design view of the reportclick on the Design tab if necessary. You should now see two new sections listed in the left column area of the design environmentGroup Header #1 and Group Footer #1. From the Insert menu, select Text Object and drop the object to the right of the Group #1 Name field in the Group Header section. Type Country/Pays: for the textual content of this new object (including a space after the colon), as shown in Figure 6.12.
Figure 6.12. The Insert menu enables you to quickly add a group and text object into your report. The resultant group and text object are shown here in the Report Designer. 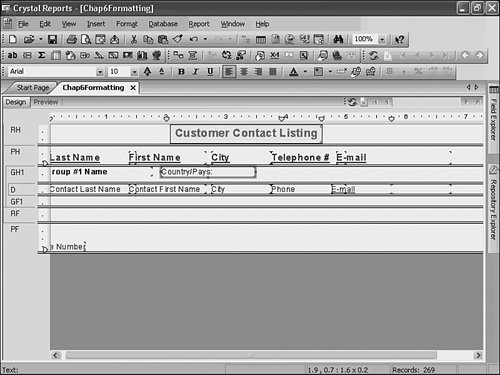
| 3. | Highlight the Group #1 Name field object, click and drag it over the new text object field (you can drag the entire object after the mouse pointer has turned into a four-way cross icon), and drop it onto the text object when the flashing vertical cursor indicates that it falls precisely to the right of the textual description you have entered.
Note Dragging and dropping objects to combine them is a very precise maneuver and might require some practice. If you have dropped the Group Name field in the wrong place, click the Undo button (curved arrow pointing backward) and try again until you are comfortable and successful with this technique. | | | 4. | After you have successfully combined these objects together, the design application still references the newly combined object as a Text object. You now need to widen the object's display area. Click this object to highlight it and drag the left-side perimeter handle farther to the left until you reach the left margin of the design area, as shown in Figure 6.13.
Figure 6.13. You have now combined a database field object with a text object to form one common report object. 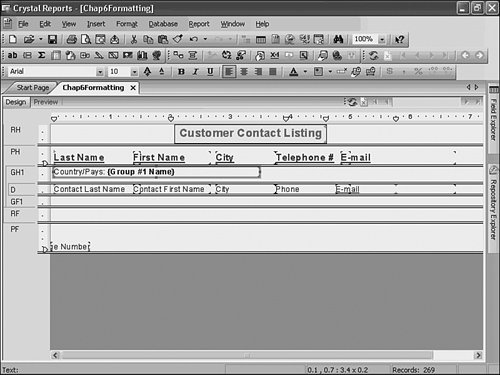
| | | 5. | With the combined text object highlighted, use the steps identified earlier in this chapter to modify the object's properties to present the field values in a bold red font style, as shown in Figure 6.14. Click the Preview tab to see how the report results are displayed. (Use the Refresh toolbar button if the Preview tab is not visible.)
Figure 6.14. After combining two or more objects, you can specify formatting properties for the newly combined report object. 
| | | 6. | Now add a corporate logo to your report and use this to discuss object layering. You need to have a picture file saved in either bitmap, TIFF, JPEG, or PNG format available for use. Use the Business Objects logo downloaded from its website for this example. Select the Picture menu option from the Insert menu. Navigate to and select the Business Objects Logo image and drag it into the Report Header section. Drop the image into the Report Header section so that its left perimeter is aligned directly above the left perimeter of the Telephone Number column, as shown in Figure 6.15.
Figure 6.15. Drag and drop the Business Objects Logo image object into place in the Report Header section. 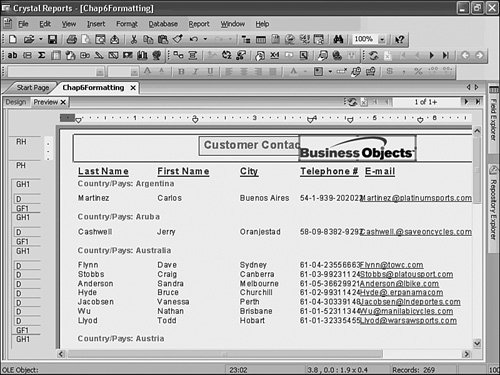
Notice, as illustrated in Figure 6.15, that you have partially covered the report title object with the new logo image. This could have certainly been avoided by placing the image object farther to the right, but for demonstration purposes, use the Move property of the report title field to once again make it visible.
| 7. | Right-click the report title text object, select Move, and then select To Front from the additional pop-up options. This positions the report title object on top of the logo image, as you can see in the report preview.
| | | 8. | To resolve the issue of overlapping objects in the Report Header section, adjust the two objects so that the report title is displayed farther to the left of the logo image, as shown in Figure 6.16. Save your report sample if you want.
Figure 6.16. By adjusting the objects located in the Report Header, you have resolved the need to layer these objects; however, layering does provide flexible display options. 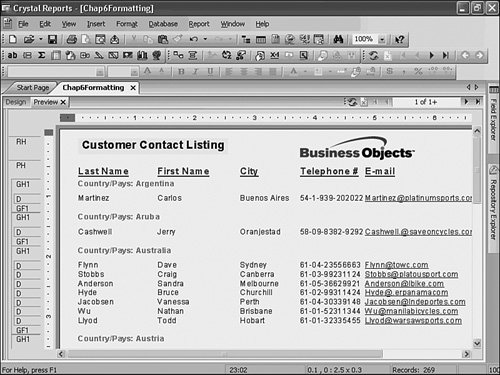
| 9. | As a final step to re-create the report in Figure 6.2, use the Format Expert dialog to modify the report title text so that it appears in a bold, navy blue, underlined, size 20 Verdana font with no displayed borders.
|
As a result of these exercises, you now have a very useful report that displays each customer contact record distinctively grouped within the country in which they are located. The formatting that has been applied introduces the capabilities that make Crystal Reports the undisputed champion of professionally formatted reports. |