-
Log on to the computer running Windows 2000 as a local or domain administrator. Note that if you are installing SharePoint Portal Server on a computer running Exchange Server, you must be a domain administrator. -
Insert the SharePoint Portal Server CD into your CD-ROM drive. See Figure 7.1 below for visual of installation screen. Figure 7.1. Default installation splash screen.  -
Click Server Installation. The SharePoint Portal Server setup wizard appears. You can also go to the Server folder on the CD, and then double-click Setup.exe. -
Follow the instructions that appear in the setup wizard. On the Product Identification page, type the CD Key in the spaces provided. The CD Key uniquely identifies your copy of SharePoint Portal Server and enables you to receive technical support. The CD Key is located on the back of your SharePoint Portal Server CD case. If the number you type is not accepted, check the following: -
If you are using the keypad to the right of your keyboard, ensure that NUM LOCK is on. -
Ensure that you are not using the letter I for the number one. -
Ensure that you are not using the letter O for the number zero. On the SharePoint Portal Server Installation Folders page, specify the location on the server's disk where you want to install the SharePoint Portal Server program files and data files. If you want a different location, click Change Folder. Figure 7.2. Default dialog box to determine where to store files associated with the installation. 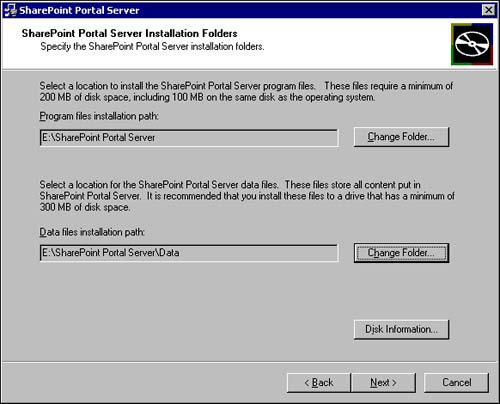 Click Disk Information for information about the amount of disk space required and the amount remaining. If there are existing files in the installation paths, setup removes these files. Note the following restrictions for the path : -
The path name can have a maximum length of 100 characters . -
The path name can contain only characters in the lower ASCII range. The lower ASCII code set includes the characters with codes 32127. The workspace name cannot exceed 25 characters in length. -
The path cannot point to a root directory. For example, E:\ is not allowed, but E:\SharePoint Portal Server is allowed. On the SPS Indexing Settings page, specify the default content Access account and the gatherer email address. An external site administrator can contact this address if problems occur when SPS crawls the external site. The default content access account is used to crawl content sources. These settings are necessary for SPS to crawl content stored outside the workspace and include it in an index. Figure 7.3. Default page for Server Index Settings. 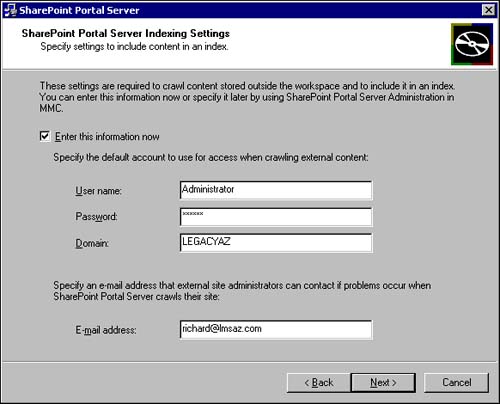 SharePoint Portal Server Administration in Microsoft Management Console (MMC) will allow you to manage the local server and workspace. However, you can only use the MMC to perform administration tasks on the local server. If you need to control or manage remote server, you will need to do this through a terminal server connection. To open SharePoint Portal Server Administration: -
Click Start. -
Point to Programs. -
Point to Administrative Tools . -
Click SharePoint Portal Server Administration. Creating a Workspace on the Server After you run SharePoint Portal Server setup, the New Workspace Wizard appears. This wizard helps you create a default workspace. If you click Cancel, the New Workspace Wizard does not appear. However, you can create a workspace later by using SharePoint Portal Server Administration. -
On the first page of the wizard, click Next . -
Within the Workspace Definition dialog box, type a Workspace for the Workspace that you are creating. NOTE Workspace names can consist of characters from lower ASCII except for the following: # : \? * < > % / " { } ~ [ ] Space ! () = ; . , @ & +. The lower ASCII code set includes the characters with codes 32127. The workspace name cannot exceed 25 characters in length.
NOTE The wizard verifies that the workspace name is unique and does not conflict with any other workspace names or propagated index names on the server. If the name is already in use, the wizard prompts you to enter a unique name. You cannot edit a workspace name after you create the workspace. If you are creating an index workspace, the name of the workspace you are creating must be different from that of the destination workspace.
In the Workspace Definition dialog box, type a description for the workspace. Click advanced if you want to distribute the task of searching and crawling content among several servers. Figure 7.4. The Advanced option allows you specify a server to be configured as an indexed workspace. 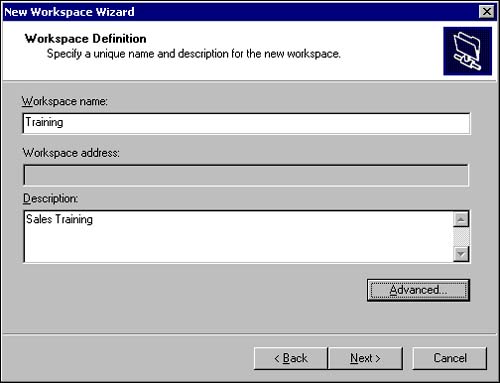 Within the Advanced Workspace Definition dialog box, you can click on the check box to configure the server as an index workspace. Enabling this option will dedicate the available resources of this server to crawling. Indexed workspaces are used to manage content sources, not individual documents. The index can also be propagated to a workspace on another server, which would allow the remote server to be dedicated to searching.  To learn more about indexing and dedicating servers to searching or crawling, see "Optimizing SPS Architecture for Crawling," p. 470. To learn more about indexing and dedicating servers to searching or crawling, see "Optimizing SPS Architecture for Crawling," p. 470. Figure 7.5. Enabling the check box will dedicate this server to crawling. 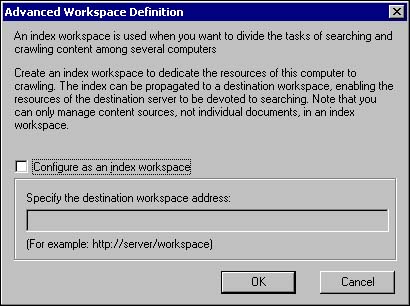 To configure the server as an index workspace, perform the following tasks: -
Within the Advanced Workspace Definition dialog box, click the check box next to Configure as an Index Workspace. -
In Specify the destination workspace address, type the destination workspace for the propagated index. The name of the destination workspace will use the following syntax: http://server_name/workspace_name. -
Click OK to save the changes. The wizard prompts you to provide the name of a propagation access account, which is required before you can propagate an index. This account must have local administrator permissions on the destination server. The destination workspace must exist before you create the index workspace. The wizard ensures that a workspace with the same name as the index workspace does not already exist on the destination. You cannot change the destination workspace after you have created the index workspace. If the destination server is not a SharePoint Portal Server computer, the wizard logs an error in the Application Log in Windows 2000 Event Viewer. You can create index workspaces with the same name (and propagating to the same destination) on multiple servers dedicated to creating and updating indexes. The last index to propagate has its index active on the destination. You can use this setup to continually update the destination by appropriately scheduling the crawls for each index workspace. NOTE It is a good idea to maintain a list of index workspace names, the servers on which they are stored, and the servers and workspaces to which they are propagated.
TIP To use FQDN and index workspace propagation together, both the server dedicated to indexing and the destination server must be in Windows 2000 domains.
The workspace contact page then is launched. Perform the following steps to complete the installation wizard process. -
In Workspace contact name, type the name of the user or group that you are assigning as the workspace contact. The workspace contact is the individual user or group with overall responsibility for the workspace. -
In Workspace contact e-mail address, type the email address for the workspace contact. The contact email address can be that of an individual user or a group. -
Click Next (see Figure 7.6). Figure 7.6. Populate the required fields and proceed to the next dialog box. 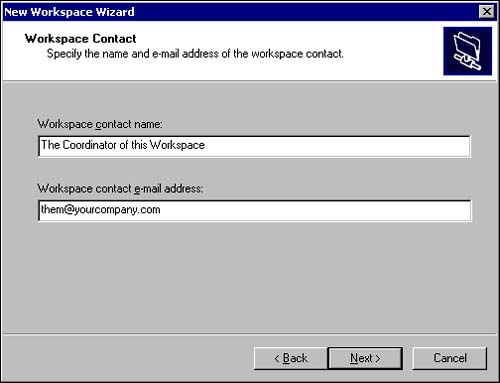 -
Click Finish to complete the wizard and create the new workspace. After SharePoint Portal Server creates the workspace, it displays a message stating that the wizard will open the workspace and create a link to it in My Network Places. -
Click OK. The link is created, the Configure Your Workspace page opens, and the dashboard site opens. For index workspaces, an introduction page opens and the link points to the Content Sources folder within the workspace. TIP After you create the workspace, you must configure security on the workspace node by using SharePoint Portal Server Administration or Web folders. The Windows 2000 local Administrators group has permission to read documents and configure security on any folder or document in a workspace.
Workspace Creation Failure Workspace creation may fail for the following reasons: -
Are you trying to use a workspace name that is the same as another workspace name on the server, the same as another workspace name on the destination workspace (for an index workspace), or the same as an existing IIS virtual directory? -
Are you trying to use characters that are not allowed in the workspace name? Workspace names can consist of characters from lower ASCII except for the following: # : \? * < > % / " { } ~ [ ] Space ! () = ; . , @ & + The lower ASCII code set includes the characters with codes 32127. -
Is there sufficient disk space? -
Are you creating an index workspace? NOTE If you want to use FQDN and index workspace propagation together, both the server dedicated to creating and updating indexes and the destination server must be in Windows 2000 domains.
Creating Additional Workspaces After the initial workspace is created during install, additional workspaces can only be created using the SharePoint Portal Server Administration. During installation, SharePoint Portal Server automatically adds the Administration snap-in to the MMC. To start SharePoint Portal Server Administration -
On the Start menu, point to Programs, point to Administrative Tools, and click SharePoint Portal Server Administration. -
Double-click the SharePoint Portal Server icon in the console tree on the left pane to view SharePoint Portal Server computer. -
Double-click the server to see any existing workspaces. -
Right-click on the SharePoint Portal Server computer (for example, Sales). -
Point to New, and click Workspace. -
Follow the prompts. You can access your new workspace through http://localhost/workspacename. Deleting a Workspace You can delete a workspace by using SharePoint Portal Server (MMC). Workspace deletion can fail for the following reasons: -
Are you trying to delete an index workspace? If so, does the destination workspace exist? -
Is the destination server online? If the destination workspace is unavailable at the time the index workspace is deleted, you are notified and prompted to continue. If you choose to continue, the index workspace deletion succeeds. To then delete the propagated index from the destination server, see ToolsHowTo.txt in the Support\Tools directory on the SharePoint Portal Server CD. Using Unattended Installation Options for the Server You can run SharePoint Portal Server setup in unattended mode, if you are installing a large number of servers or want to customize your installation. SharePoint Portal Server supports the following unattended options. If you have Terminal Services, you can use it to install SharePoint Portal Server remotely on multiple computers in your organization. Using an .ini file is an excellent choice if you need to install identical configurations of SharePoint Portal Server on multiple computers. However, before running setup in this mode, you must create the .ini file that contains the default installation settings that you want to use. After you create the .ini file, you can edit it by using a text editor. By editing the .ini file, you can specify additional options and gain more control over your installation. To create the .ini file used for unattended setup, you must run the SharePoint Portal Server setup wizard. The wizard stores the settings that you specify in the .ini file. When installing SharePoint Portal Server by using an .ini file, dialog boxes or error messages that require user intervention are not displayed unless prerequisites are missing. To install SharePoint Portal Server by using an .ini file, do the following steps: -
Create an .ini file. -
Click Start, and then click Run. -
In Open, type path_to_server_setup_file setup /Create Unattended path filename . ini, where filename is the name of the .ini file that you want to create. For example, if the setup file is in the Setup directory on drive D and you want to create sample.ini on the E drive, type D:\Setup\setup /Create Unattended E:\sample.ini. -
Click OK. -
Follow the instructions that appear in the SharePoint Portal Server setup wizard. All settings that you choose are included in the .ini file that you create. CAUTION If you enter the user name and password for the default content access account when creating the file, the password is not encrypted and appears in the file. -
Edit the .ini file. -
In a text editor such as Microsoft WordPad, open filename .ini where filename is the name of the .ini file that you created. -
Modify parameters in the file for the settings that you want SharePoint Portal Server setup to use. NOTE If you plan to use an unattended installation file on servers with varying storage configurations, ensure that hard-coded paths are valid for each server configuration before starting the installation. An example of a hard-coded path reference is "C:\". You can force the installer to automatically choose the correct default path by removing an entry line completely.
The default location of where to store files can be modified for certain installation elements during installation. Additional details are provided on which components can be modified. InstallDirectory. You can specify the installation location for SharePoint Portal Server program files. TIP Altering the default location for the Microsoft Document Store and the MSSearch is not recommended. The recommended option for the MSSearch and Document Store installation directories are as follows : InstallDirectory= operating_system_drive \Program Files\Common Files\Microsoft Shared\Document Store InstallDirectory= operating_system_drive \Program Files\Common Files\Microsoft Shared\MSSearch
Search Gatherer Log Directory. Each time SharePoint Portal Server creates a workspace index, it creates a log file for that workspace. This log file contains data about crawling content sources and records access errors. After installation, you can use SharePoint Portal Server Administration to change this path. Search Index Directory. When creating a workspace, SharePoint Portal Server creates an index under this root node. SharePoint Portal Server also creates all indexes propagated to the server under this root node. After installation, you can use SharePoint Portal Server Administration to change this path. If you want to move existing indexes to a new location, see ToolsHowTo.txt in the Support\Tools directory on the SharePoint Portal Server CD. Search Property Store Database Directory. After installation, you cannot modify the file location by using SharePoint Portal Server Administration. However, during setup you can specify the location of the property store file. To modify the file location, see ToolsHowTo.txt in the Support\Tools directory on the SharePoint Portal Server CD. This file contains the metadata from documents. Search Property Store Log Directory. After installation, you cannot modify the location of these files by using SharePoint Portal Server Administration. During setup you can specify the location of the property store log files. To modify the file location, see ToolsHowTo.txt in the Support\Tools directory on the SharePoint Portal Server CD. TIP For optimal performance, the property store and property store log files should be on dedicated physical volumes . SharePoint Portal Server shares this file across all workspaces.
Document Store Database Directory. You can specify the location of the Document Store Database file. Every SharePoint Portal Server computer contains one public store (wss.mdb). All workspaces hosted on the server reside on the Document Store. After installation, you can use SharePoint Portal Server Administration to change this path. If this location changes, the existing file moves to the new location. Document Store Streaming Database Directory. You can specify the location of the Document Store-Streaming Database file. Used for streaming files, the Document Store-Streaming Database file (wss.stm) contains data and is a companion to the Document Store-Database file (wss.mdb). Together, these two files form the database. SharePoint Portal Server document streams make up a sizable part of the total amount of data. After installation, you can use SharePoint Portal Server Administration to change this path. If this location changes, the existing file moves to the new location. Move these files to a larger drive ( ideally a dynamic disk that you can easily resize) because it can increase substantially over time. Document Store Database Log Directory. You can specify the location of the Document Store-Database Log files. After installation, you can use SharePoint Portal Server Administration to change this path. If this location changes, the existing files move to the new location. For optimal performance, place the log files on a dedicated physical volume. CAUTION All other installation components should not be changed. You can modify the parameter apply indexing settings in the .ini file to set the default content access account and gatherer email address during the unattended installation. The default content access account is the user name and password used when crawling content outside the workspace. SharePoint Portal Server provides the gatherer email address to each Web site it crawls when creating an index. If a problem occurs while crawling (for example, the crawler is hitting the site too much), the Web site's administrator can contact this address.
TIP If apply indexing settings equals 0, the default content access account and gatherer email address are not set when you run the unattended installation. You can set these options after installation by using SharePoint Portal Server Administration.
To specify the account and email address, do the following: -
Set apply indexing settings=1 -
Set Default Content Access Account=user_name,domain,password -
Set gatherer e-mail address=you@yourcompany.com -
Run setup. -
On the server you want to run setup, Click Start, and then click Run. -
In Open, type path_to_server_setup_file setup /UnattendFile path filename .ini where filename is the name of the .ini file you created. -
Click OK. You do not see the finish page or the New Workspace Wizard page. Gathering Information from the Server Installation Logs You can examine the following logs for information about server installation: -
Errorlog.txt file . Located in \Program Files\Microsoft Integration\SharePoint Portal Server\Logs for successful installations. For failed installations, this file is located in the %temp% directory. The error "VAIFY Failed" tells you that the portion of setup that configures default SharePoint Portal Server settings in the Microsoft Document Store failed. If you experience a nonfatal error that documents an ordering problem, you might read lines like this in the log file: "[Date, Time] Dependency Manager: [2] Ordering problem: Microsoft SharePoint Portal Server Microsoft Search." The ordering problem could originate from Microsoft Search (MSSearch), SharePoint Portal Server, Exchange Server, or a combination of these. It is informing you that the order in which things are being installed is different from the order SharePoint Portal Server requested . It is safe to ignore this message. -
Eventlog.txt file . Located in \Program Files\Microsoft Integration\SharePoint Portal Server\Logs for successful installations. For failed installations, this file is located in the %temp% directory. This file contains a detailed list of the actions performed during the installation. Lines that contain errors are copied to Errorlog.txt. -
Setup.log file . Located in \Program Files\Microsoft Integration\SharePoint Portal Server\Logs. -
SPSClient.Log file . Located in \Program Files\Microsoft Integration\SharePoint Portal Server\Logs for successful server installations. -
Exchange Server Setup Progress.log file . Located at the root of the operating system drive. Installing SharePoint Portal Server on Exchange 2000 Server results in multiple instances of this file. This log tells you whether the Document Store installed correctly, and can help you identify issues such as A server name has an illegal character. IIS 5.0 is not installed, so the Document Store cannot be installed. SMTP service is not installed. SharePoint Portal Server Does Not Install If SharePoint Portal Server does not install, check the following: -
An unsupported operating system. Only Windows 2000 Server and Advanced Server, Service Pack 1 (SP1) or later, are supported. -
Exchange 2000 Enterprise Server. Only Exchange 2000 Server SP1 or later is supported. -
Microsoft Exchange Server version 5.5 and earlier. -
Microsoft Site Server (any version) . -
Microsoft Office Server Extensions. CAUTION SharePoint Portal Server is not supported in a clustered environment. You cannot install SharePoint Portal Server in a clustered environment, and you must not join the SharePoint Portal Server computer to a clustered environment.
Slow Setup If setup is very slow or fails after long periods of inactivity, check the following: -
Does your system meet the recommended processor and RAM requirements? -
If you are installing over a network, is your network experiencing slow or impaired operations? The Server No Longer Functions Did you attempt to uninstall Exchange 2000 Server after you installed SharePoint Portal Server? Even if you canceled the removal of Exchange 2000 Server, SharePoint Portal Server may no longer function. To fix SharePoint Portal Server, you must manually start the following services: -
IIS Administration Service (IISAdmin) -
SharePoint Portal Server (Msdmserv) -
MSExchangeIS -
SMTP -
W3SVC -
Network News Transfer Protocol (NNTP) -
Exchange message transfer agent (MTA) Stacks -
Exchange Post Office Protocol version 3 (POP3) -
Exchange Internet Message Access Protocol version 4 (IMAP4) -
Exchange Routing Engine Did you uninstall any of the server prerequisites after installing SharePoint Portal Server? SharePoint Portal Server requires For more information about server requirements, see the beginning of this chapter. Uninstalling or Repairing SharePoint Portal Server Before uninstalling SharePoint Portal Server, you must NOTE If network drive M is already in use when you install SharePoint Portal Server, the Document Store is mapped to another network drive.
When you uninstall SharePoint Portal Server, all files and folders are removed, as well as any user-created or modified files, client components, and all workspaces. If you repair SharePoint Portal Server, it automatically repairs the client components. NOTE If you remove SharePoint Portal Server from a computer that has Microsoft SQL Server or Exchange Server installed, the upgraded MSSearch service is not removed, because it is a shared service with Exchange Server and SQL Server.
SharePoint Portal Server requires access to the original installation point to uninstall the Microsoft Embedded Exchange files. If this has moved, insert the SharePoint Portal Server CD and continue uninstalling. You can also point to the \Server\Document Store directory at the installation point.  | 